
openWeather – DIY ESP8266 Wetterstation
In letzter Zeit habe ich mich viel mit ESP32 und ESP8266 beschäftigt. Nun hatte ich die Idee für mein Smarthome Set-Up ein paar Temperatur und Feuchtigkeitssensoren in der Wohnung zu verteilen. Damit da nicht einfach nackte Platinen herumliegen, wollte ich ein schickes Gehäuse gestalten, schließlich bin ich ja Industriedesigner. Für die Küche wäre aber direkt eine kleine Wetterstation cool, die auch beim Frühstück anzeigt, wie das Wetter in den nächsten Stunden wird.
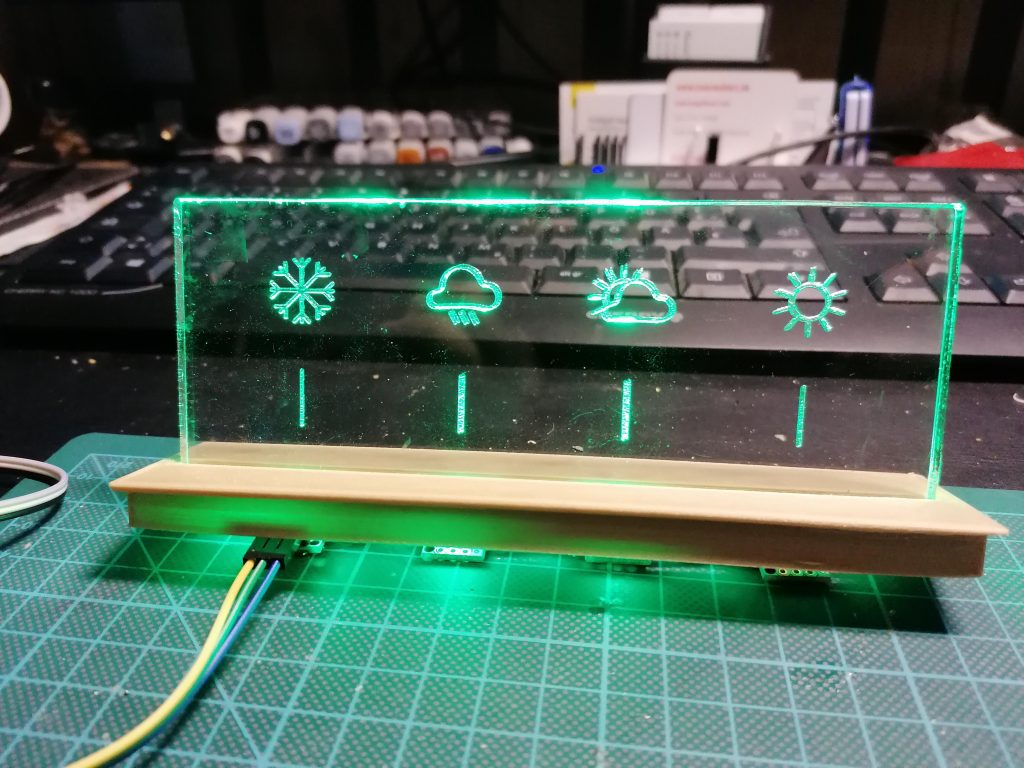
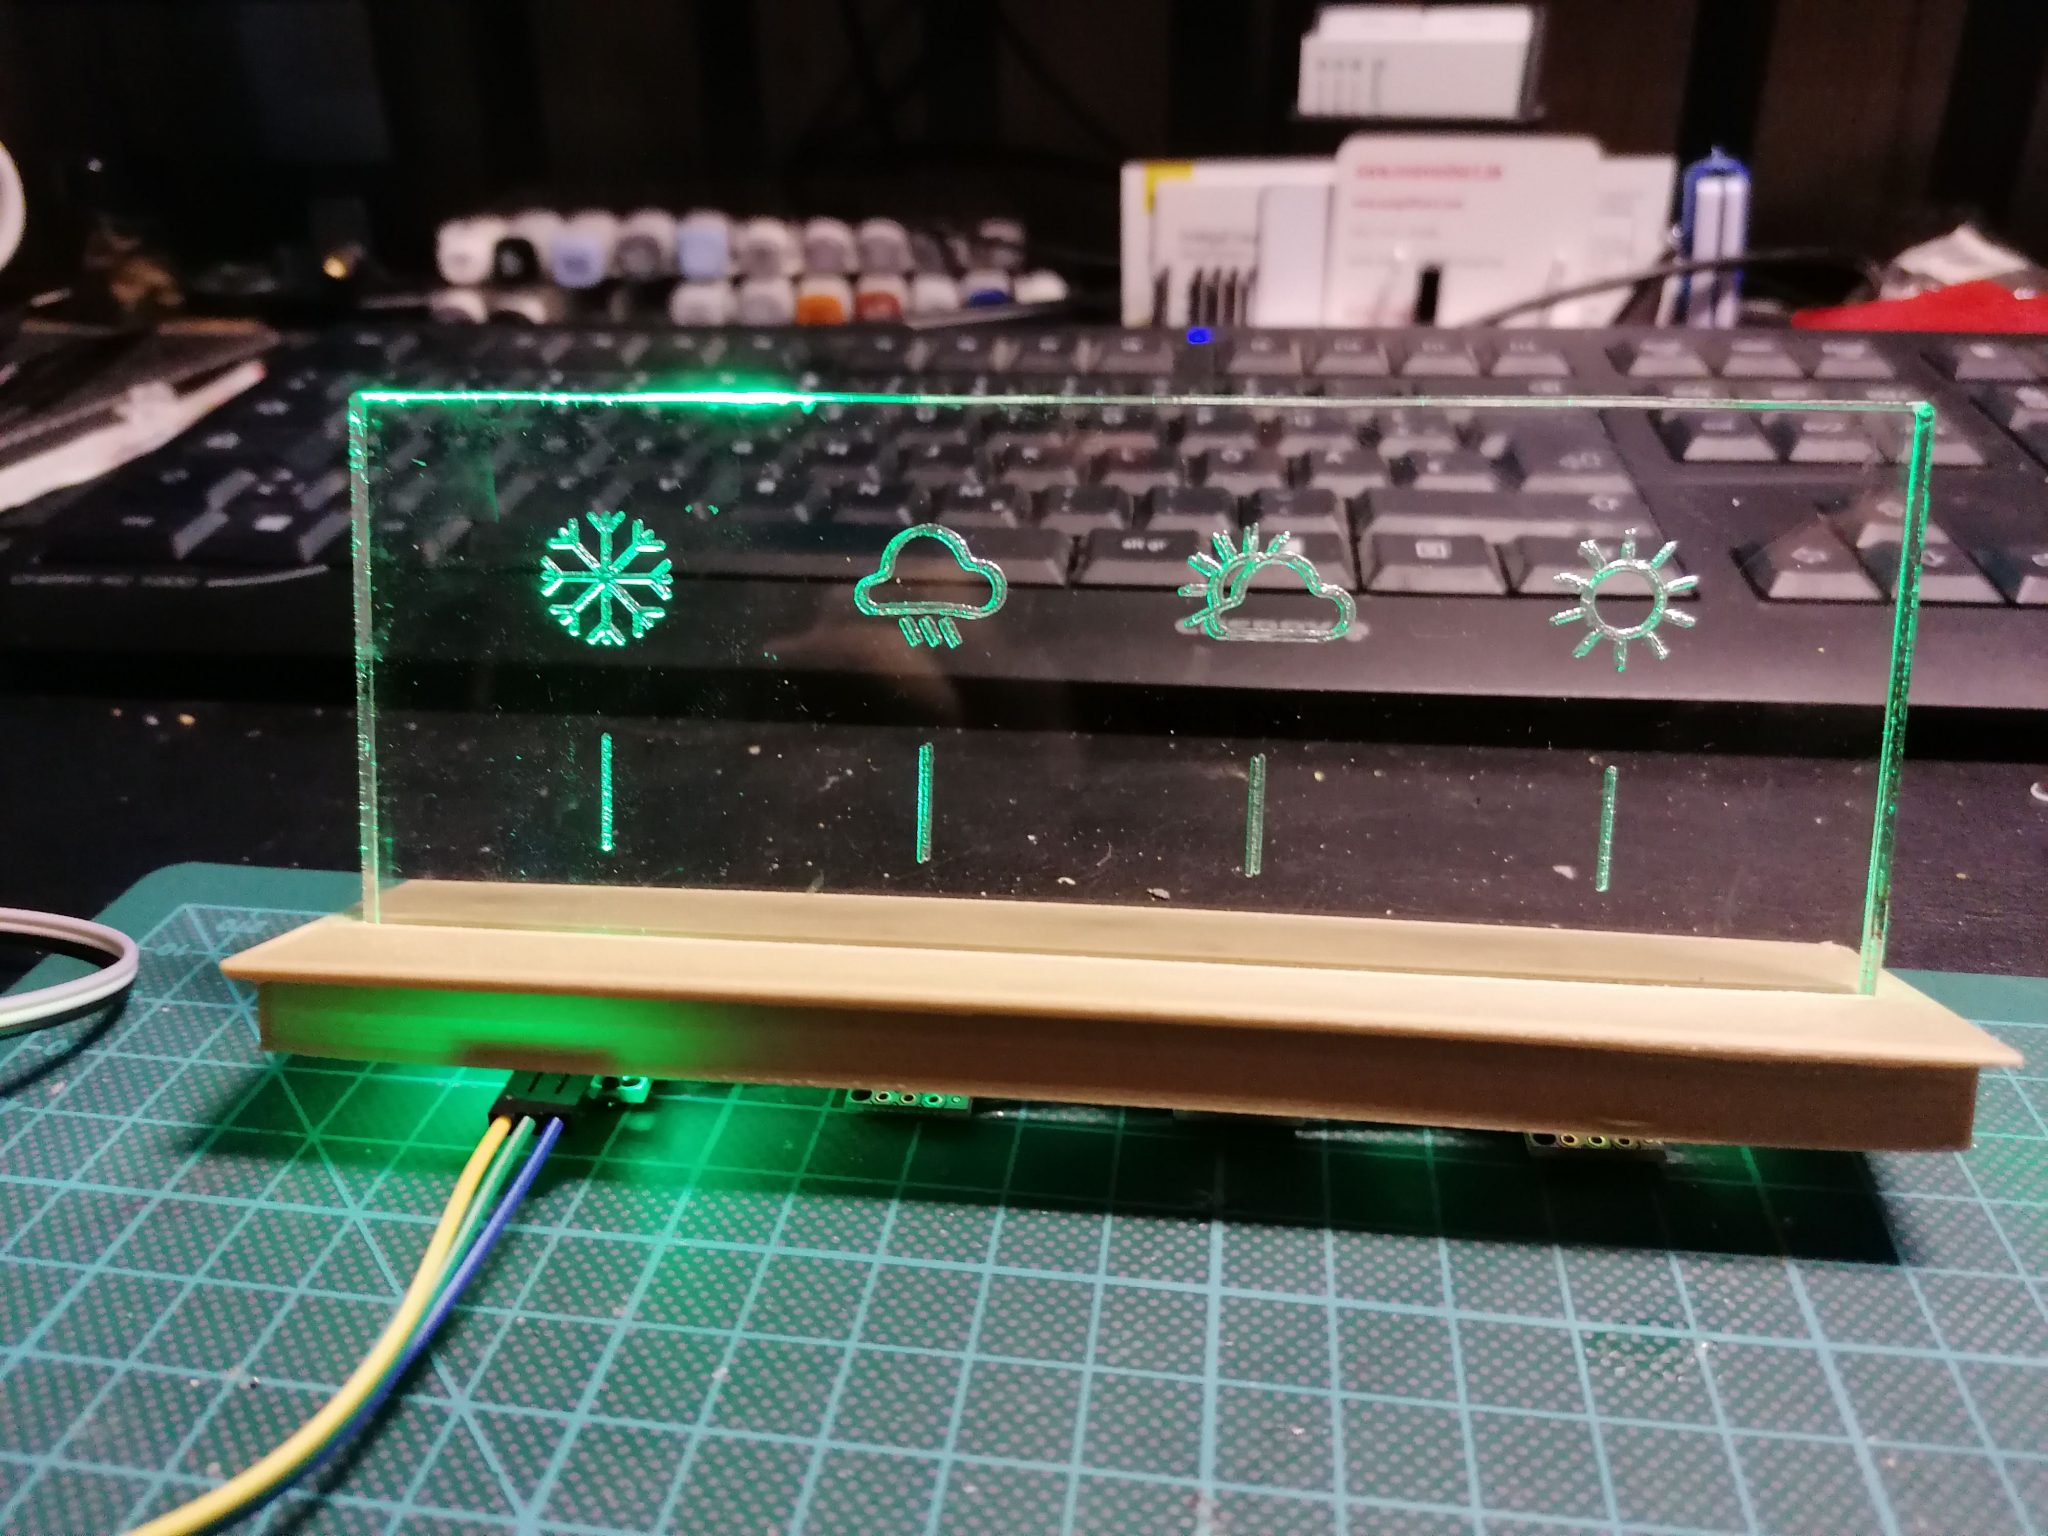
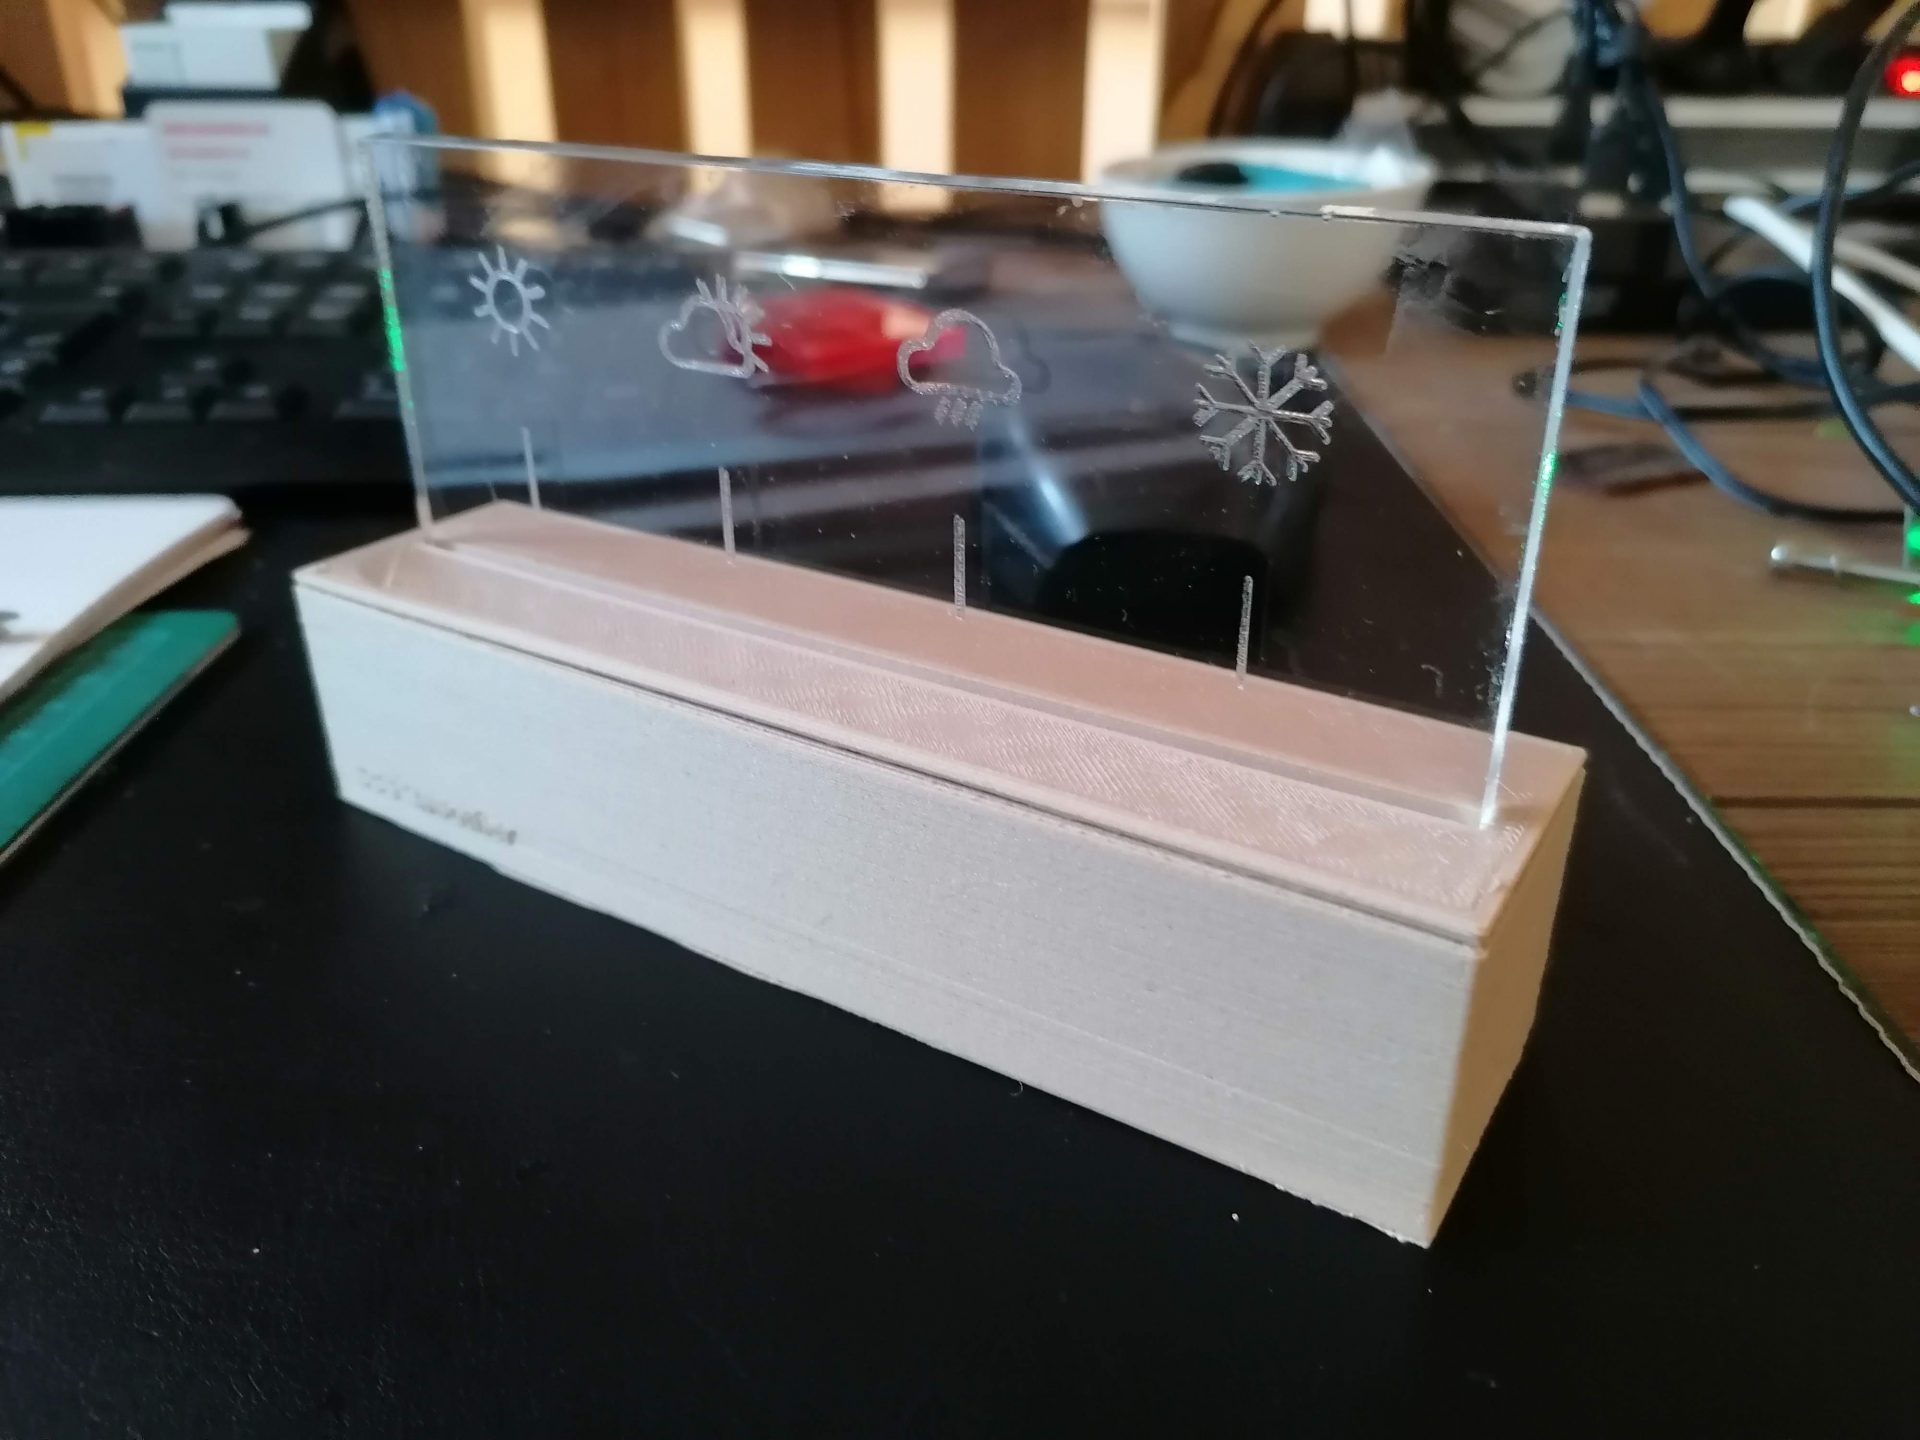
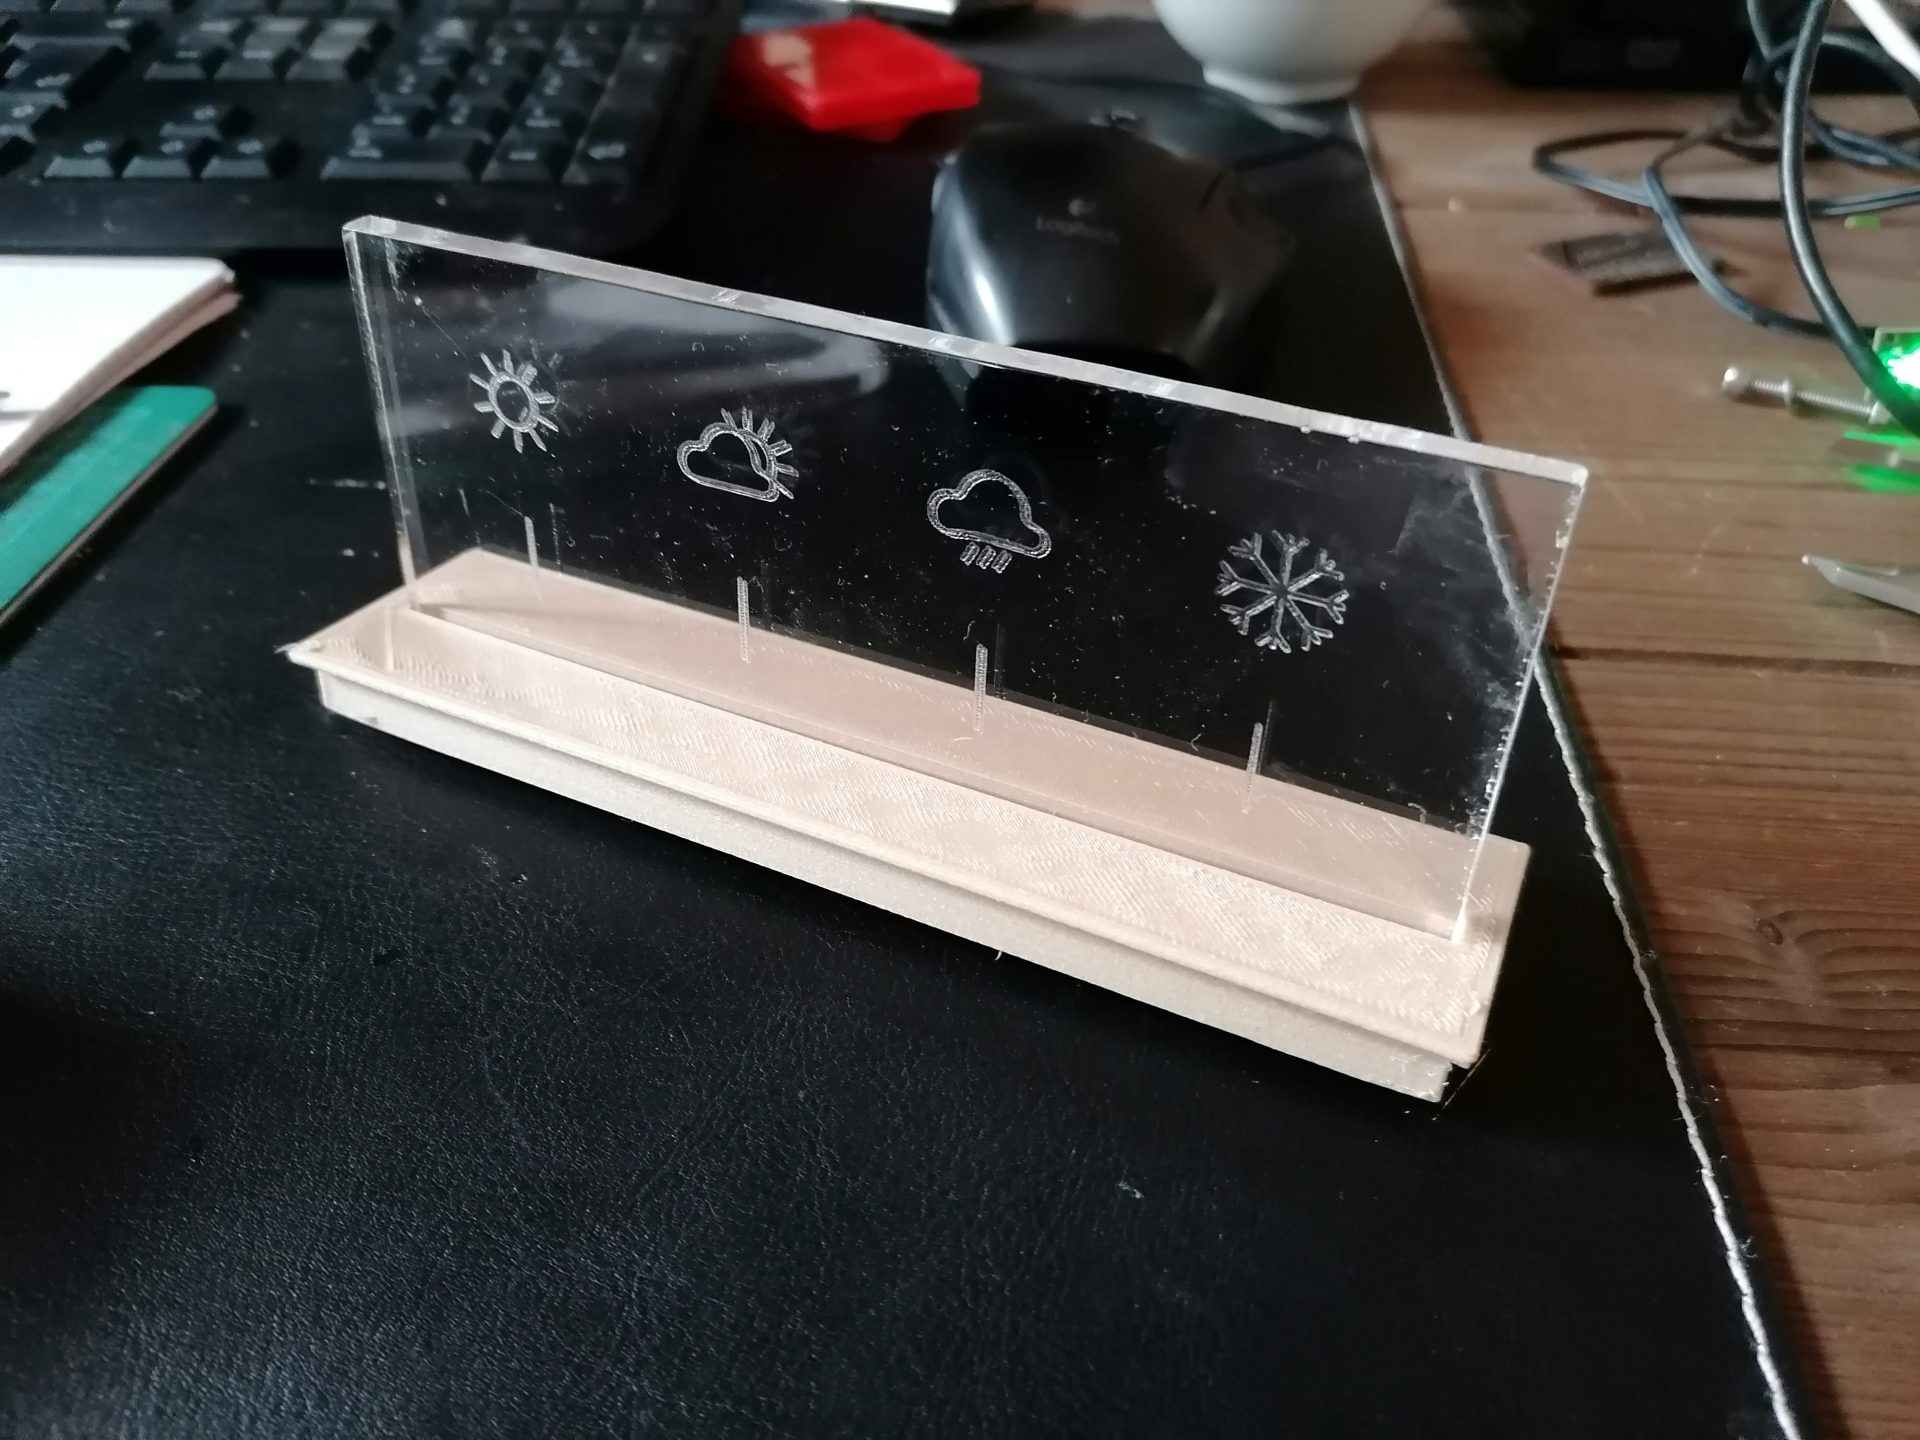
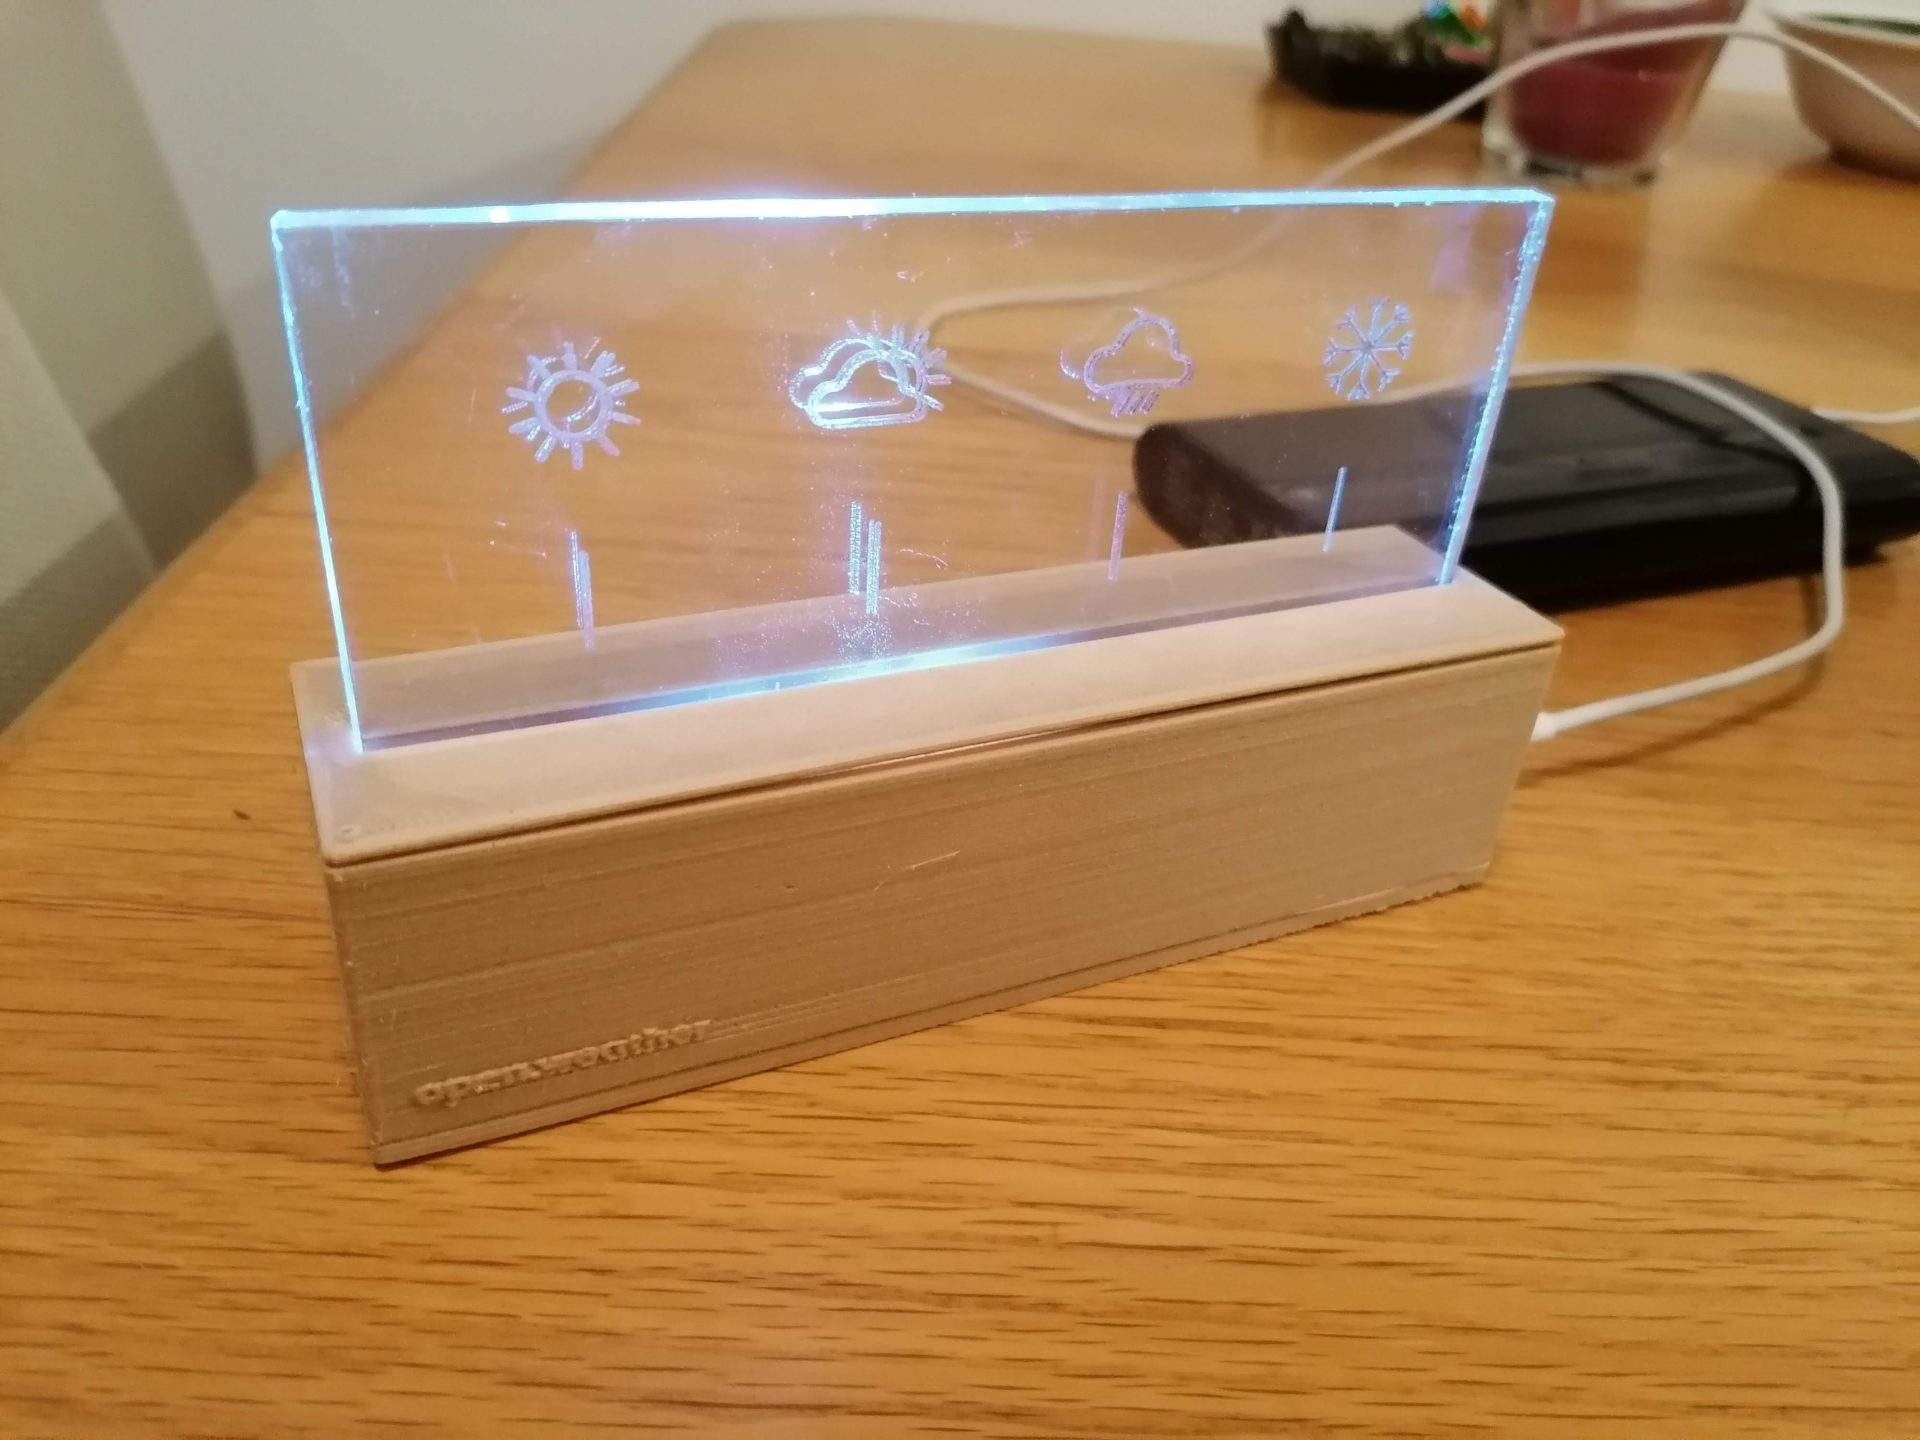
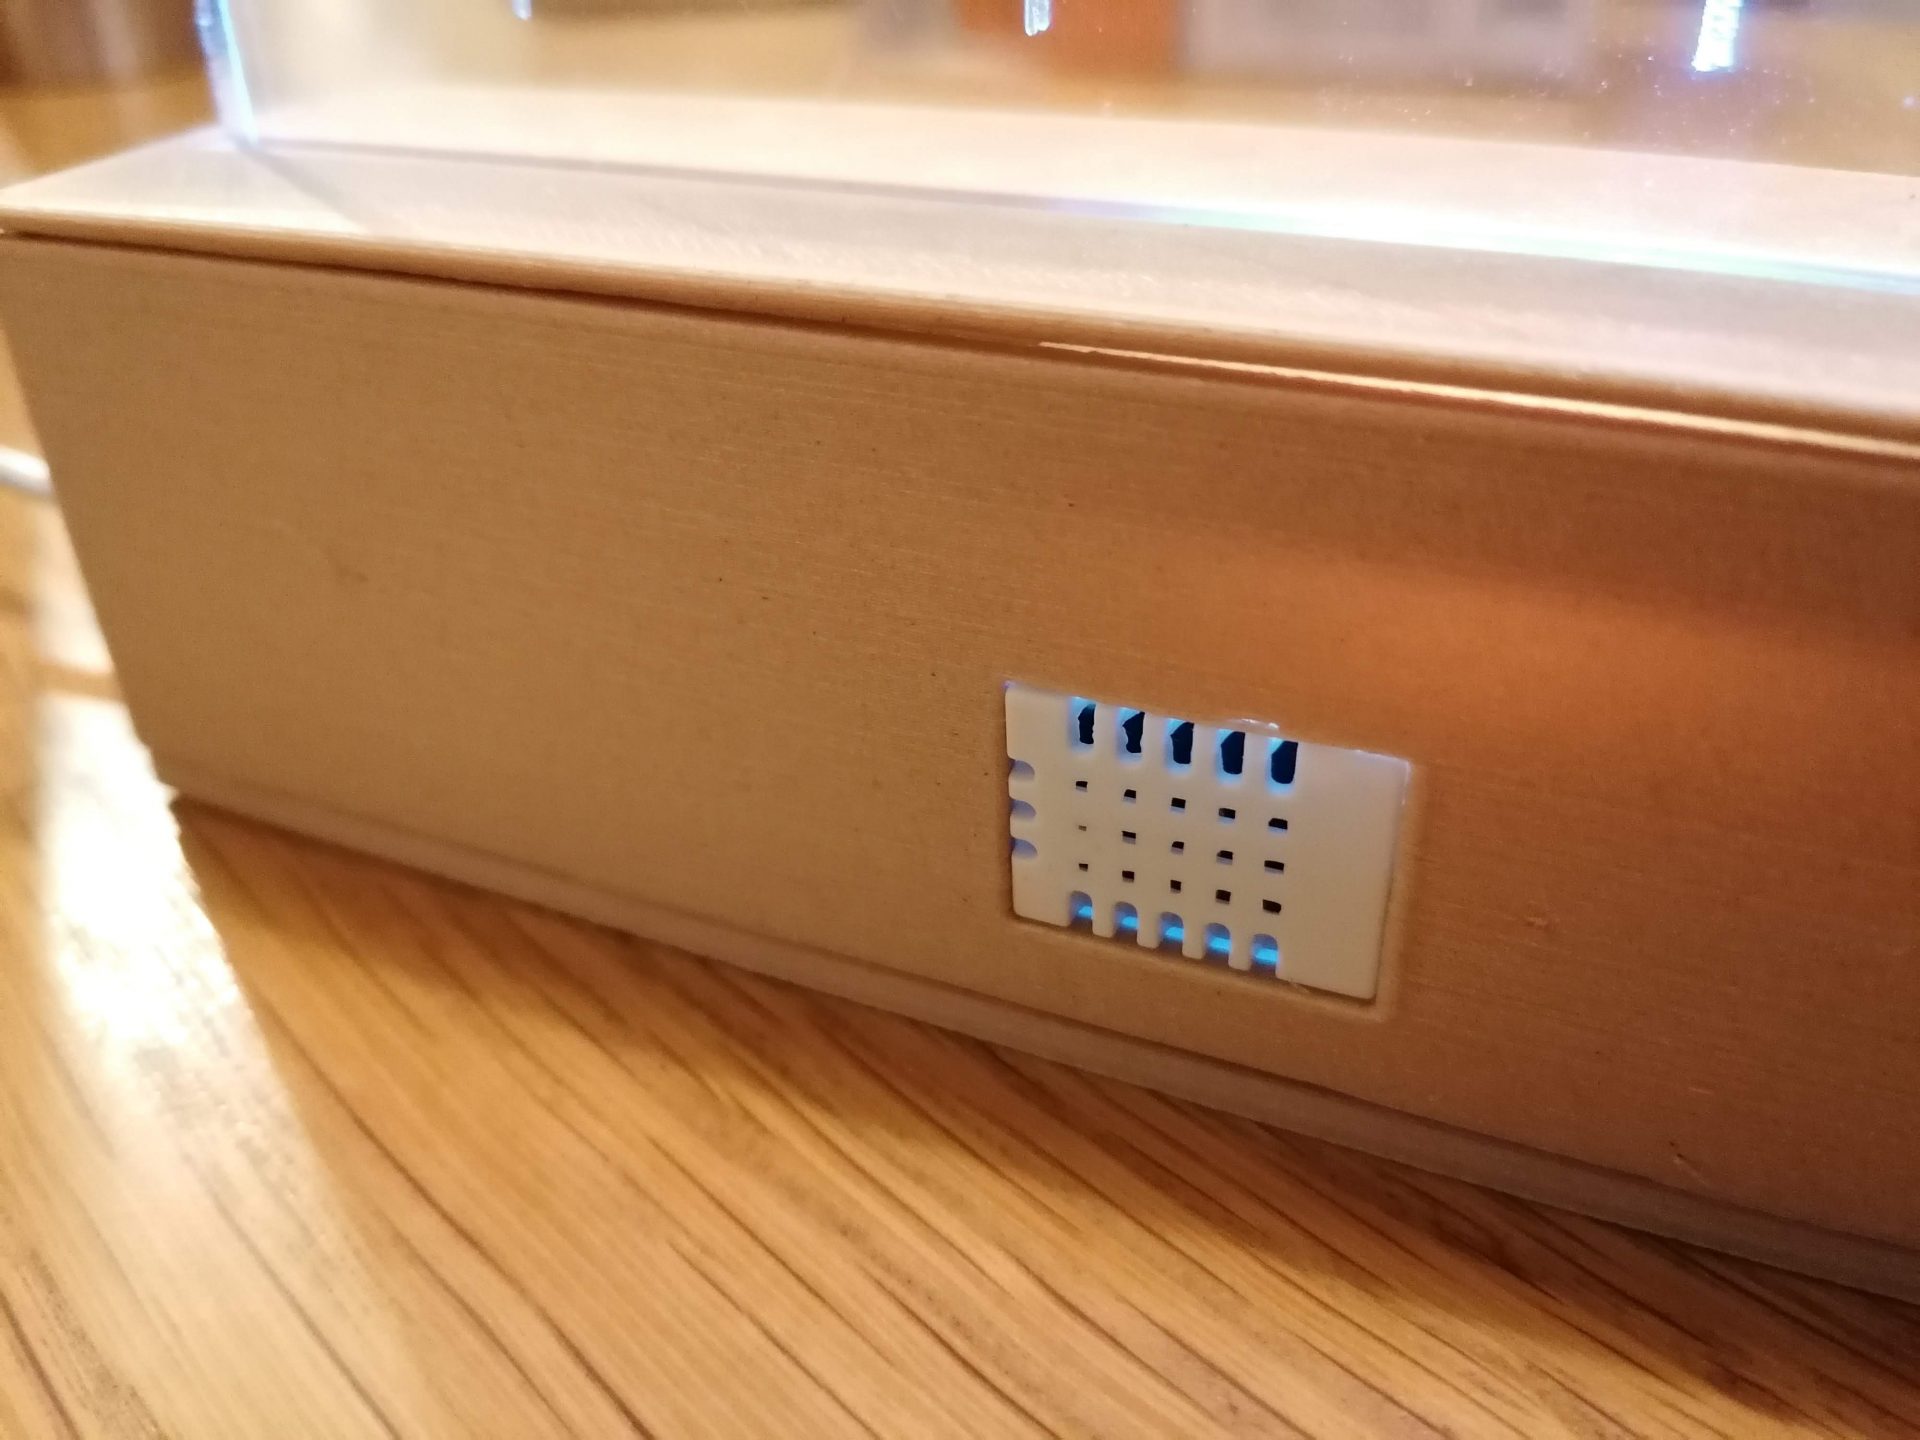
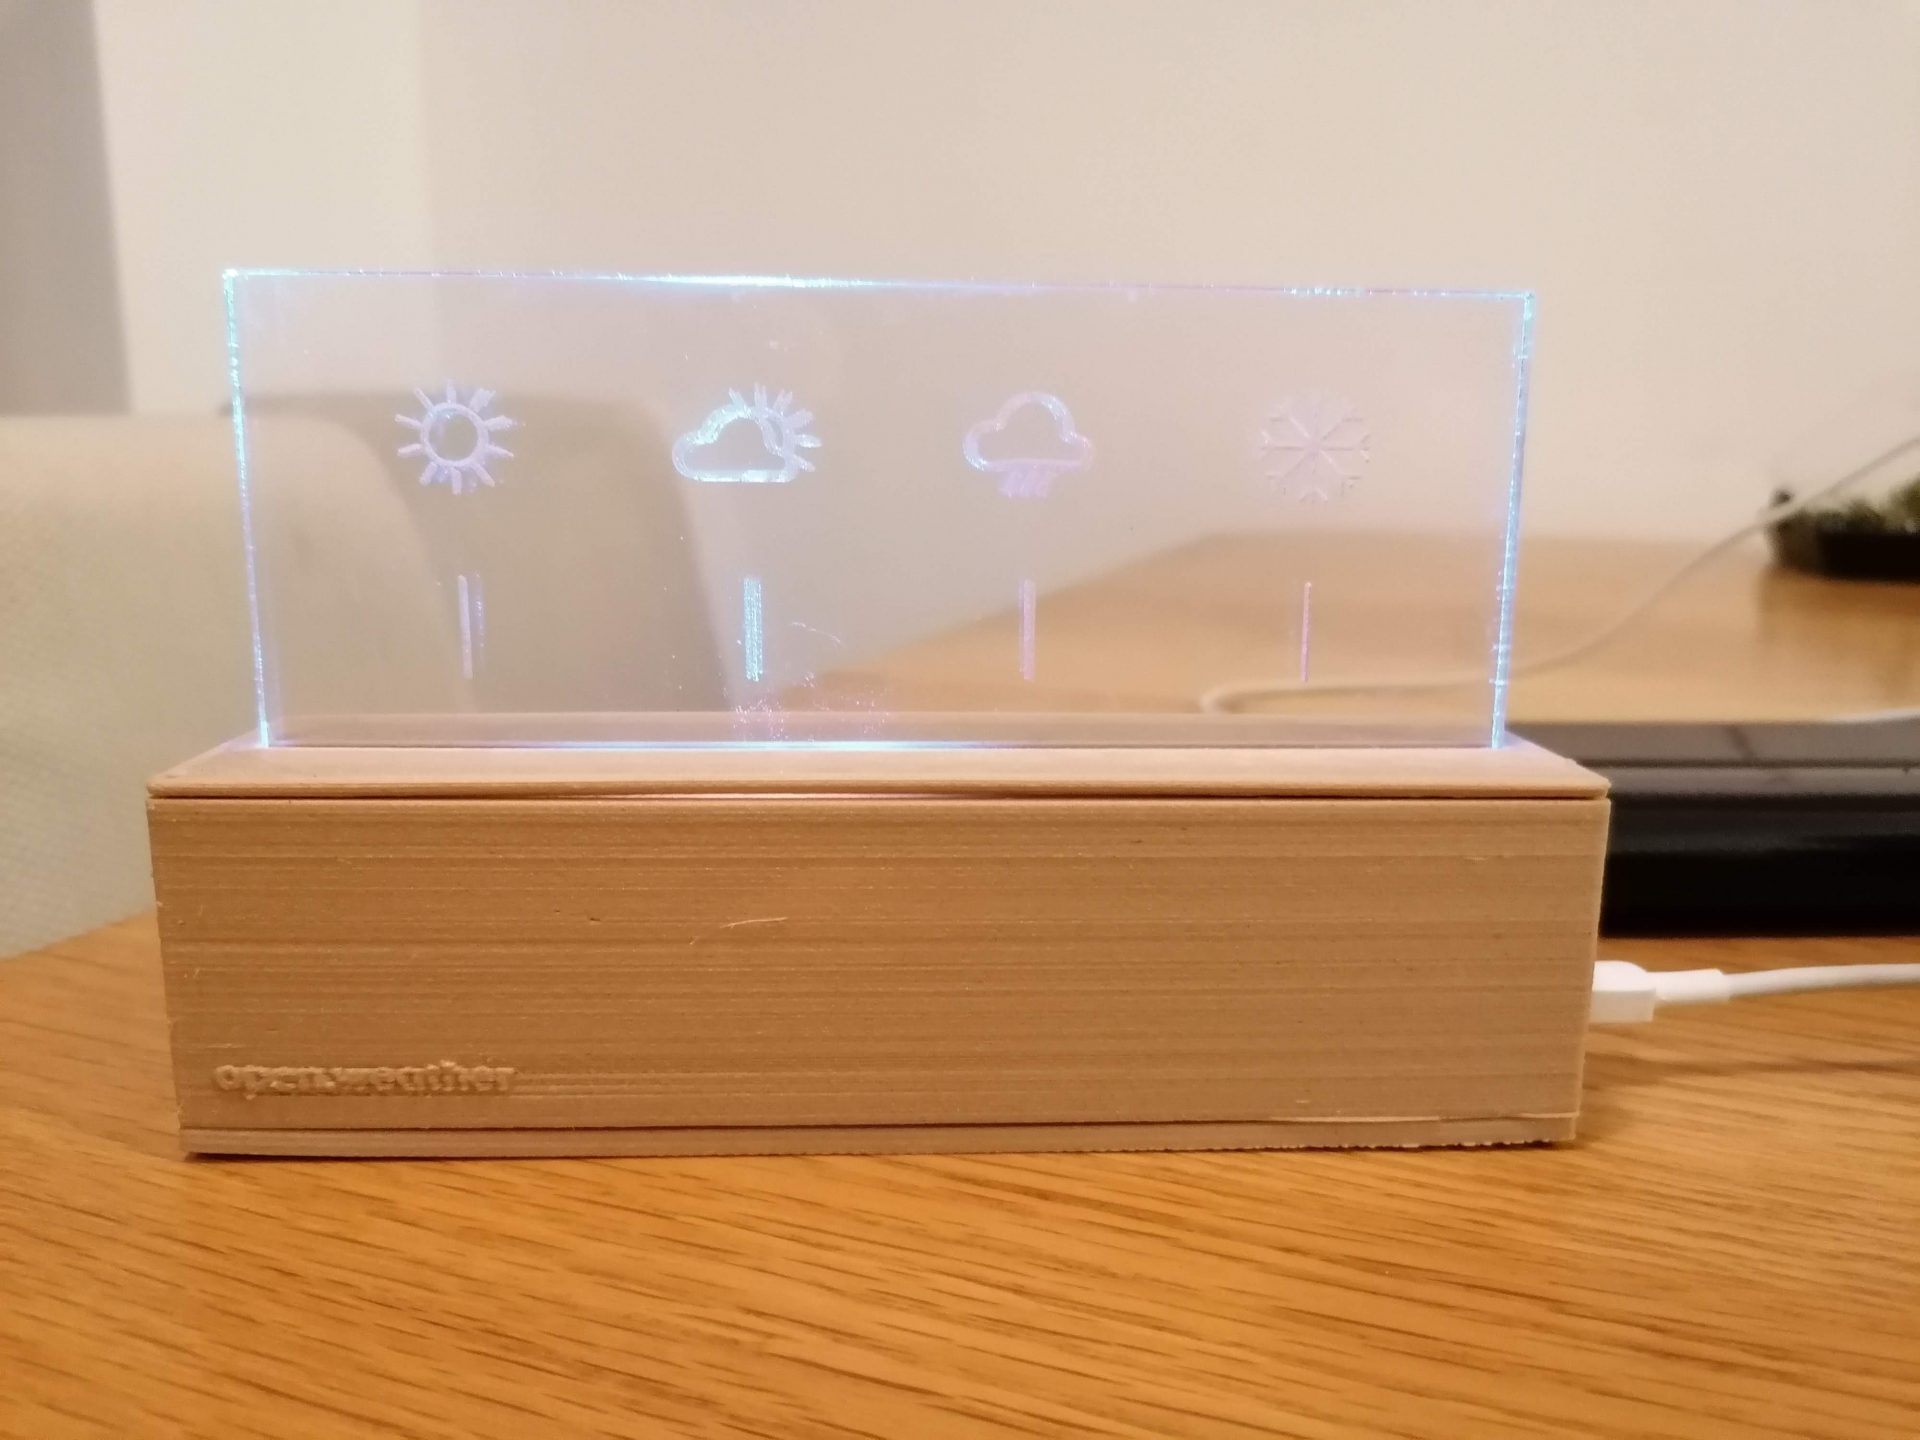
So ist das Projekt open.Weather entstanden. Das ganze Projekt habe ich unter der GNU V3 auf GitHub veröffentlicht. Und so sieht das Ergebnis aus:

So sah übrigens meine Konzeptzeichnung aus:
Also ran ans Werk. Wir brauchen folgende Komponenten:
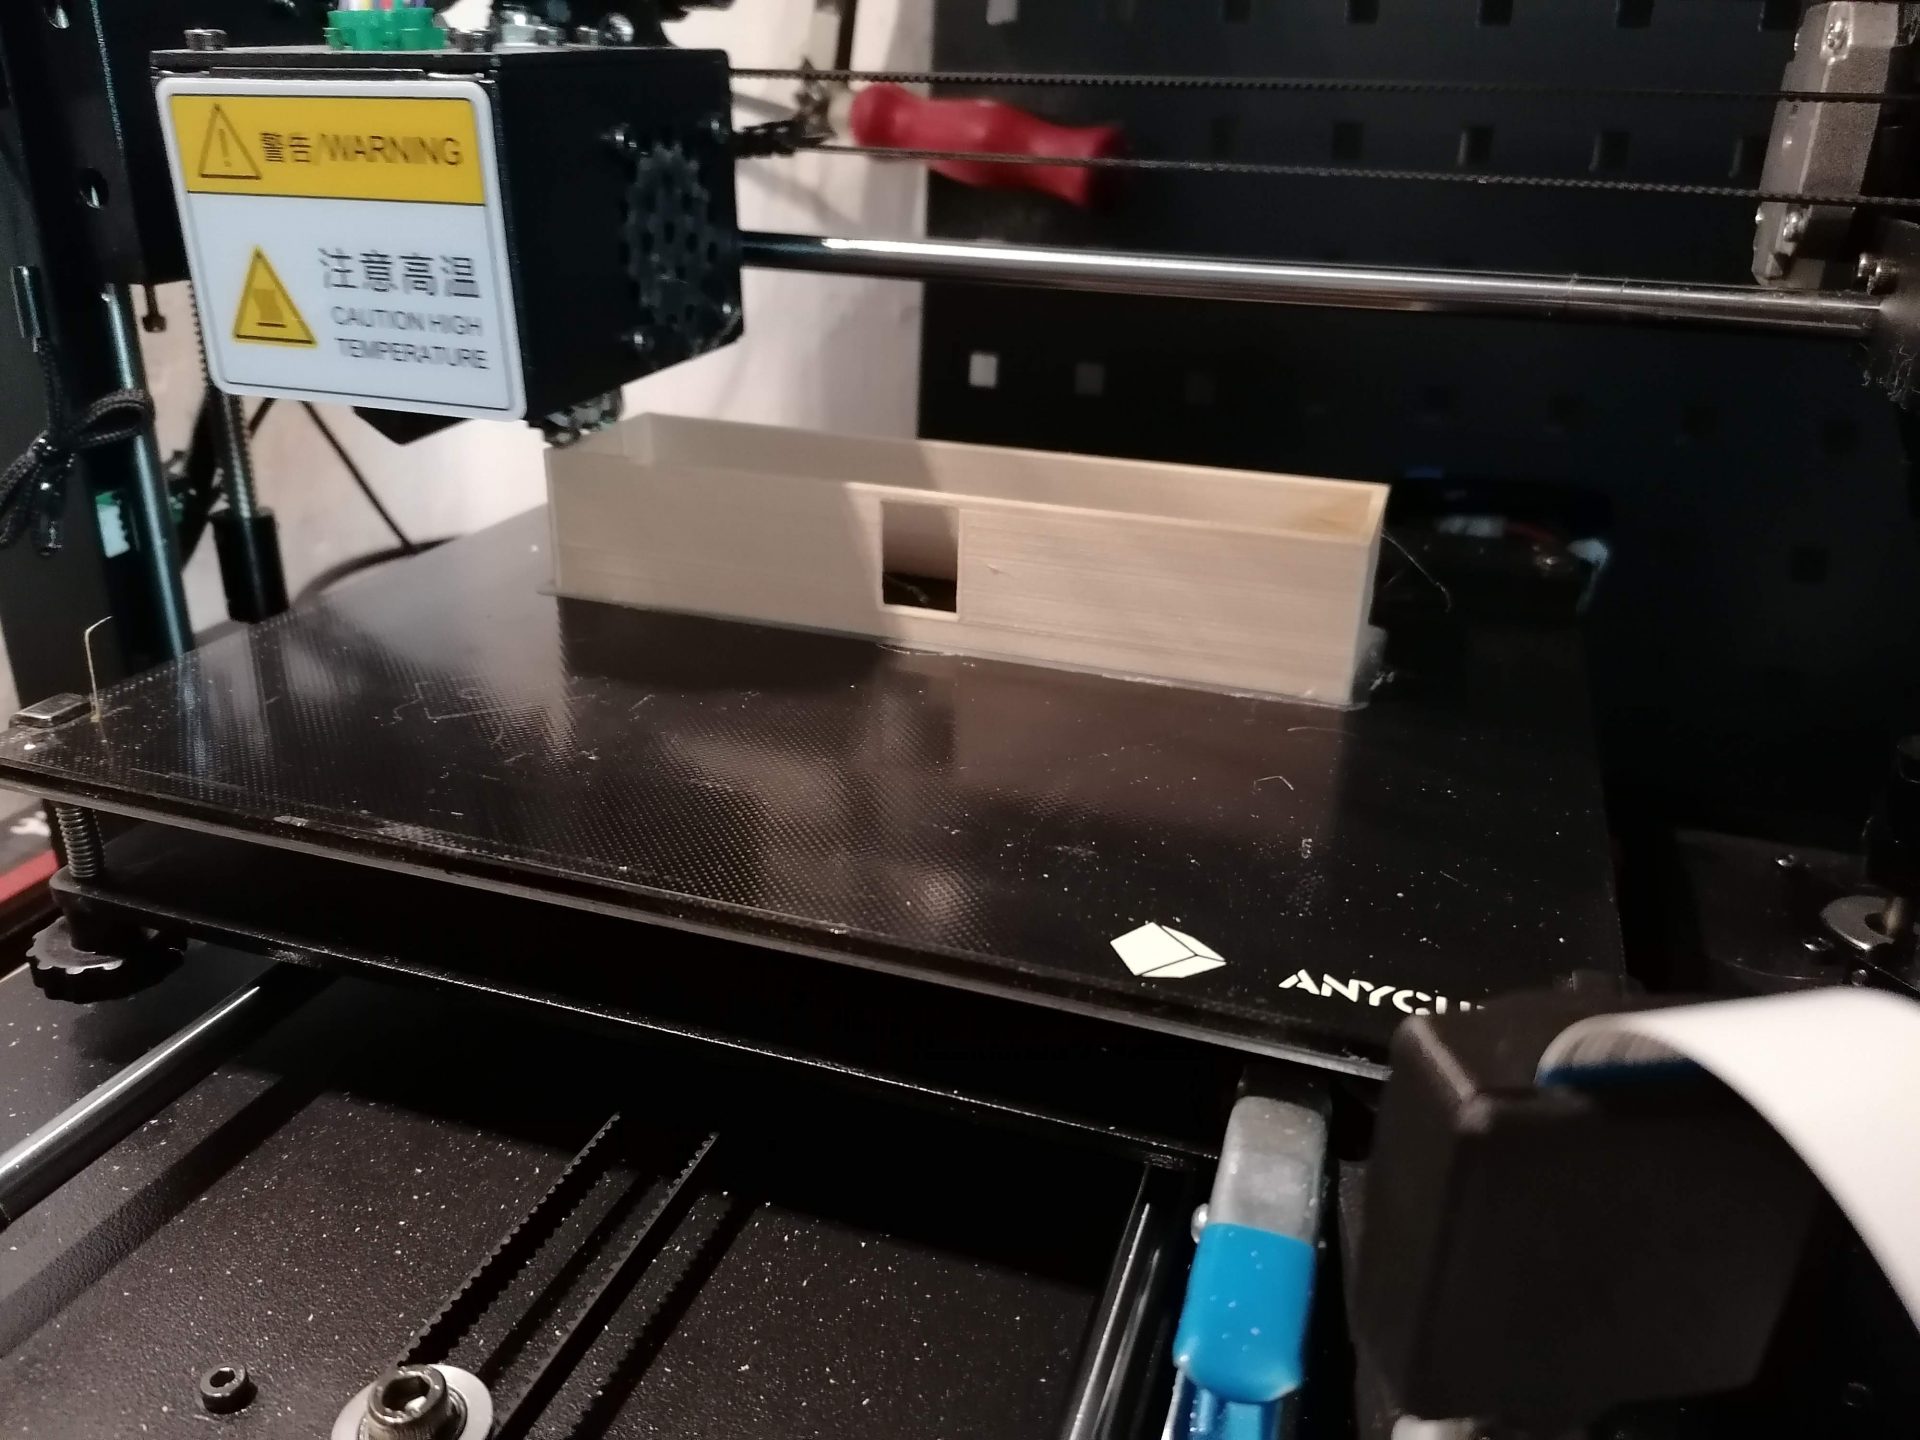
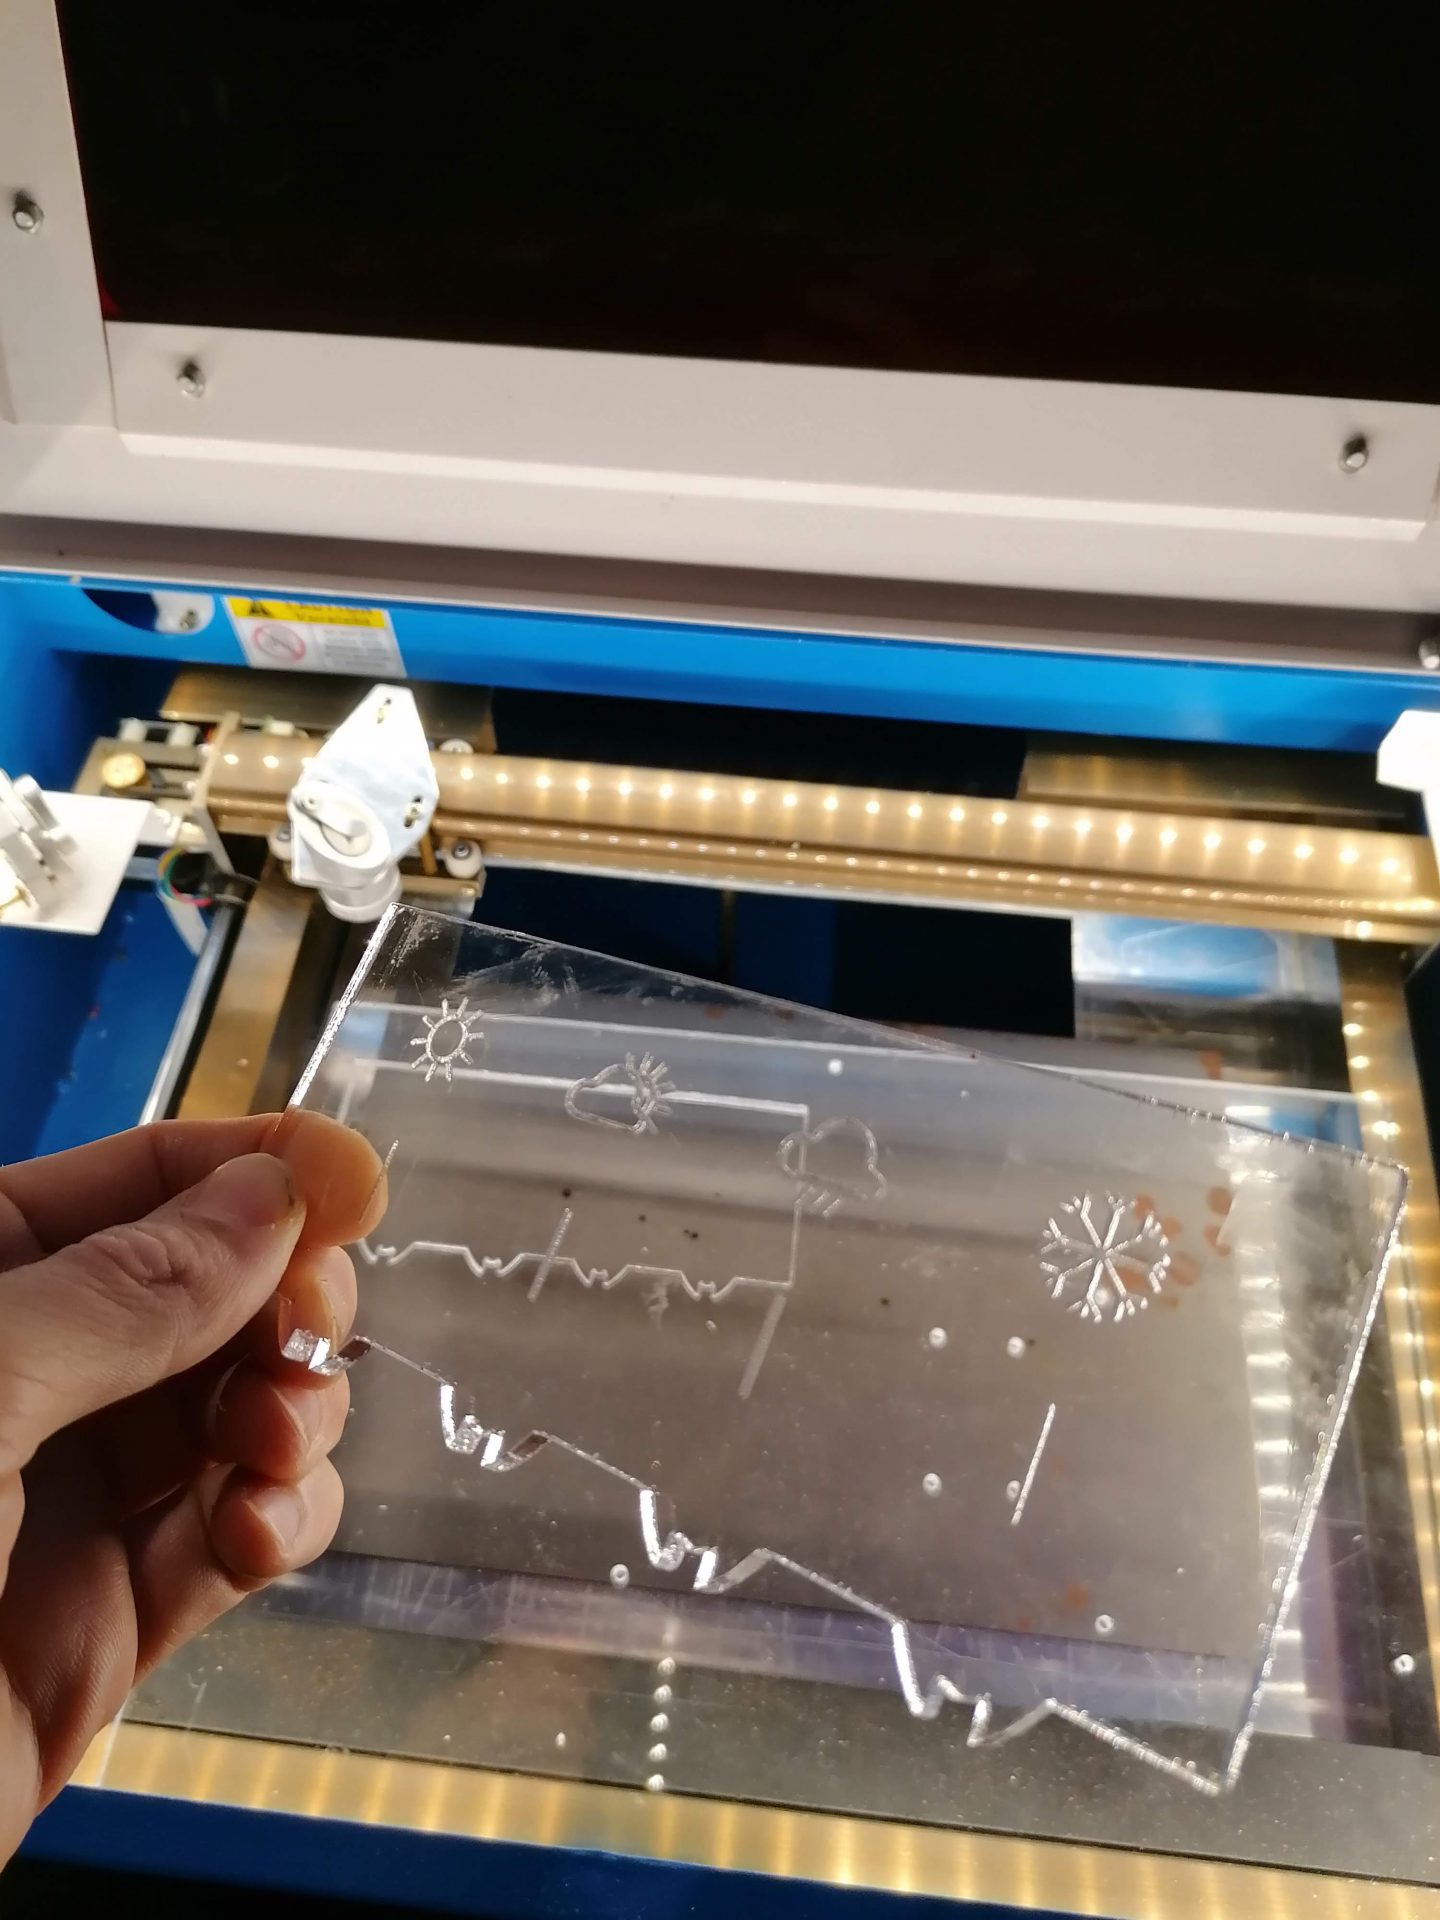
Die Scheibe ist mit dem Lasercutter hergestellt, das Gehäuse ist 3D-gedruckt. Also wäre Zugriff auf beides nicht schlecht, zum Beispiel im regionalen FabLab. Ich habe einen K40 und nutze einen Anycubic i3 Mega.
Konzept
Beim Magic Mirror habe ich ja eine API-Anfrage an Open Weather Map. Wie sich herausstellte, kann man auch direkt vom ESP8266 aus einen http Request stellen. Also kann ich den Wetterbericht aus dem Netz abfragen. Außerdem werde ich die Temperatur und Luftfeuchtigkeit mit dem DHT22 messen. Je nach Werten, sollen die WS2812 eine entsprechende Farbe anzeigen. Z.B. wenn die Luftfeuchtigkeit zu hoch ist, einen Hinweis geben, dass man Lüften sollte. Oder wenn es draußen sehr Warm oder Kalt ist entsprechend mit Orange / Rot / Blau den Hinweis geben. So auch für die Innentemperatur. Und je nach Wetterlage soll eins der Symbole beleuchtet werden.
Design
Bei Pinterest habe ich mir ein paar schöne Wetterstationen angeschaut und nach Inspiration gesucht. Dort habe ich viele hässliche Wetterstationen gefunden, doch auch ein paar schöne. Das ganze sollte irgendwie Holzoptik bekommen und minimalistisch werden. Damit es nicht wie noch ein Wecker aussieht, habe ich auf ein richtiges Display verzichtet.
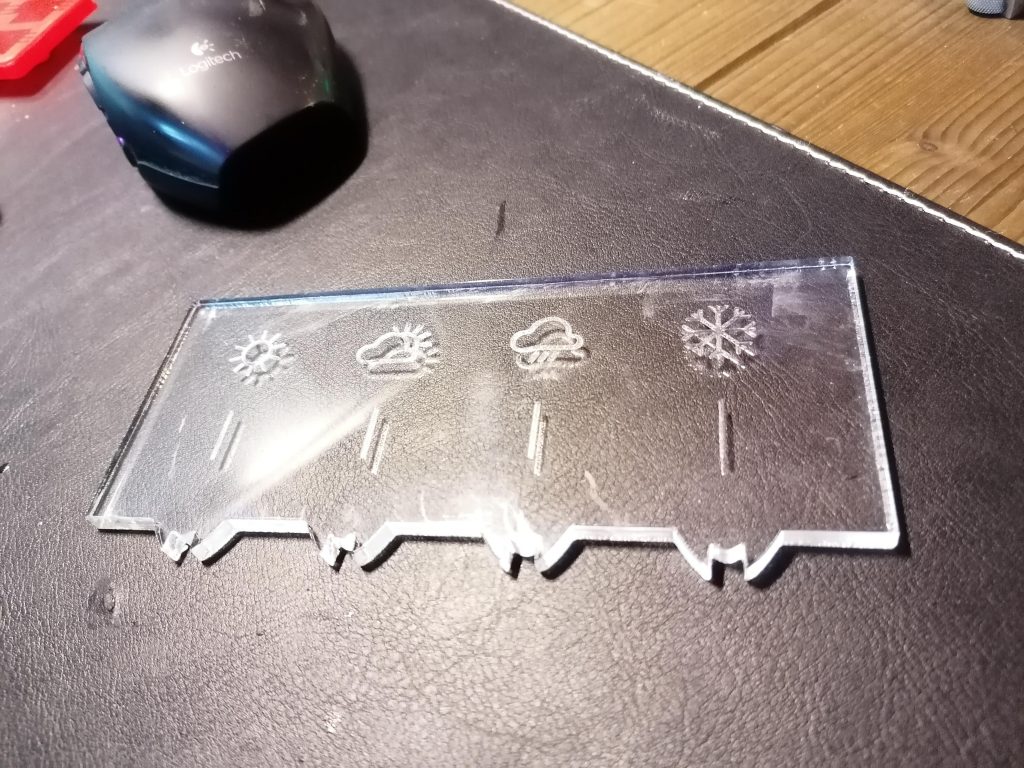
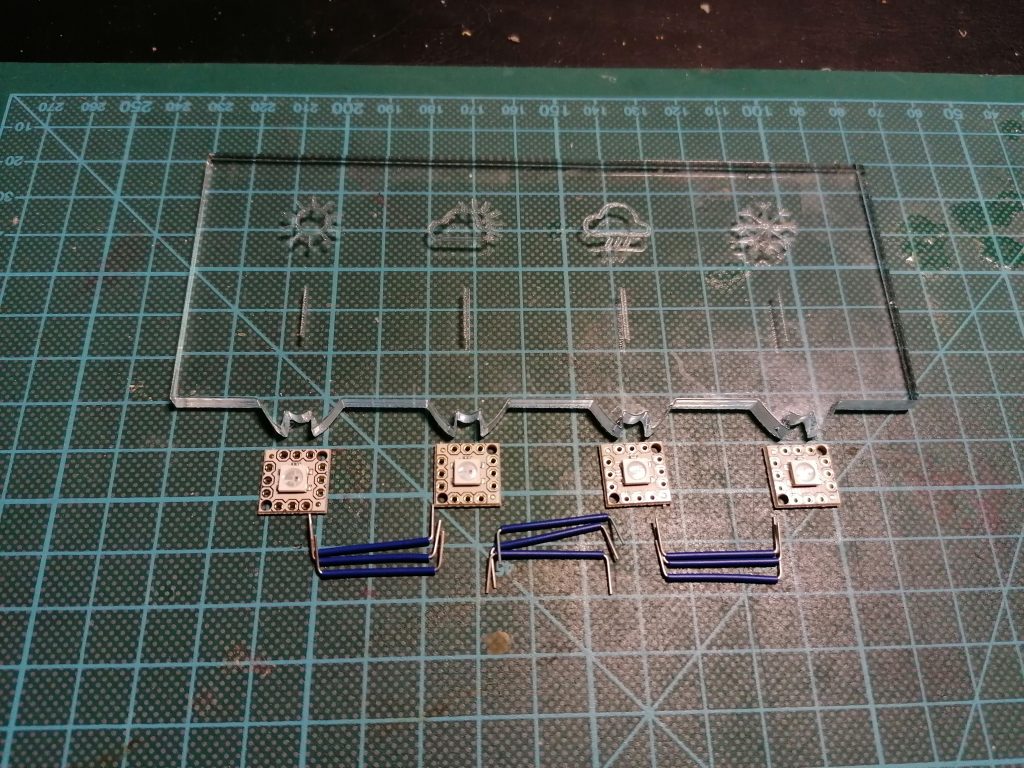
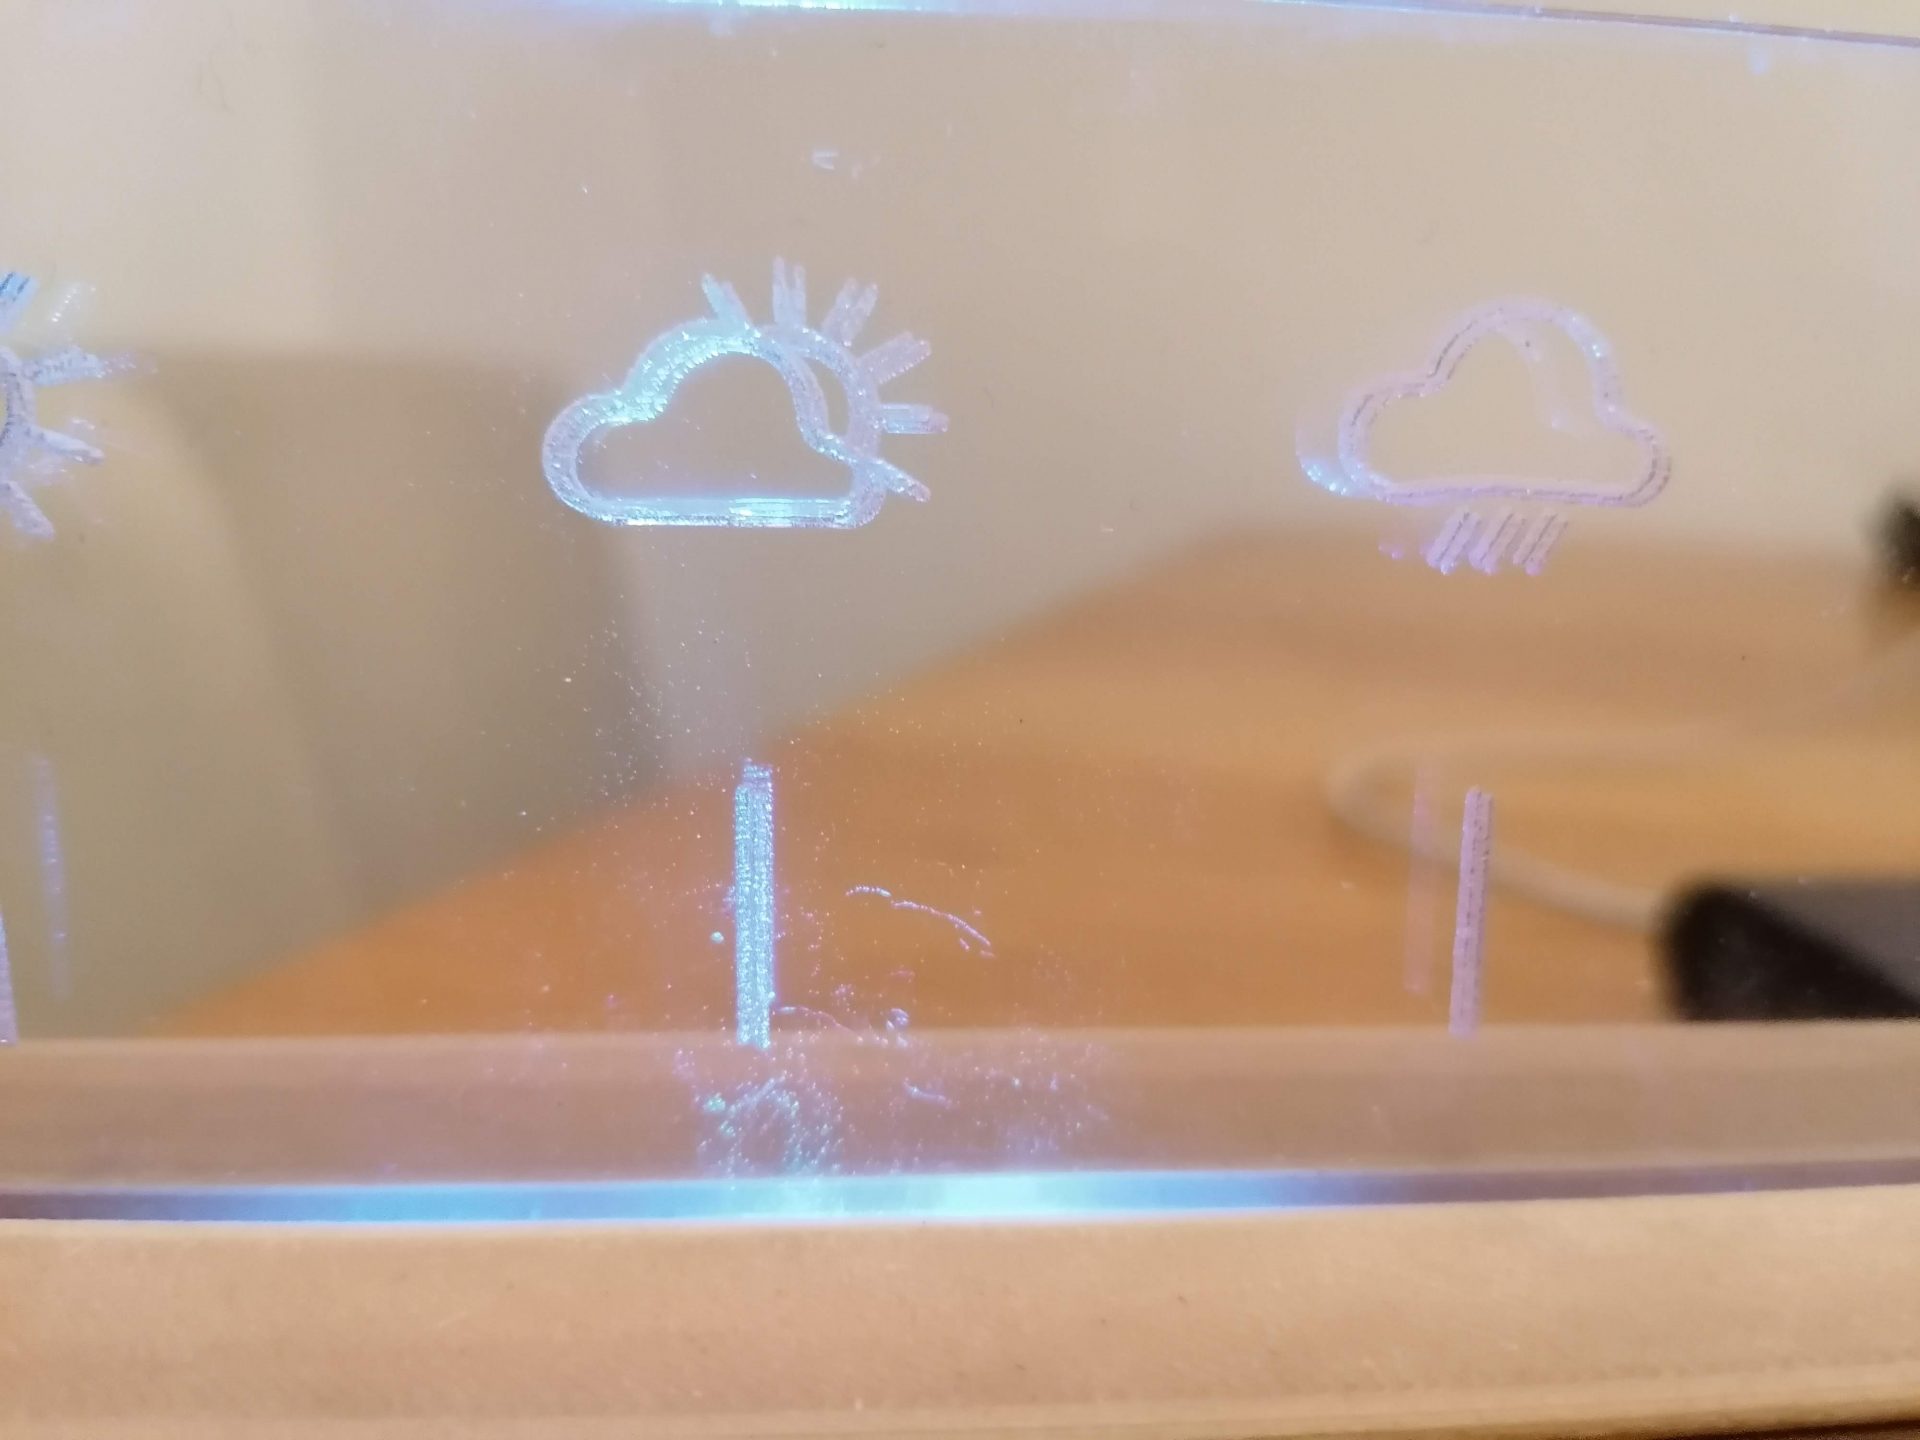
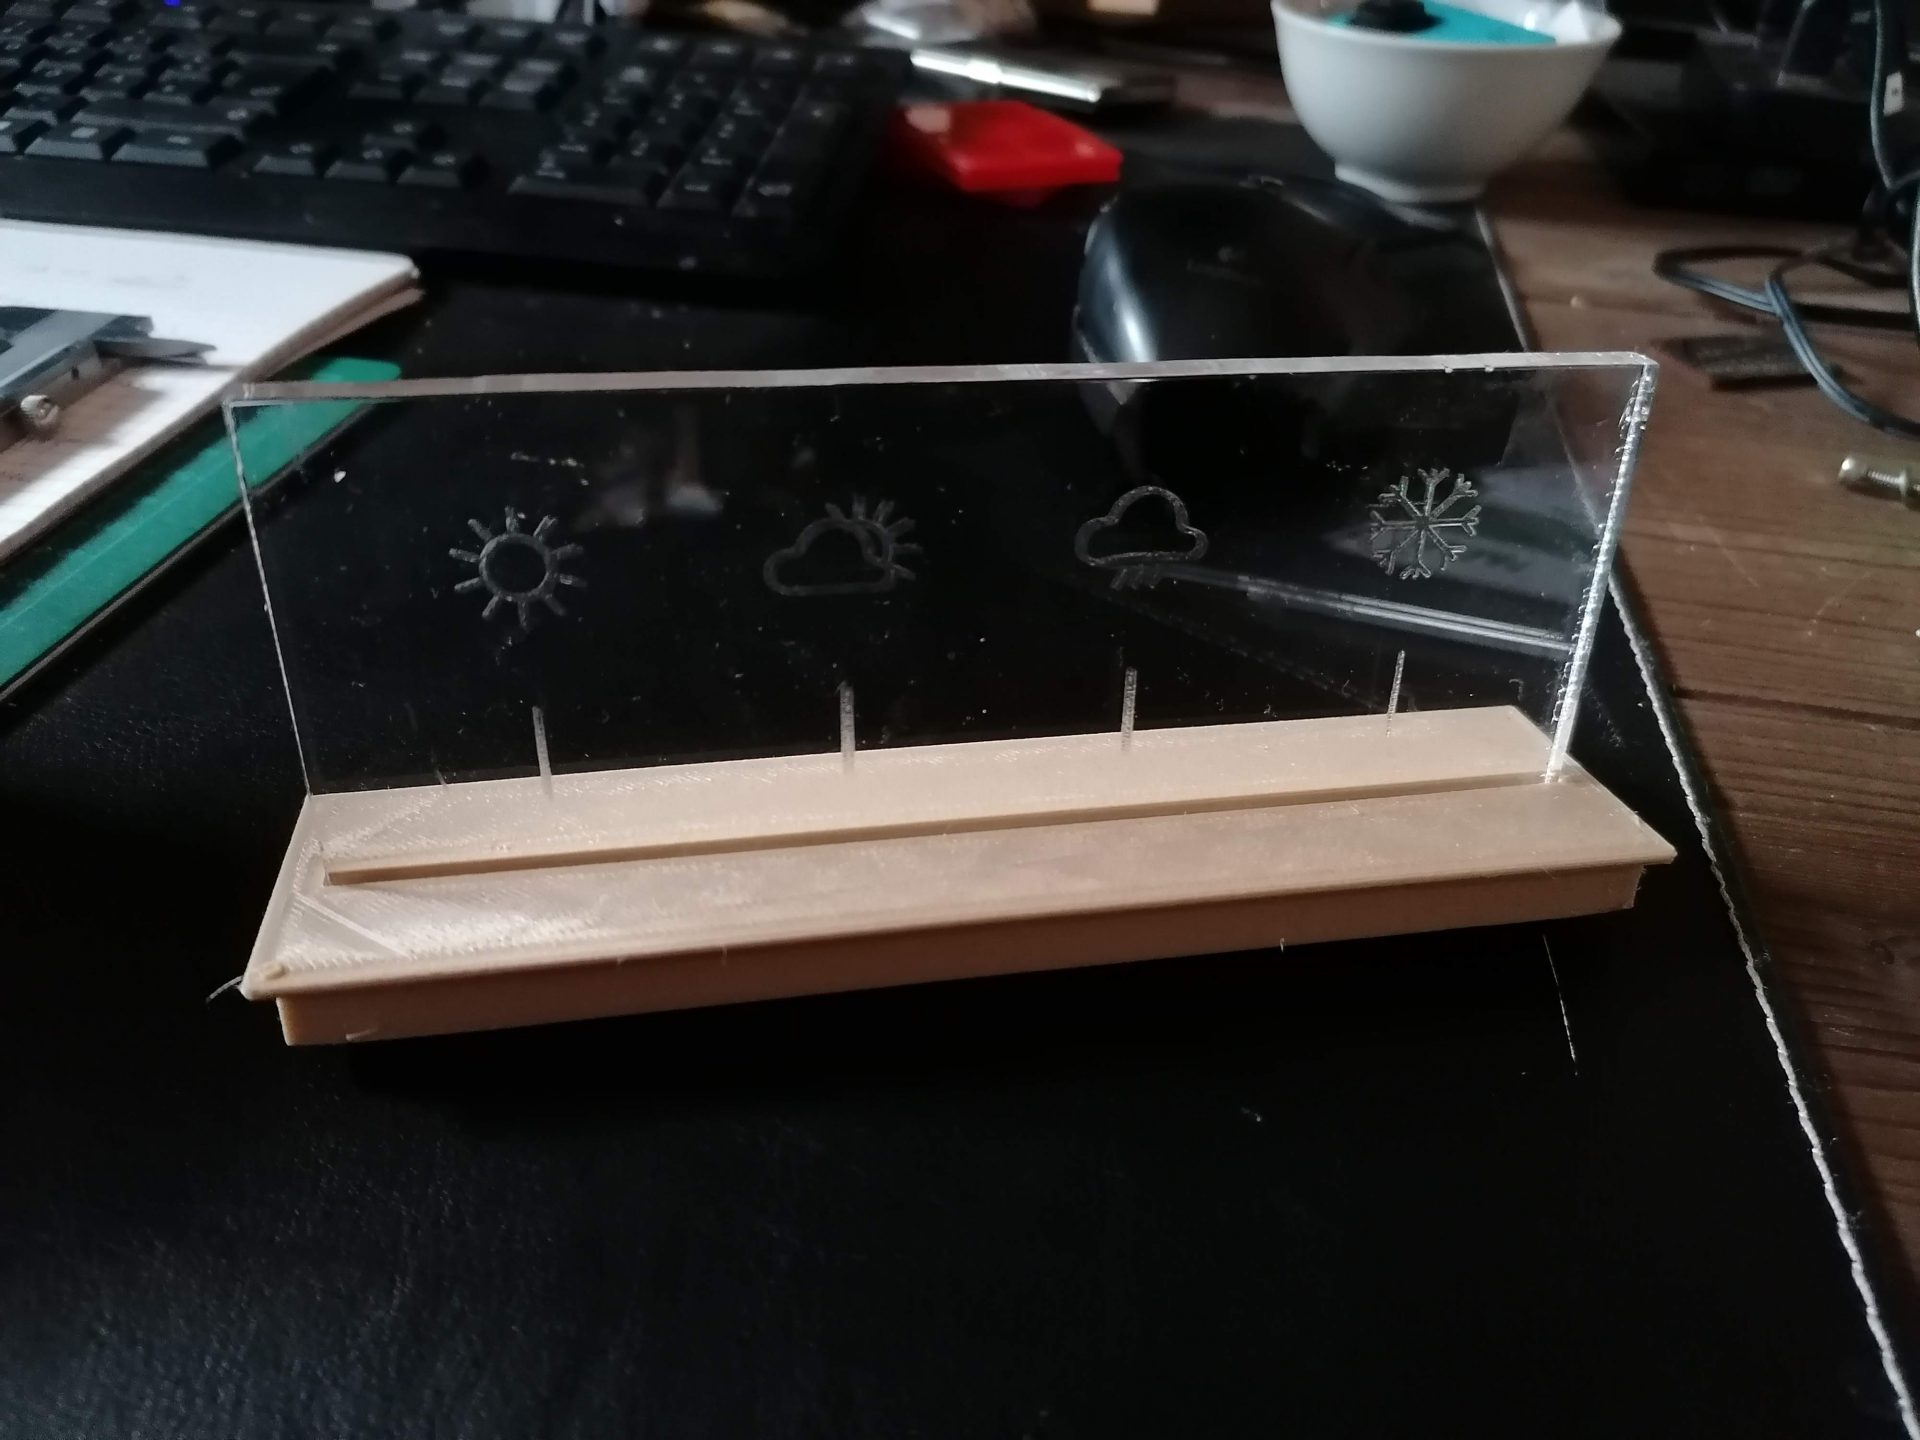
Scheibe
Herzstück der Wetterstation ist die Scheibe mit den Icons. Wir wollen diese von unten mit RGB LEds beleuchten und das PMMA quasi wie einen Lichtleiter nutzen. Je nach Wetterlage soll ein Icon leuchten.
Optik
Vor ein paar Jahren habe ich ja in der Lichttechnik gearbeitet, daher wollte ich mal gucken, ob ich es noch hinbekomme, eine kleine Kollimator-Optik für die WS2812 zu entwickeln. Leider konnte ich den genauen Brennpunkt für die die LED nicht herausfinden, daher habe ich einfach eine Parabel für den Mittelpunkt des Chips ausgelegt.

Die Optik bündelt das licht der LED und sorgt dafür, dass nur der jeweilige Bereich der Scheibe beleuchtet wird, für den sie vorgesehen ist und nicht so viel Streulicht auf die anderen Icons gelangt.
Für die Auslegung braucht man lediglich das Brechungsgesetz und den Brechungsindex des Scheibenmaterials. Dann konstruiert man mit ein paar Tangenten für ein paar vordefinierte Strahlenpfade. Good enough for me.
Icons
Natürlich sind coole Icons besonders wichtig für ein ansprechendes Aussehen. Ich habe mir im Netz ein paar Referenz-Icons gesucht, die mir vom Style her gefallen (minimalistisch) haben und angelehnt an diese dann in Solidworks die Icons konstruiert. Sie bestehen hauptsächlich aus Langlöchern, Kreisen und Splines. Zusammen mit der Schiebenkontur ergeben sie das erste Bauteil. Daraus kann man eine .dxf Datei ableiten. Die entsprechenden Farben für den K40-Whisperer habe ich in Inkscape zusammengefügt.
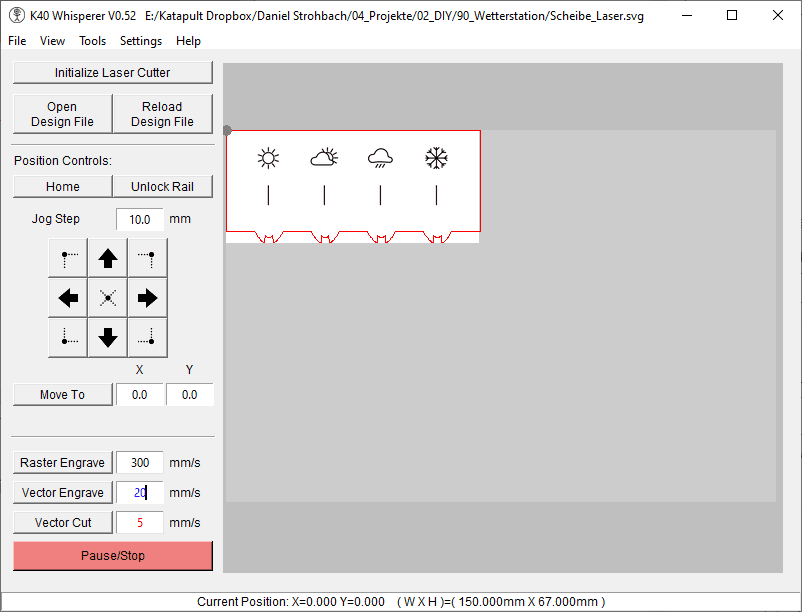
Für das Ausschneiden der Scheibe hat mein K40 bei einem Vorschub von 5mm/s und ca. 20mA Stromstärke 5 Durchgänge gebraucht. Die Icons habe ich dann im Raster-Modus mit 300m/s und ebenfalls bei 20mA Stromstärke graviert.
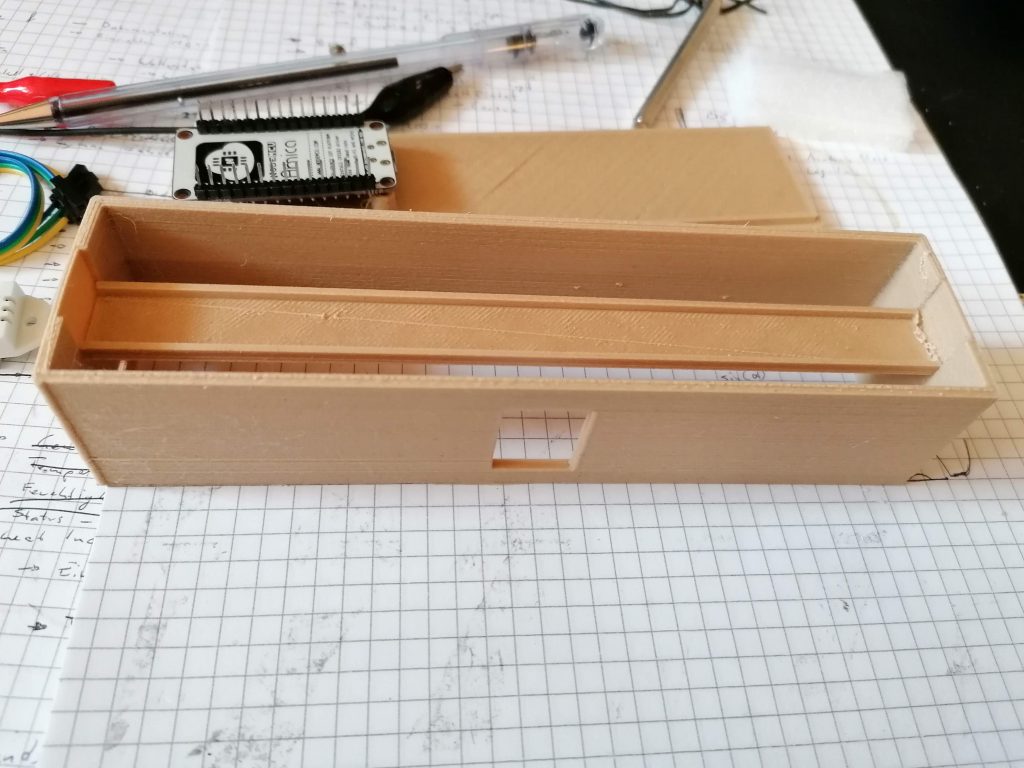
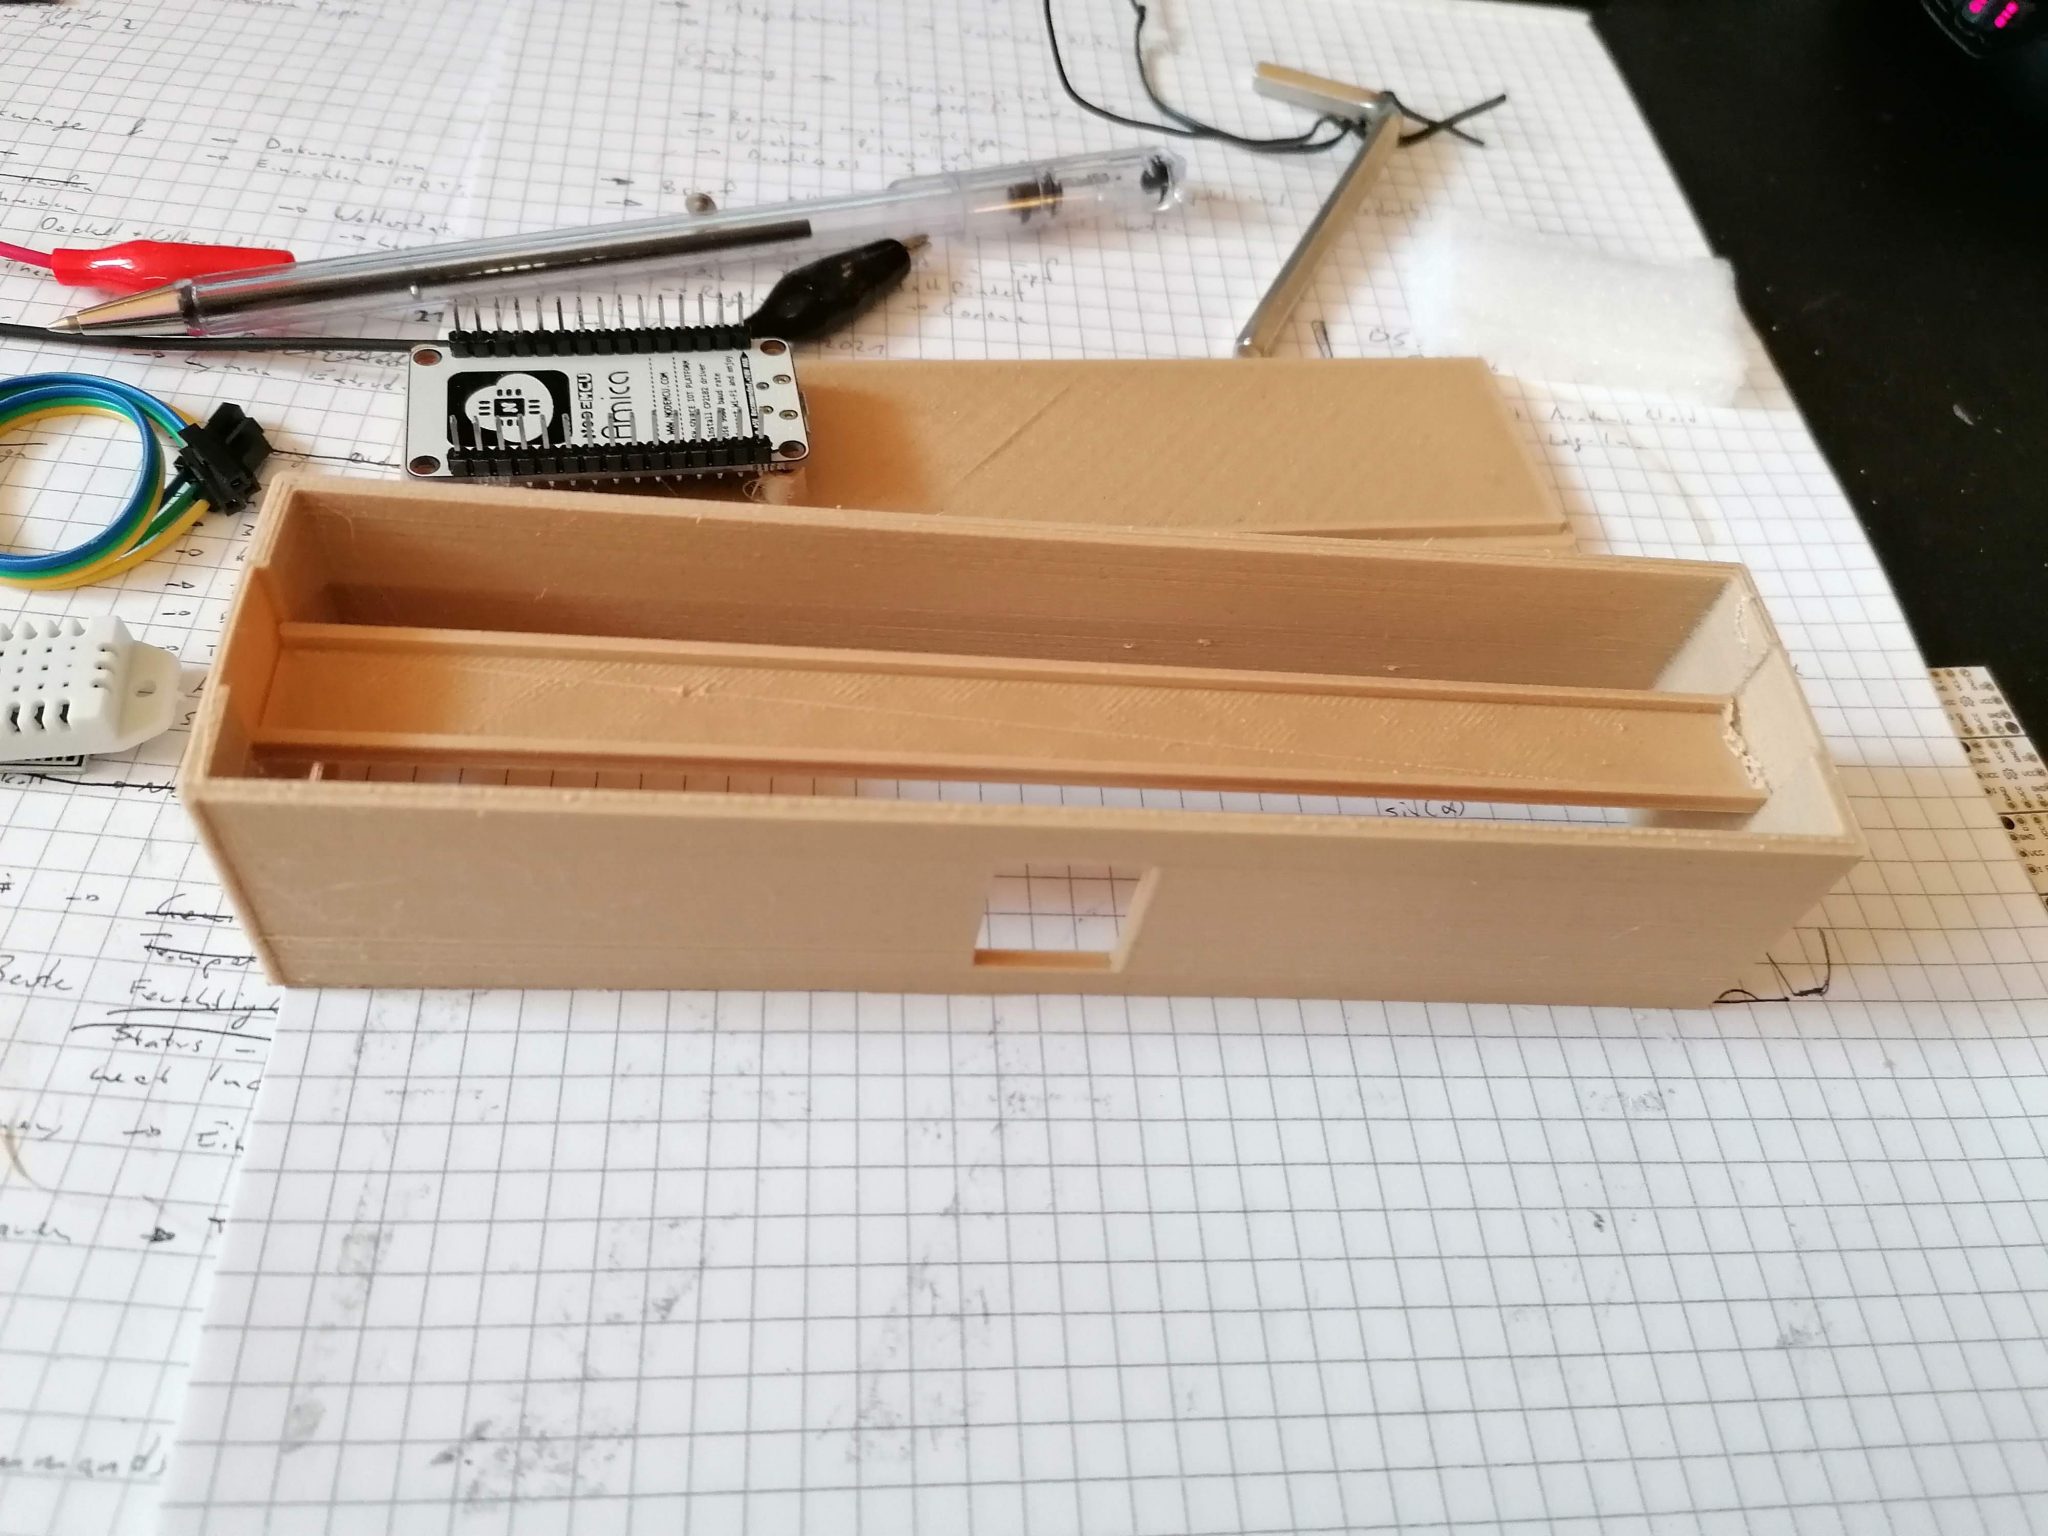
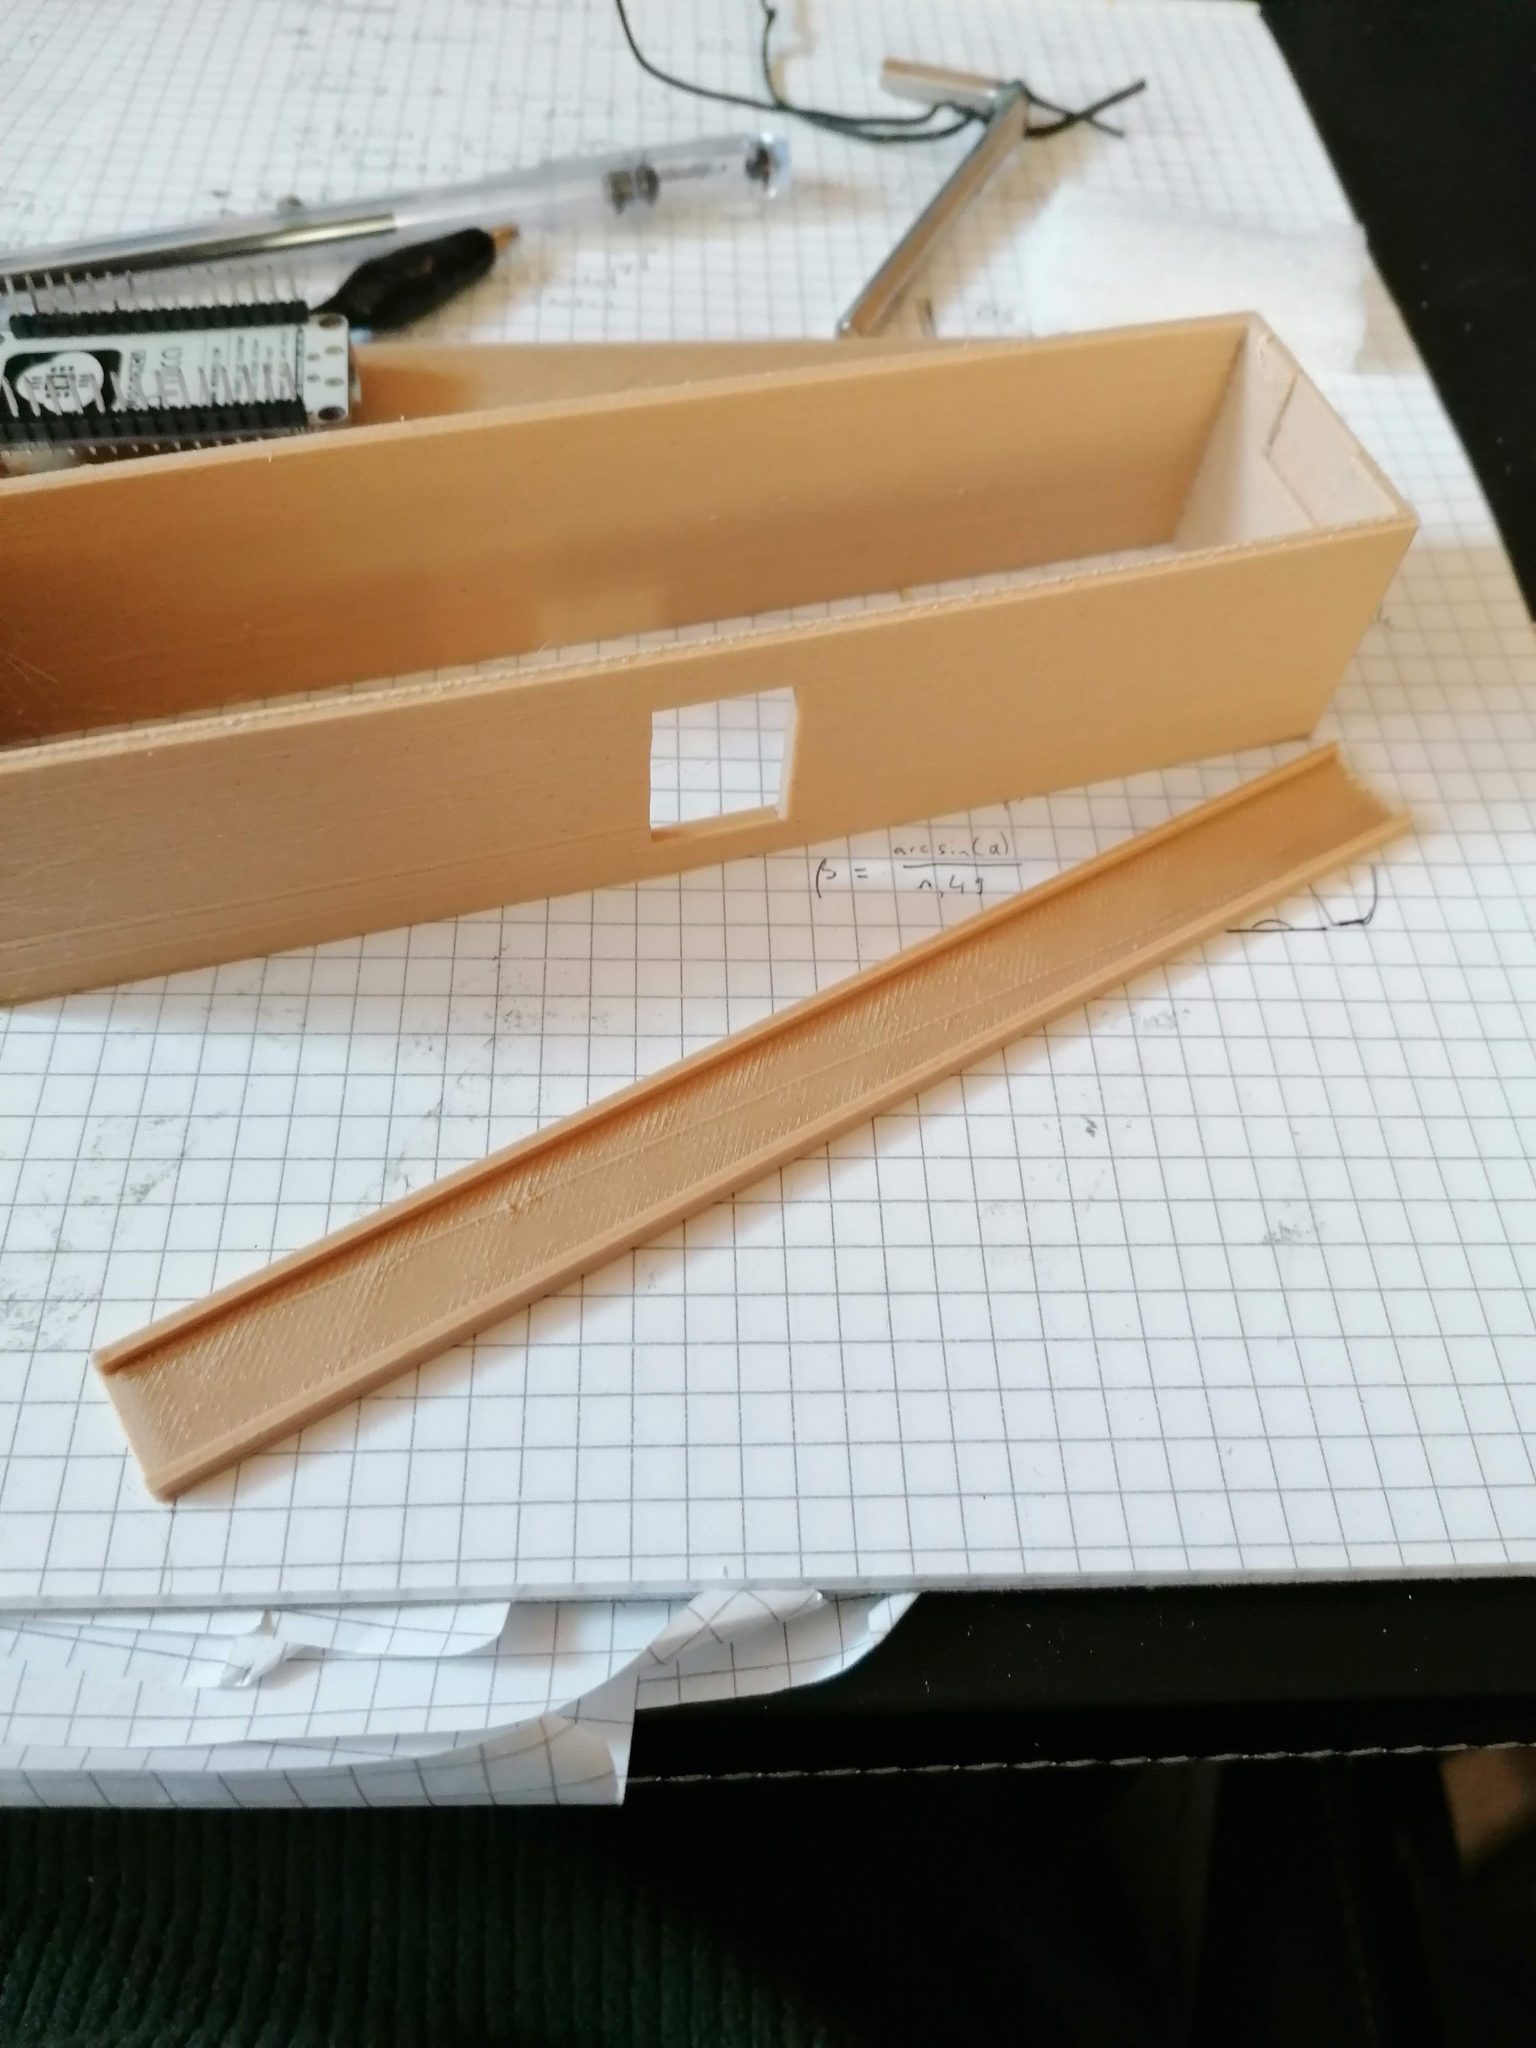
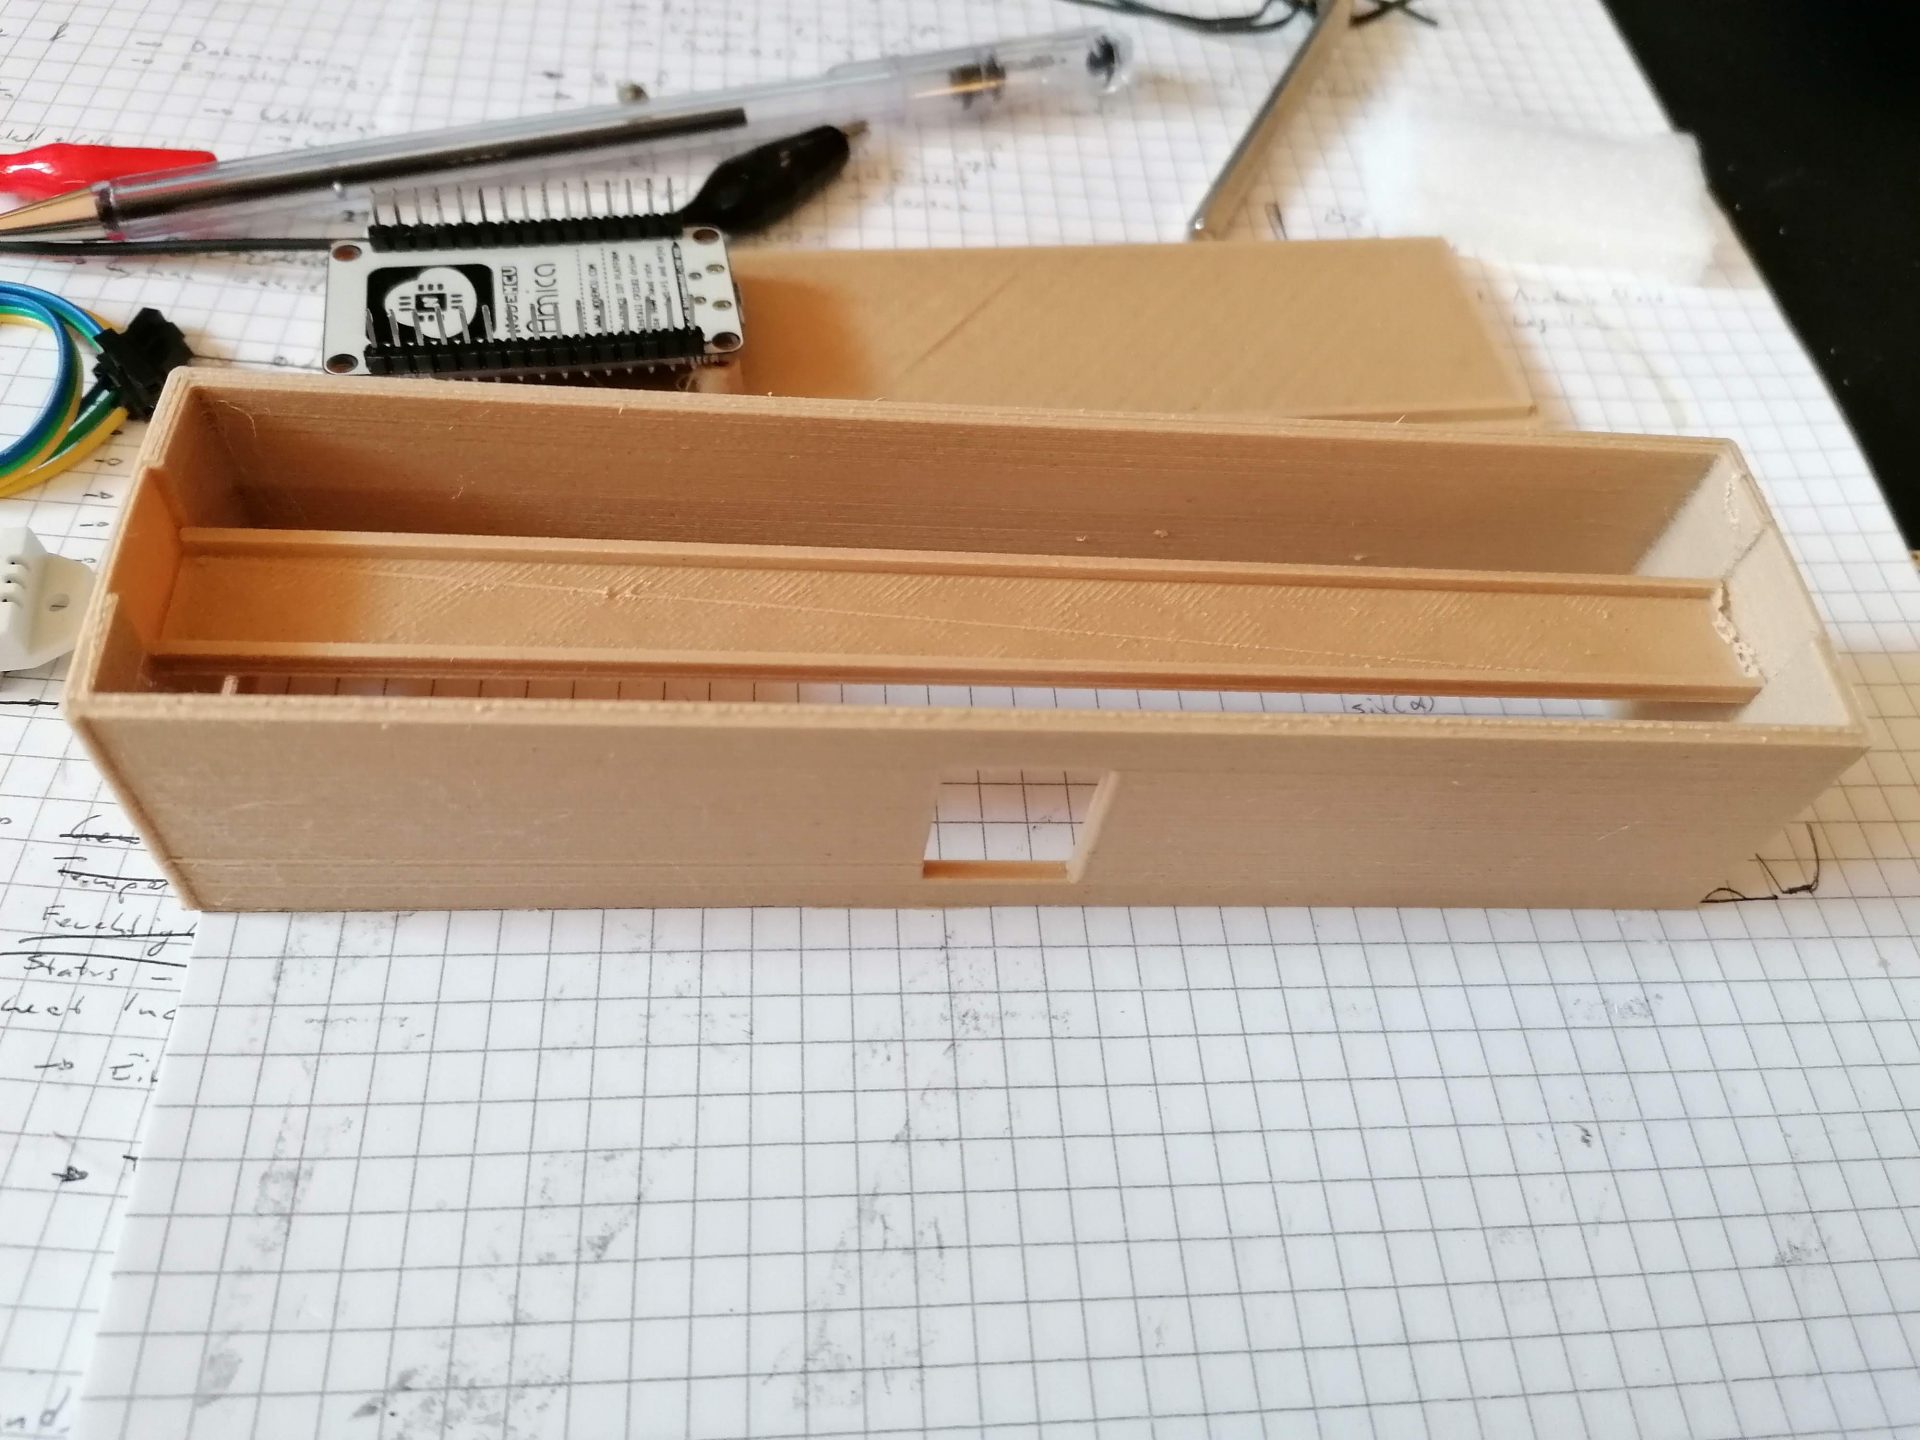
Der Sockel
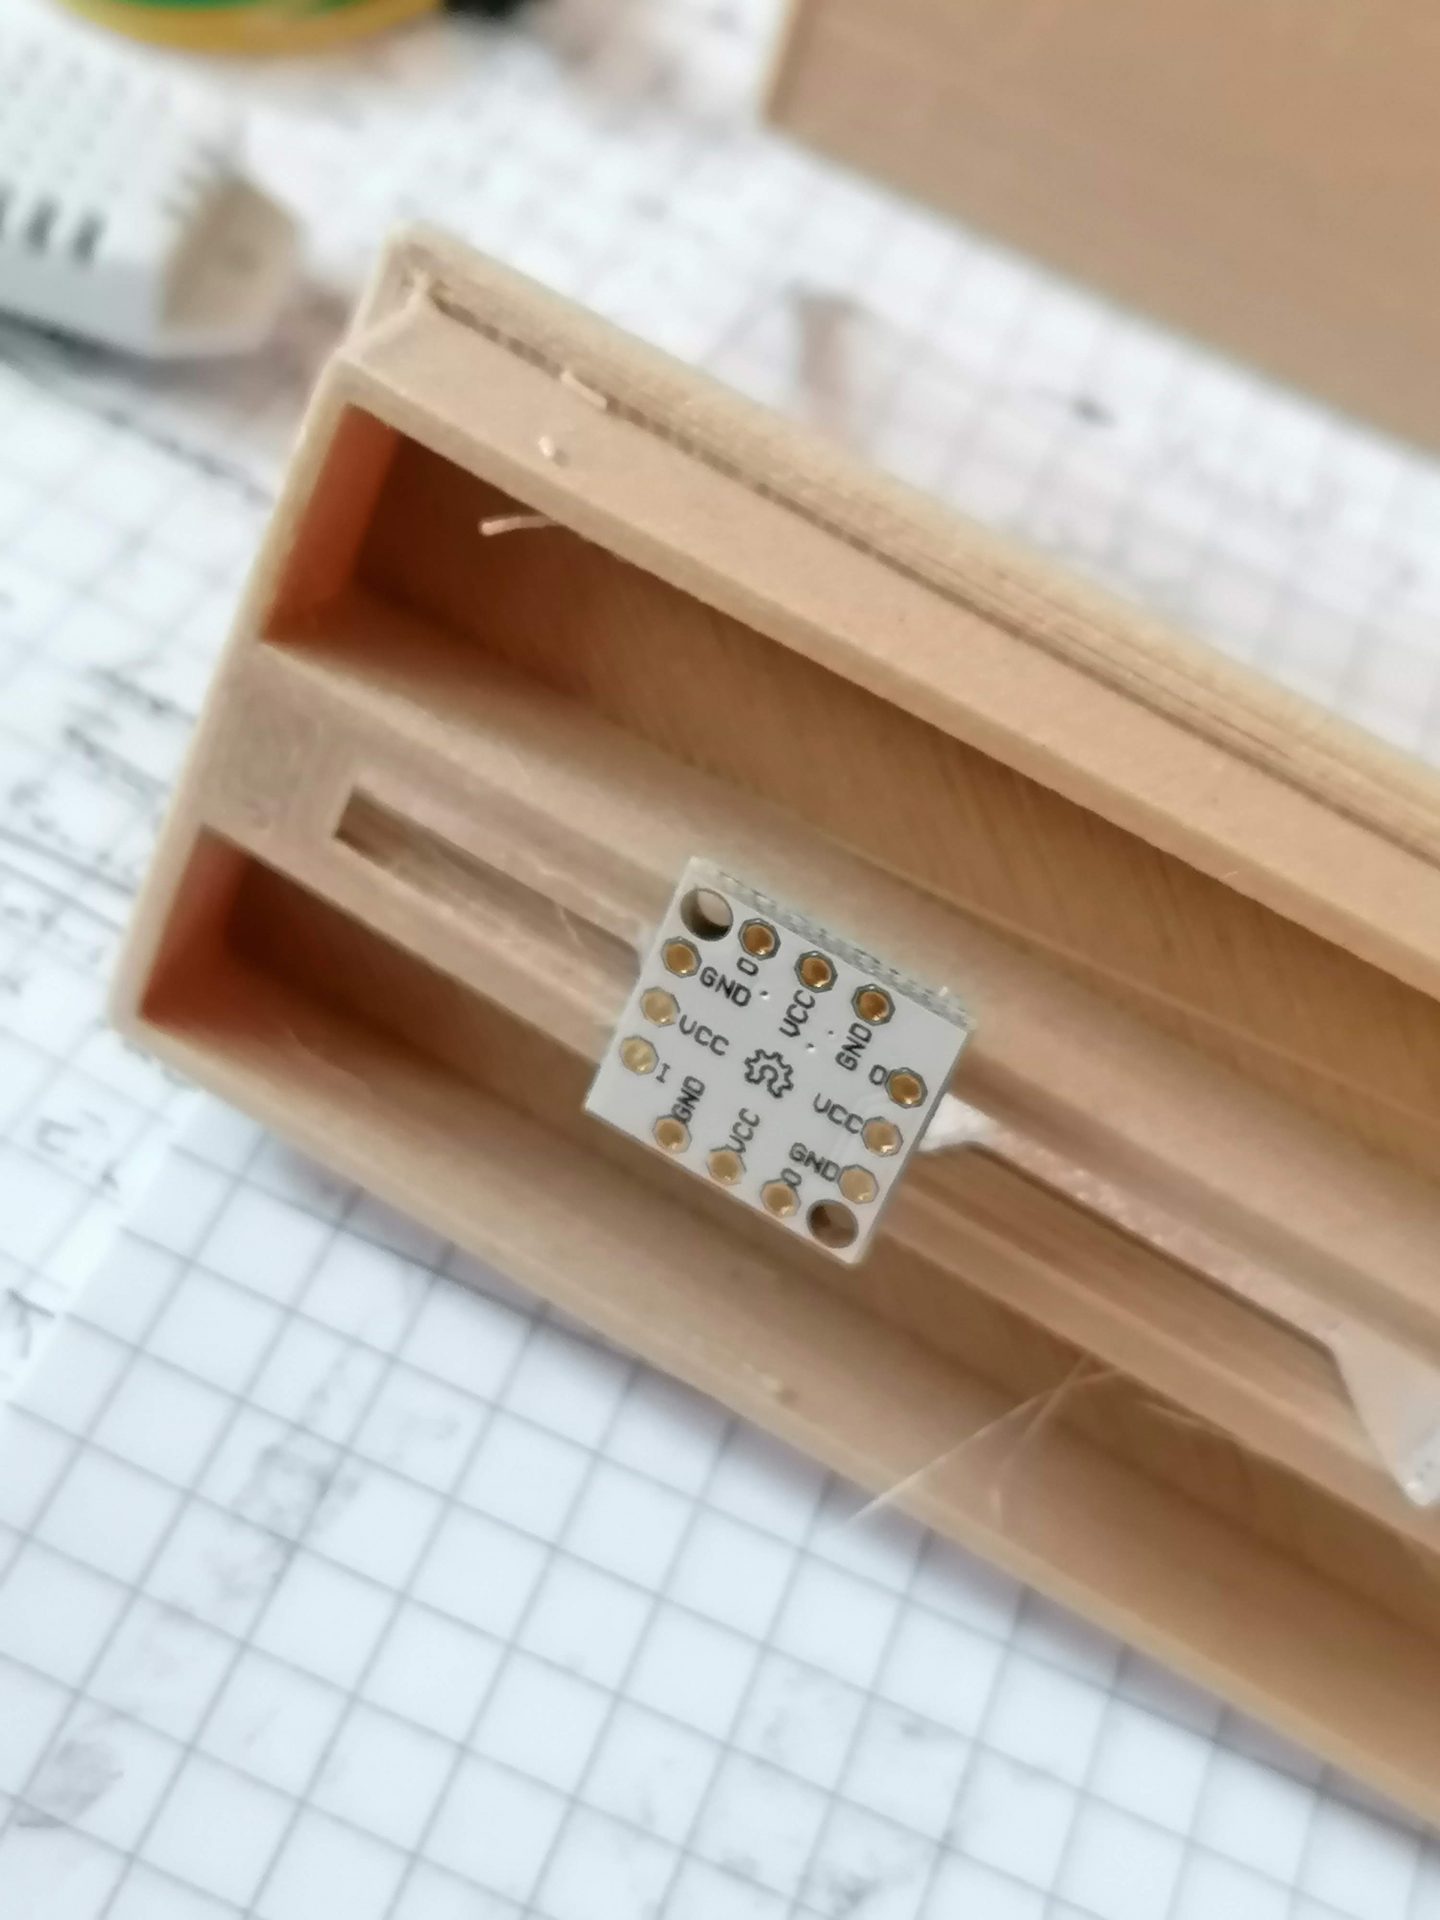
Der Sockel besteht aus vier Teilen. Einem Boden, dem eigentlichen Sockel und einem Deckel. Dazu kommt noch eine Art Brücke auf der die LEDs Platz finden.
Eigentlich würde ich nun den Deckel einfach über Kopf drucken, doch ich wollte hier nicht, dass die Struktur des Druckbettes sichtbar ist. Daher habe ich den Deckel in etwas ungünster ausrichtung gesliced – dazu habe ich dann einen kleinen Rand für eine Schichtdicke hinzu konstruiert, damit ich nicht so viel Support benötige. Das hat sogar ganz gut geklappt. Die restlichen Teile waren soweit kein Problem, nur hat der Anycubic mal wieder einen kleine defekt erlitten. Das Fitting für den PTFE Schlauch hat sich verabschiedet – das Gewinde ist gebrochen.

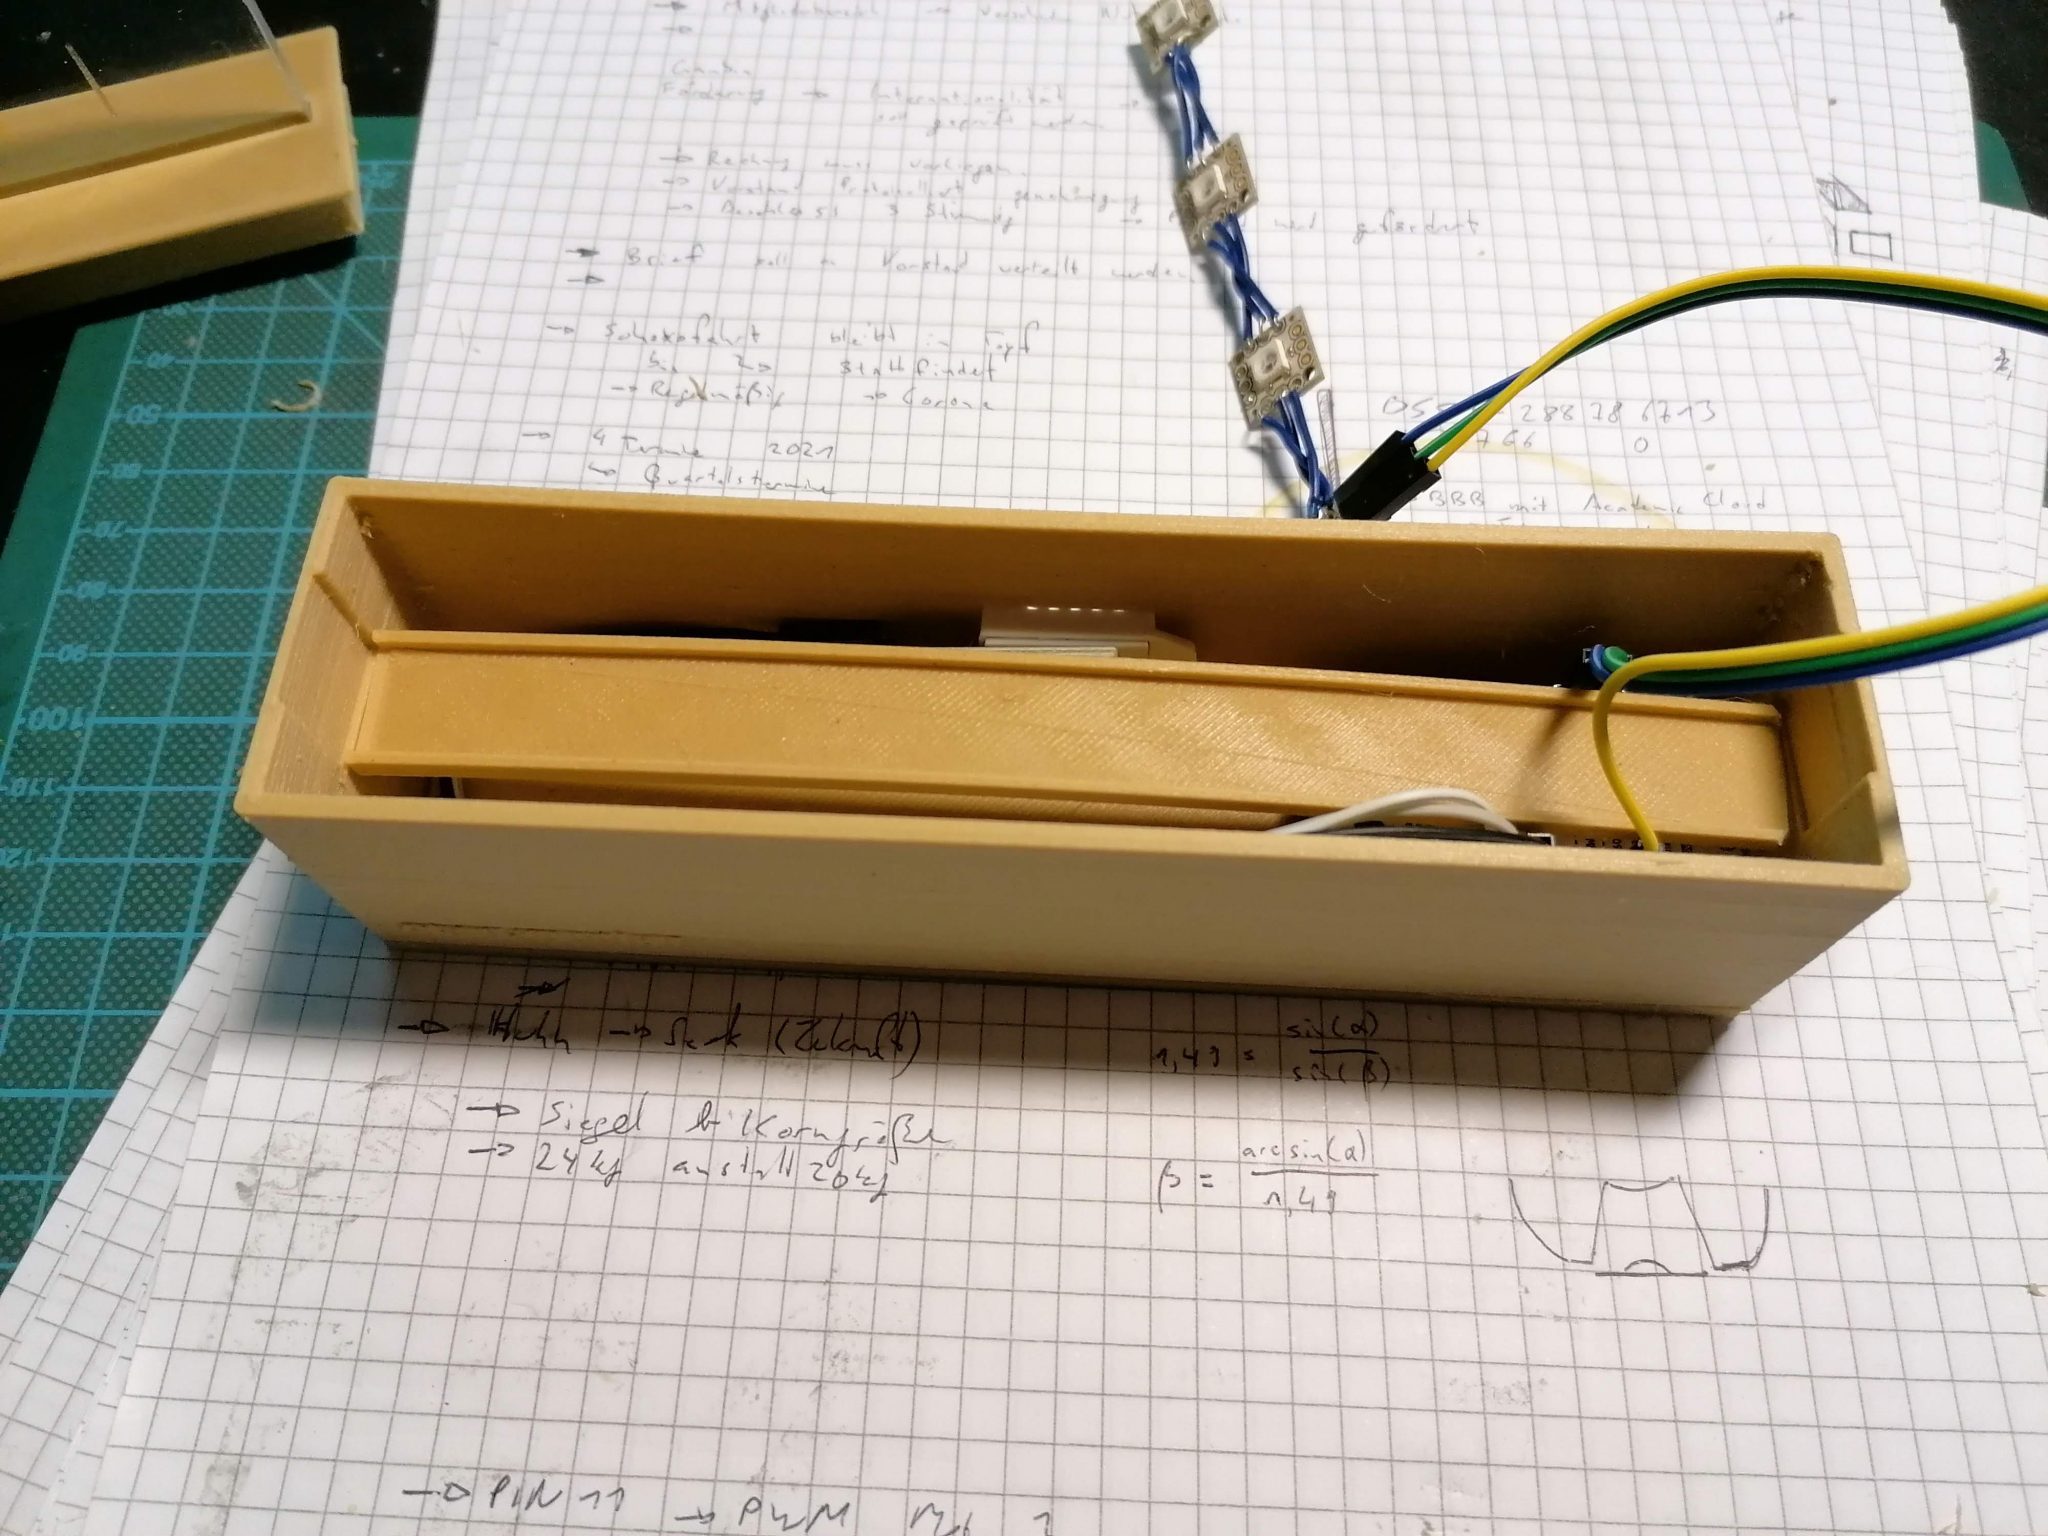
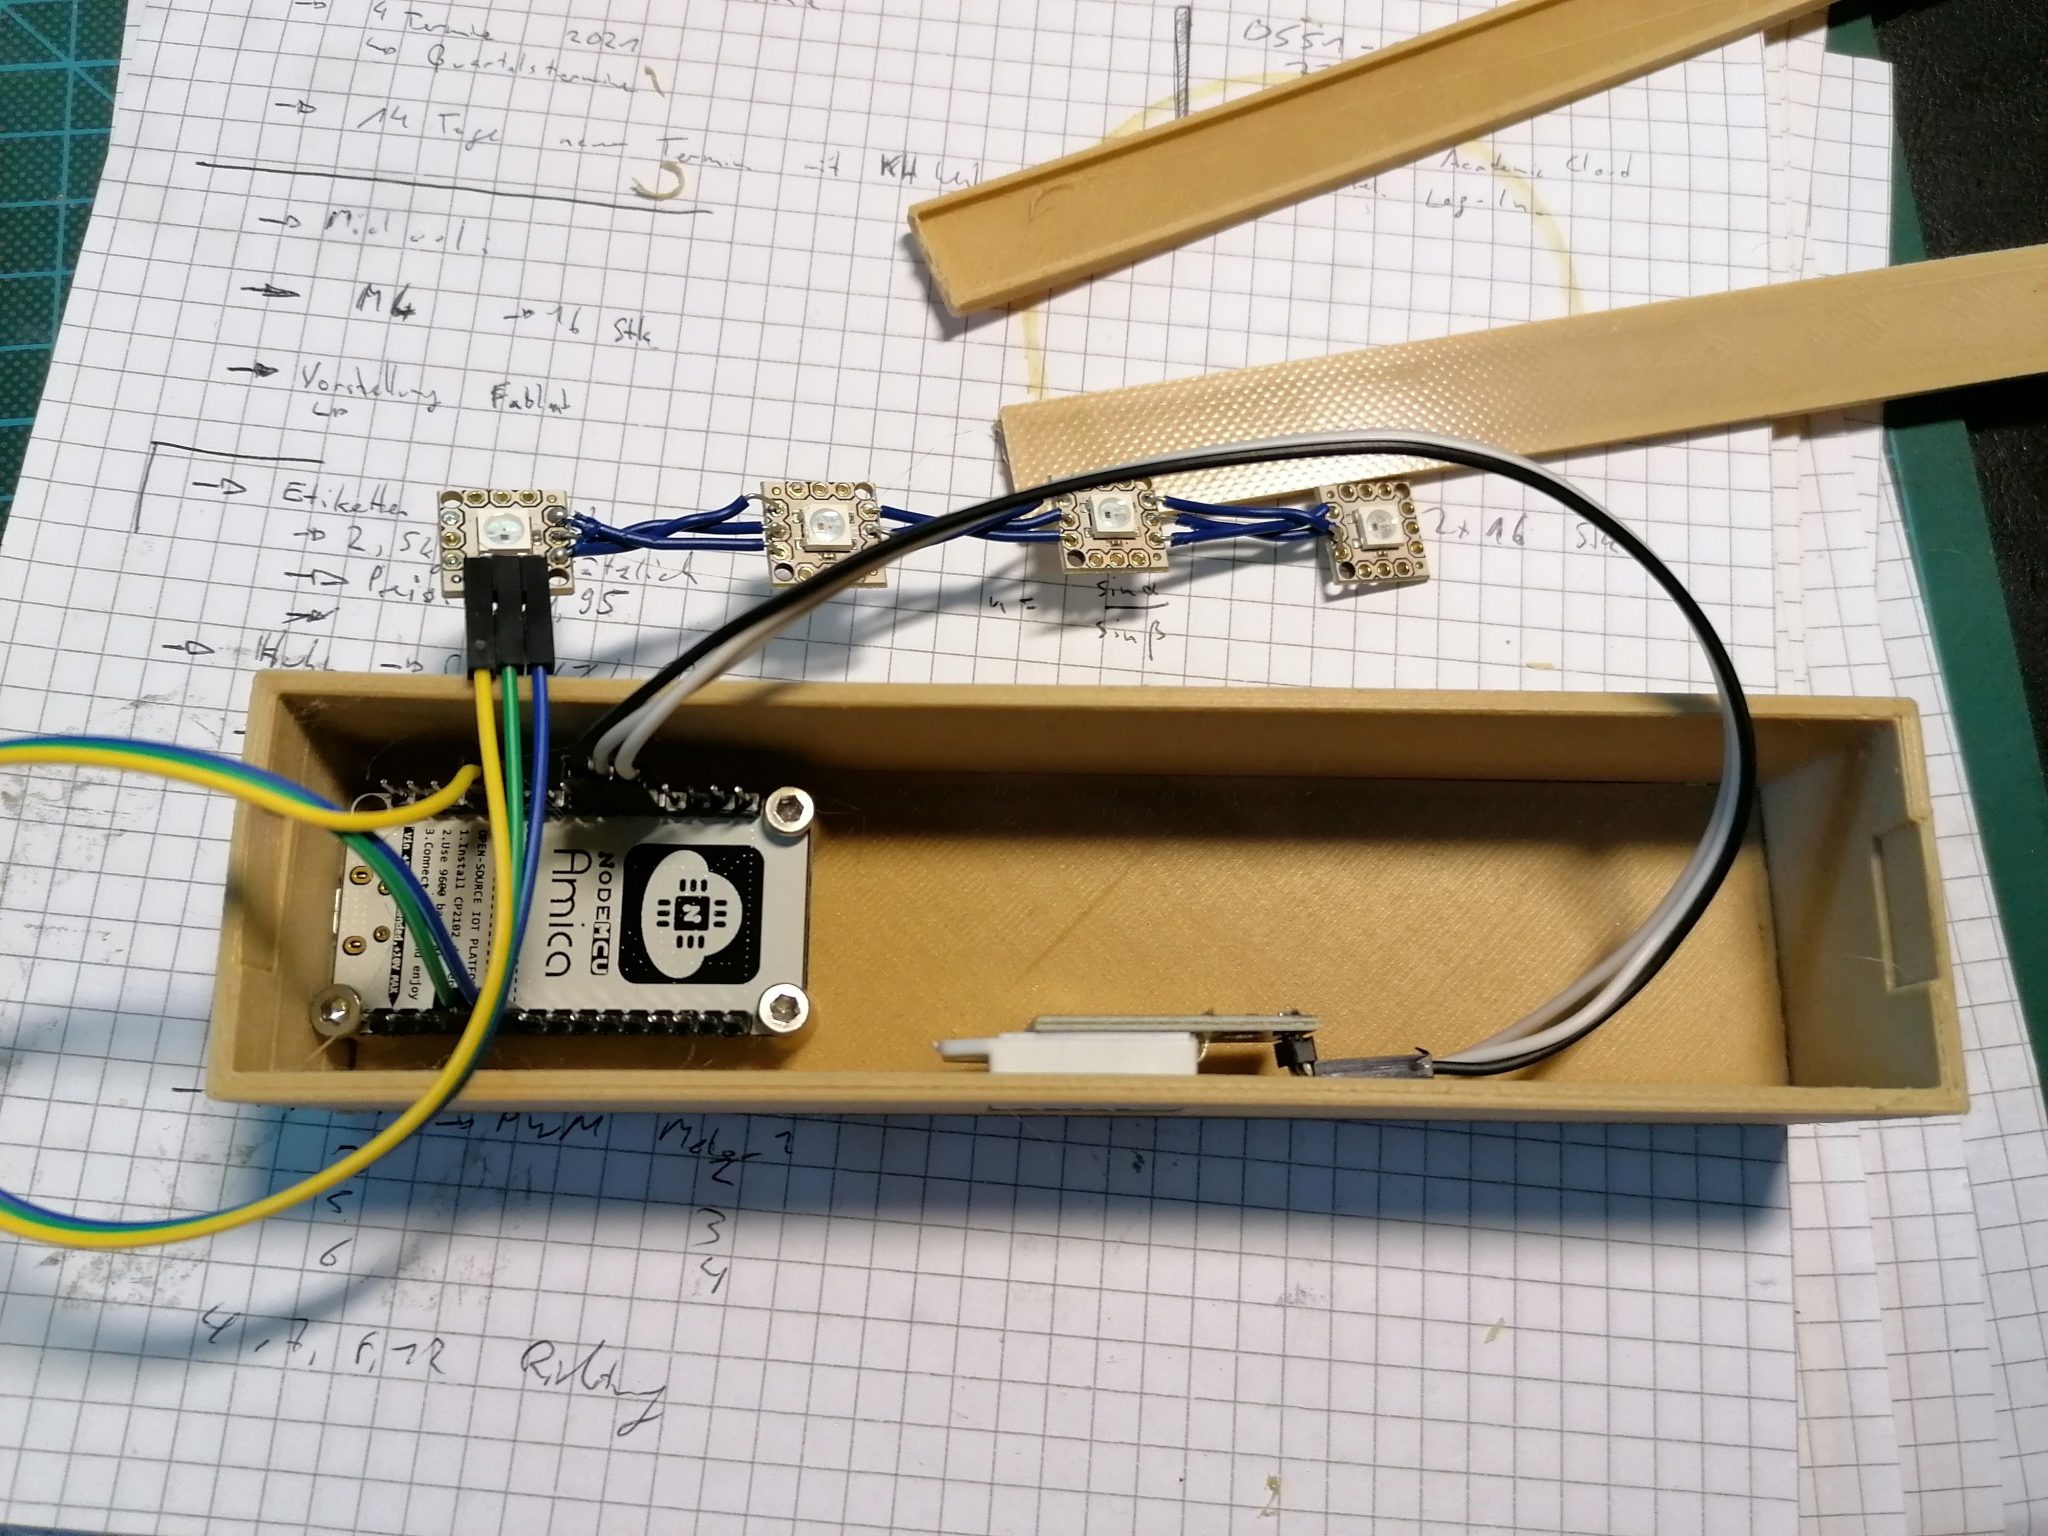
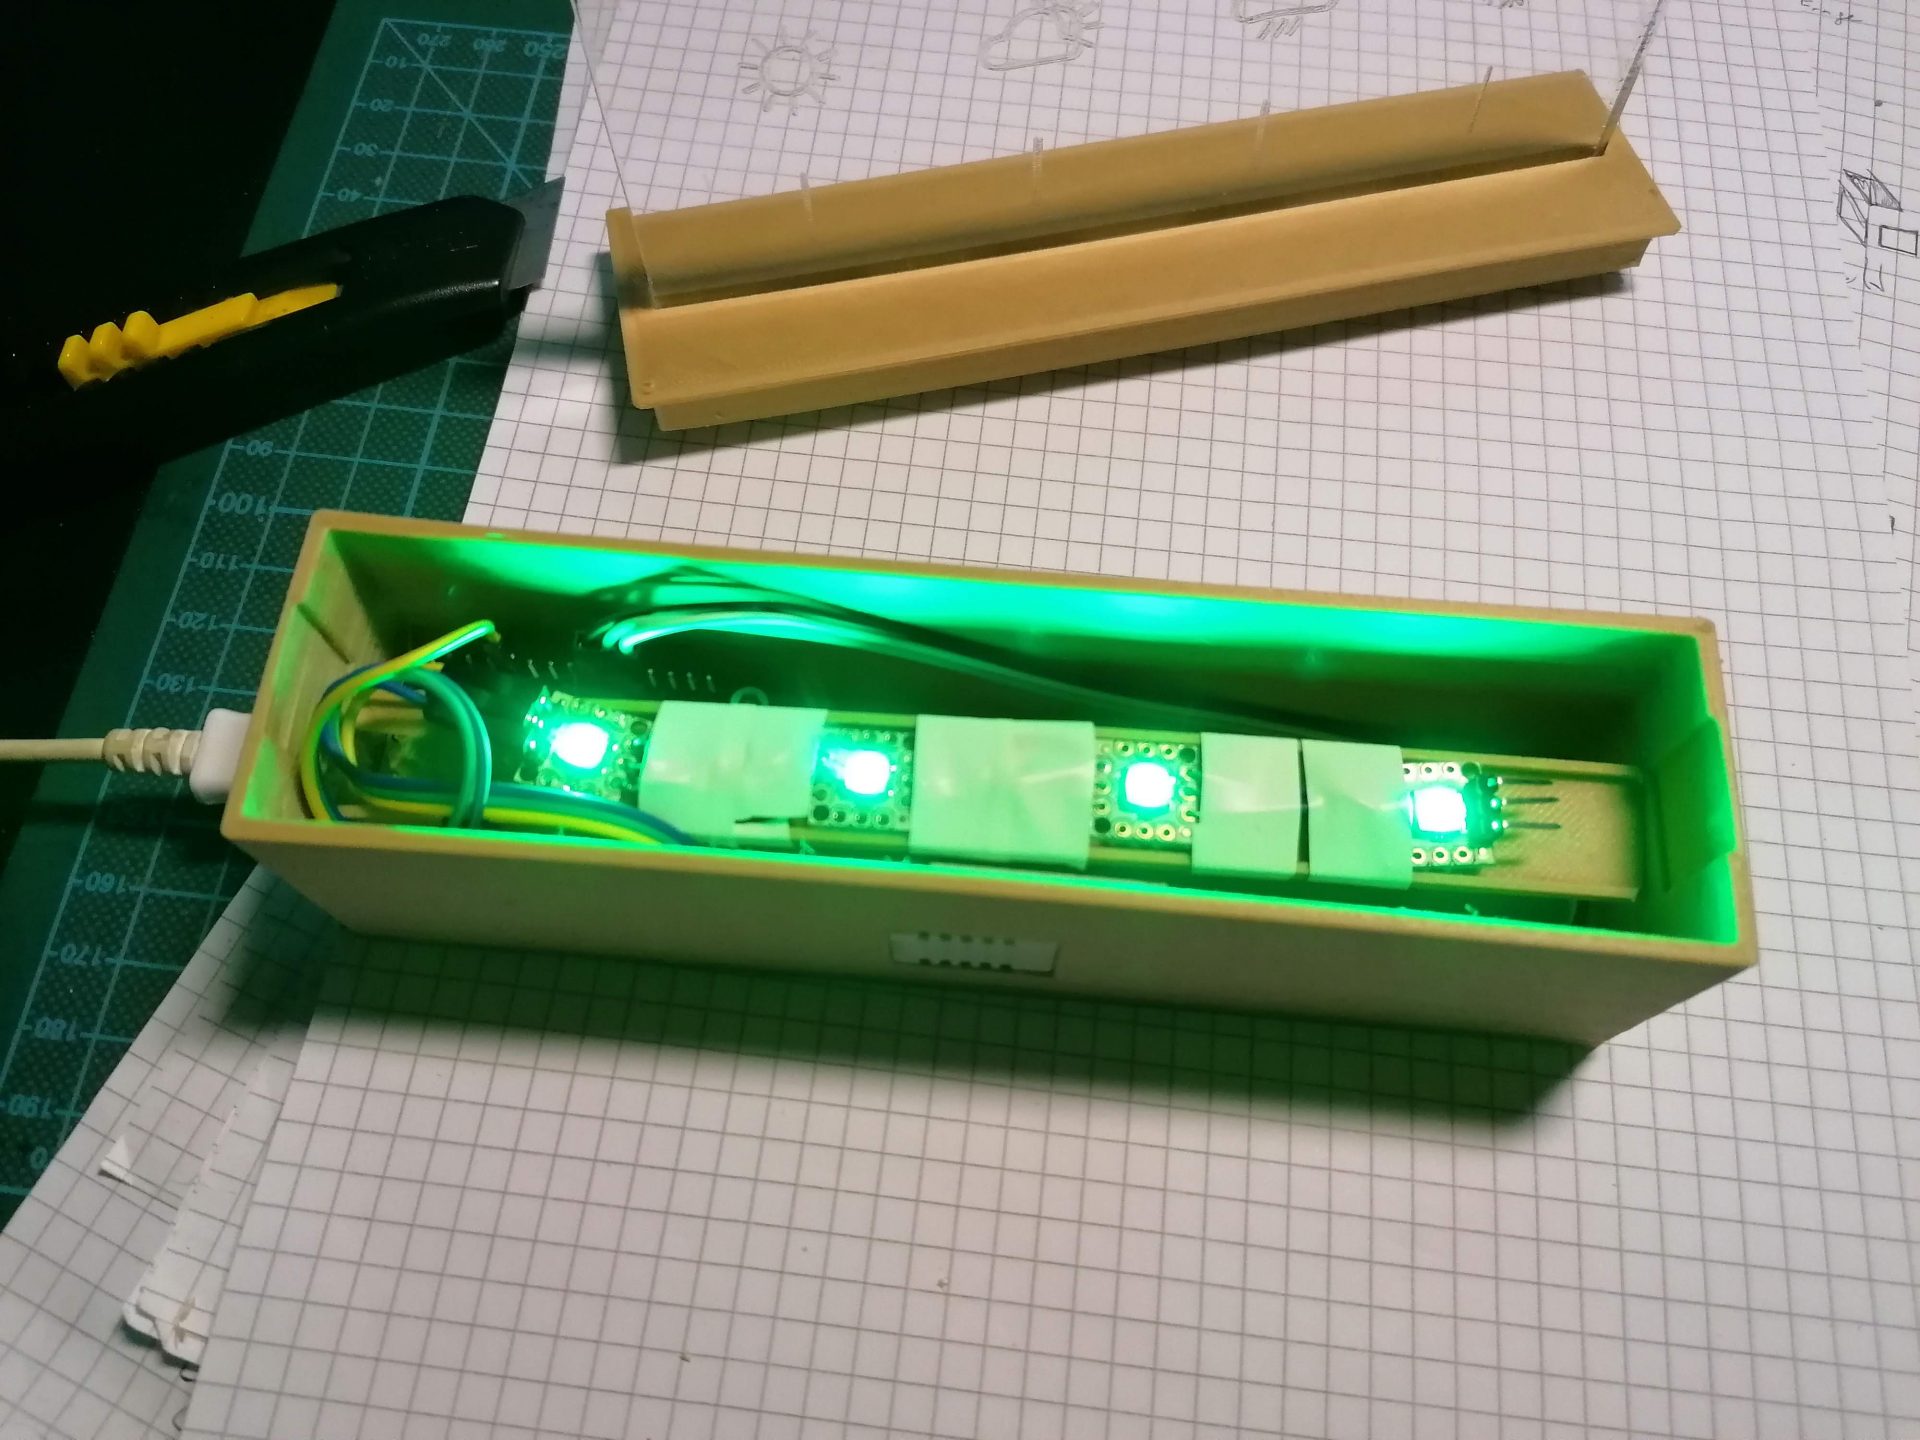
Innenleben
Im Inneren der Wetterstation befindet sich der ESP sowie der DHT-Sensor. Für den ESP8266 gibt es passende Schraubsockel, für die Version ESP32 muss ich diese noch einbauen.
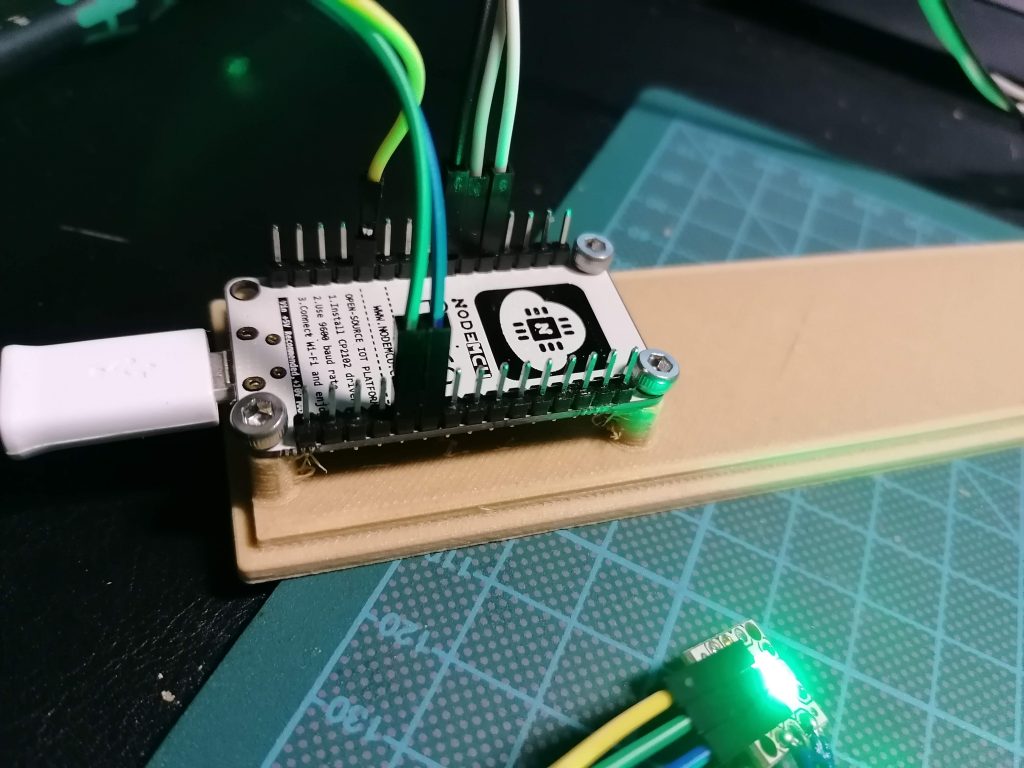
Der ESP8266 wird mit M3 Schrauben befestigt, die Pins müssen nach oben zeigen. So passt der USB-Port direkt in das andere Gehäuseteil und die LEDs und der Sensor können einfach per Jumper angeschlossen werden.
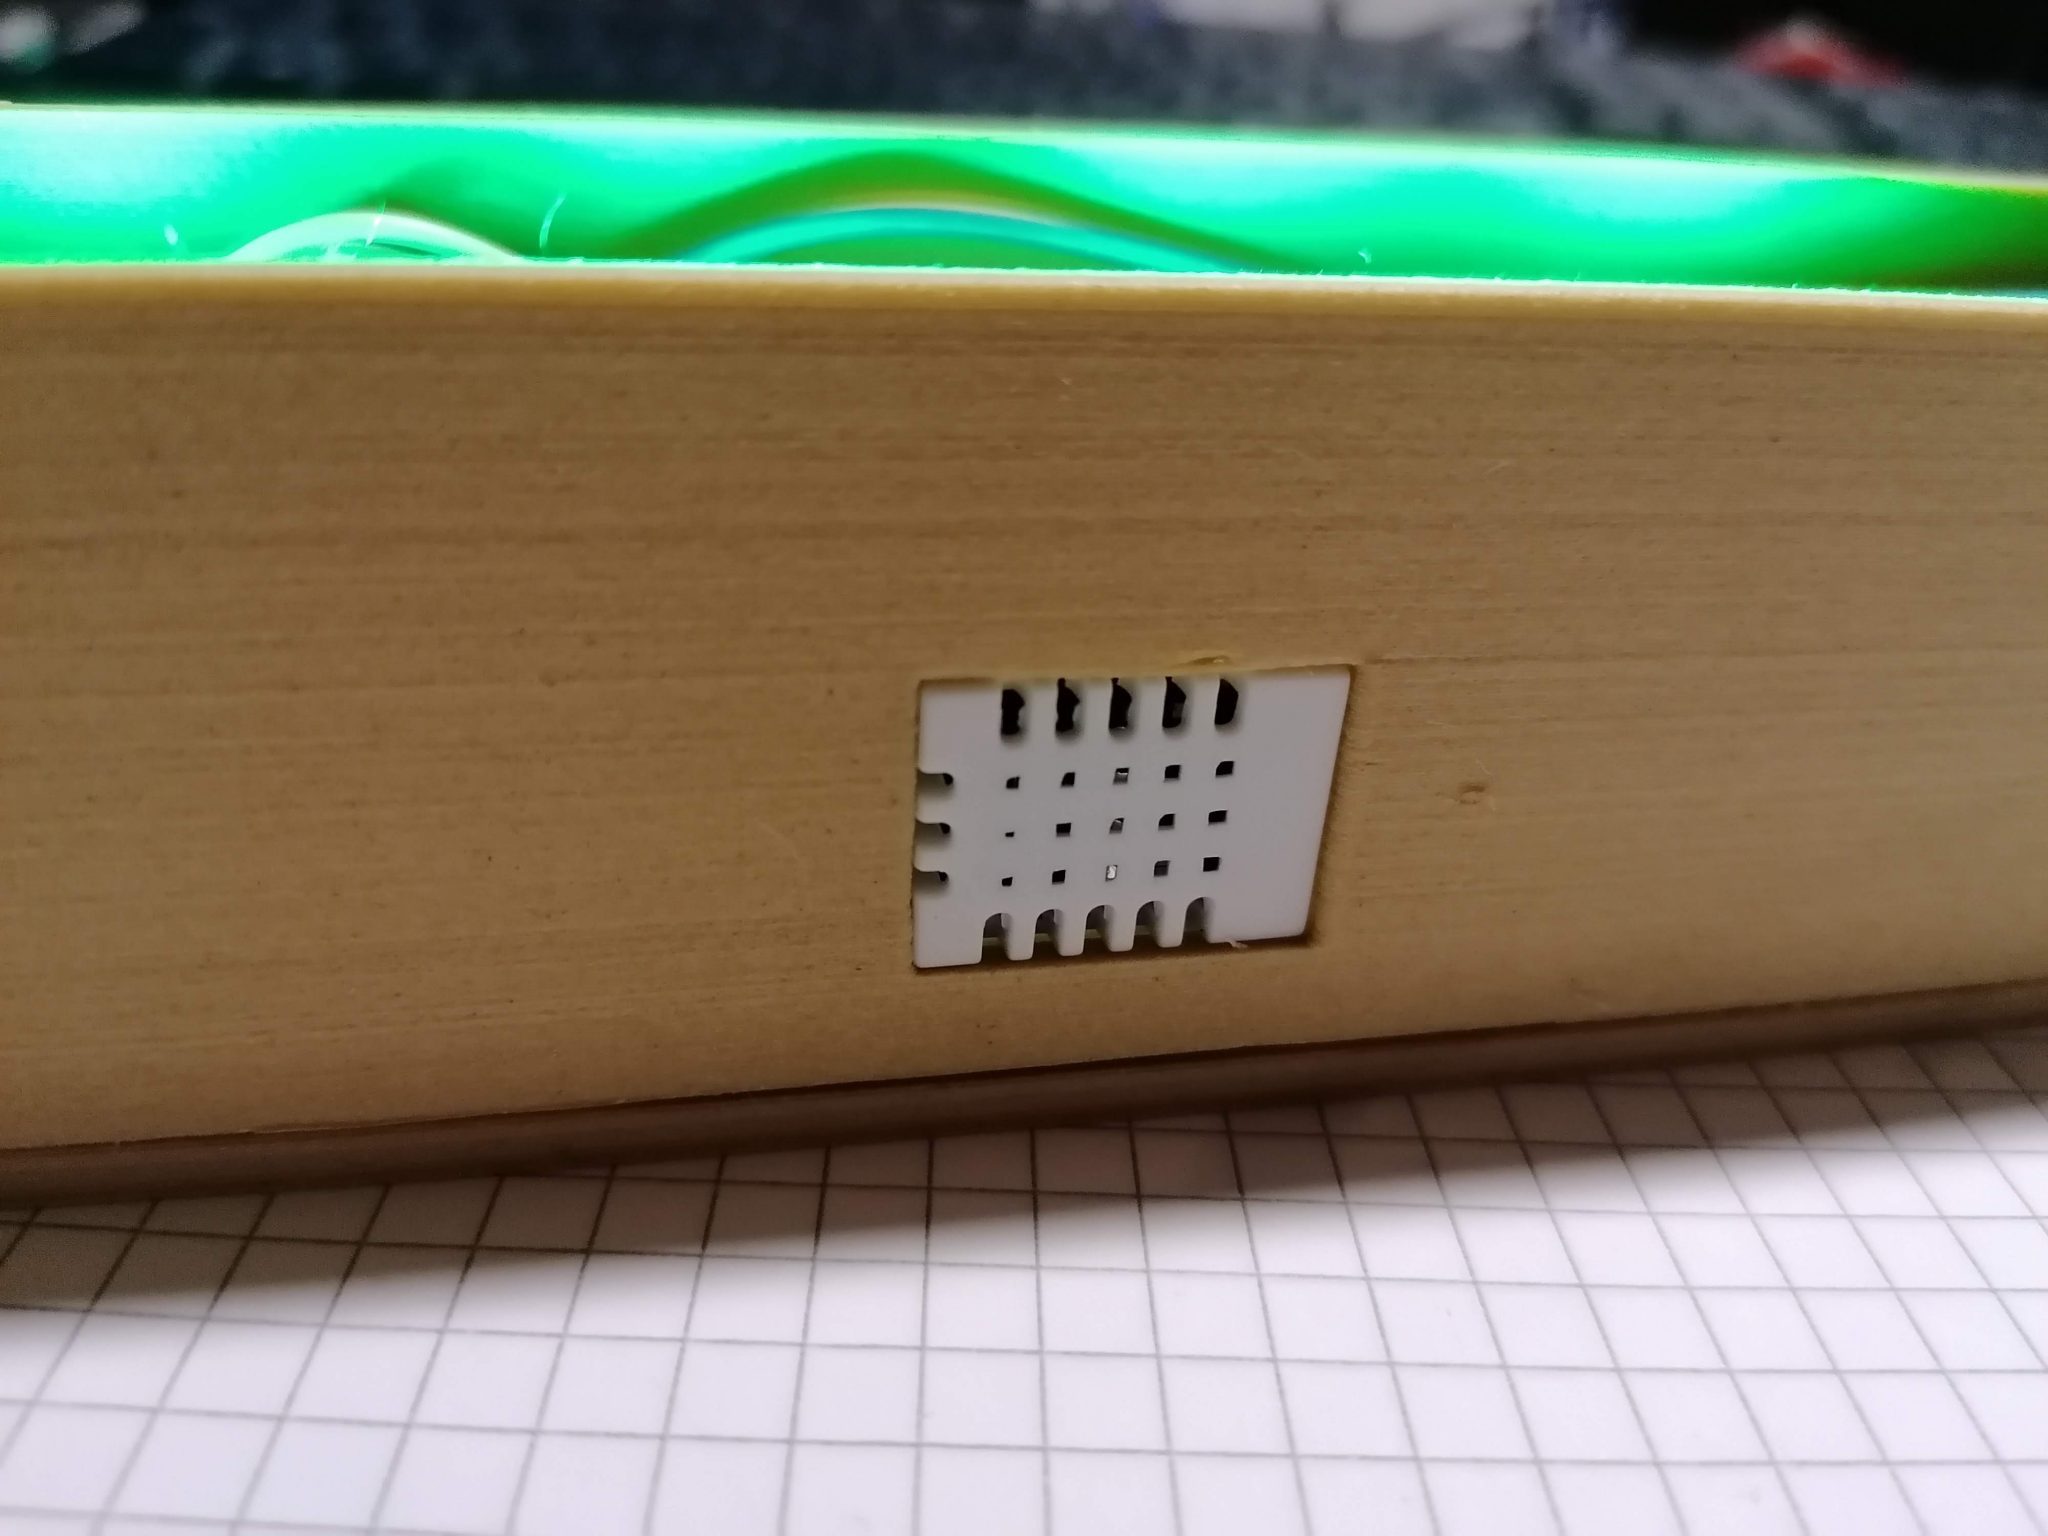
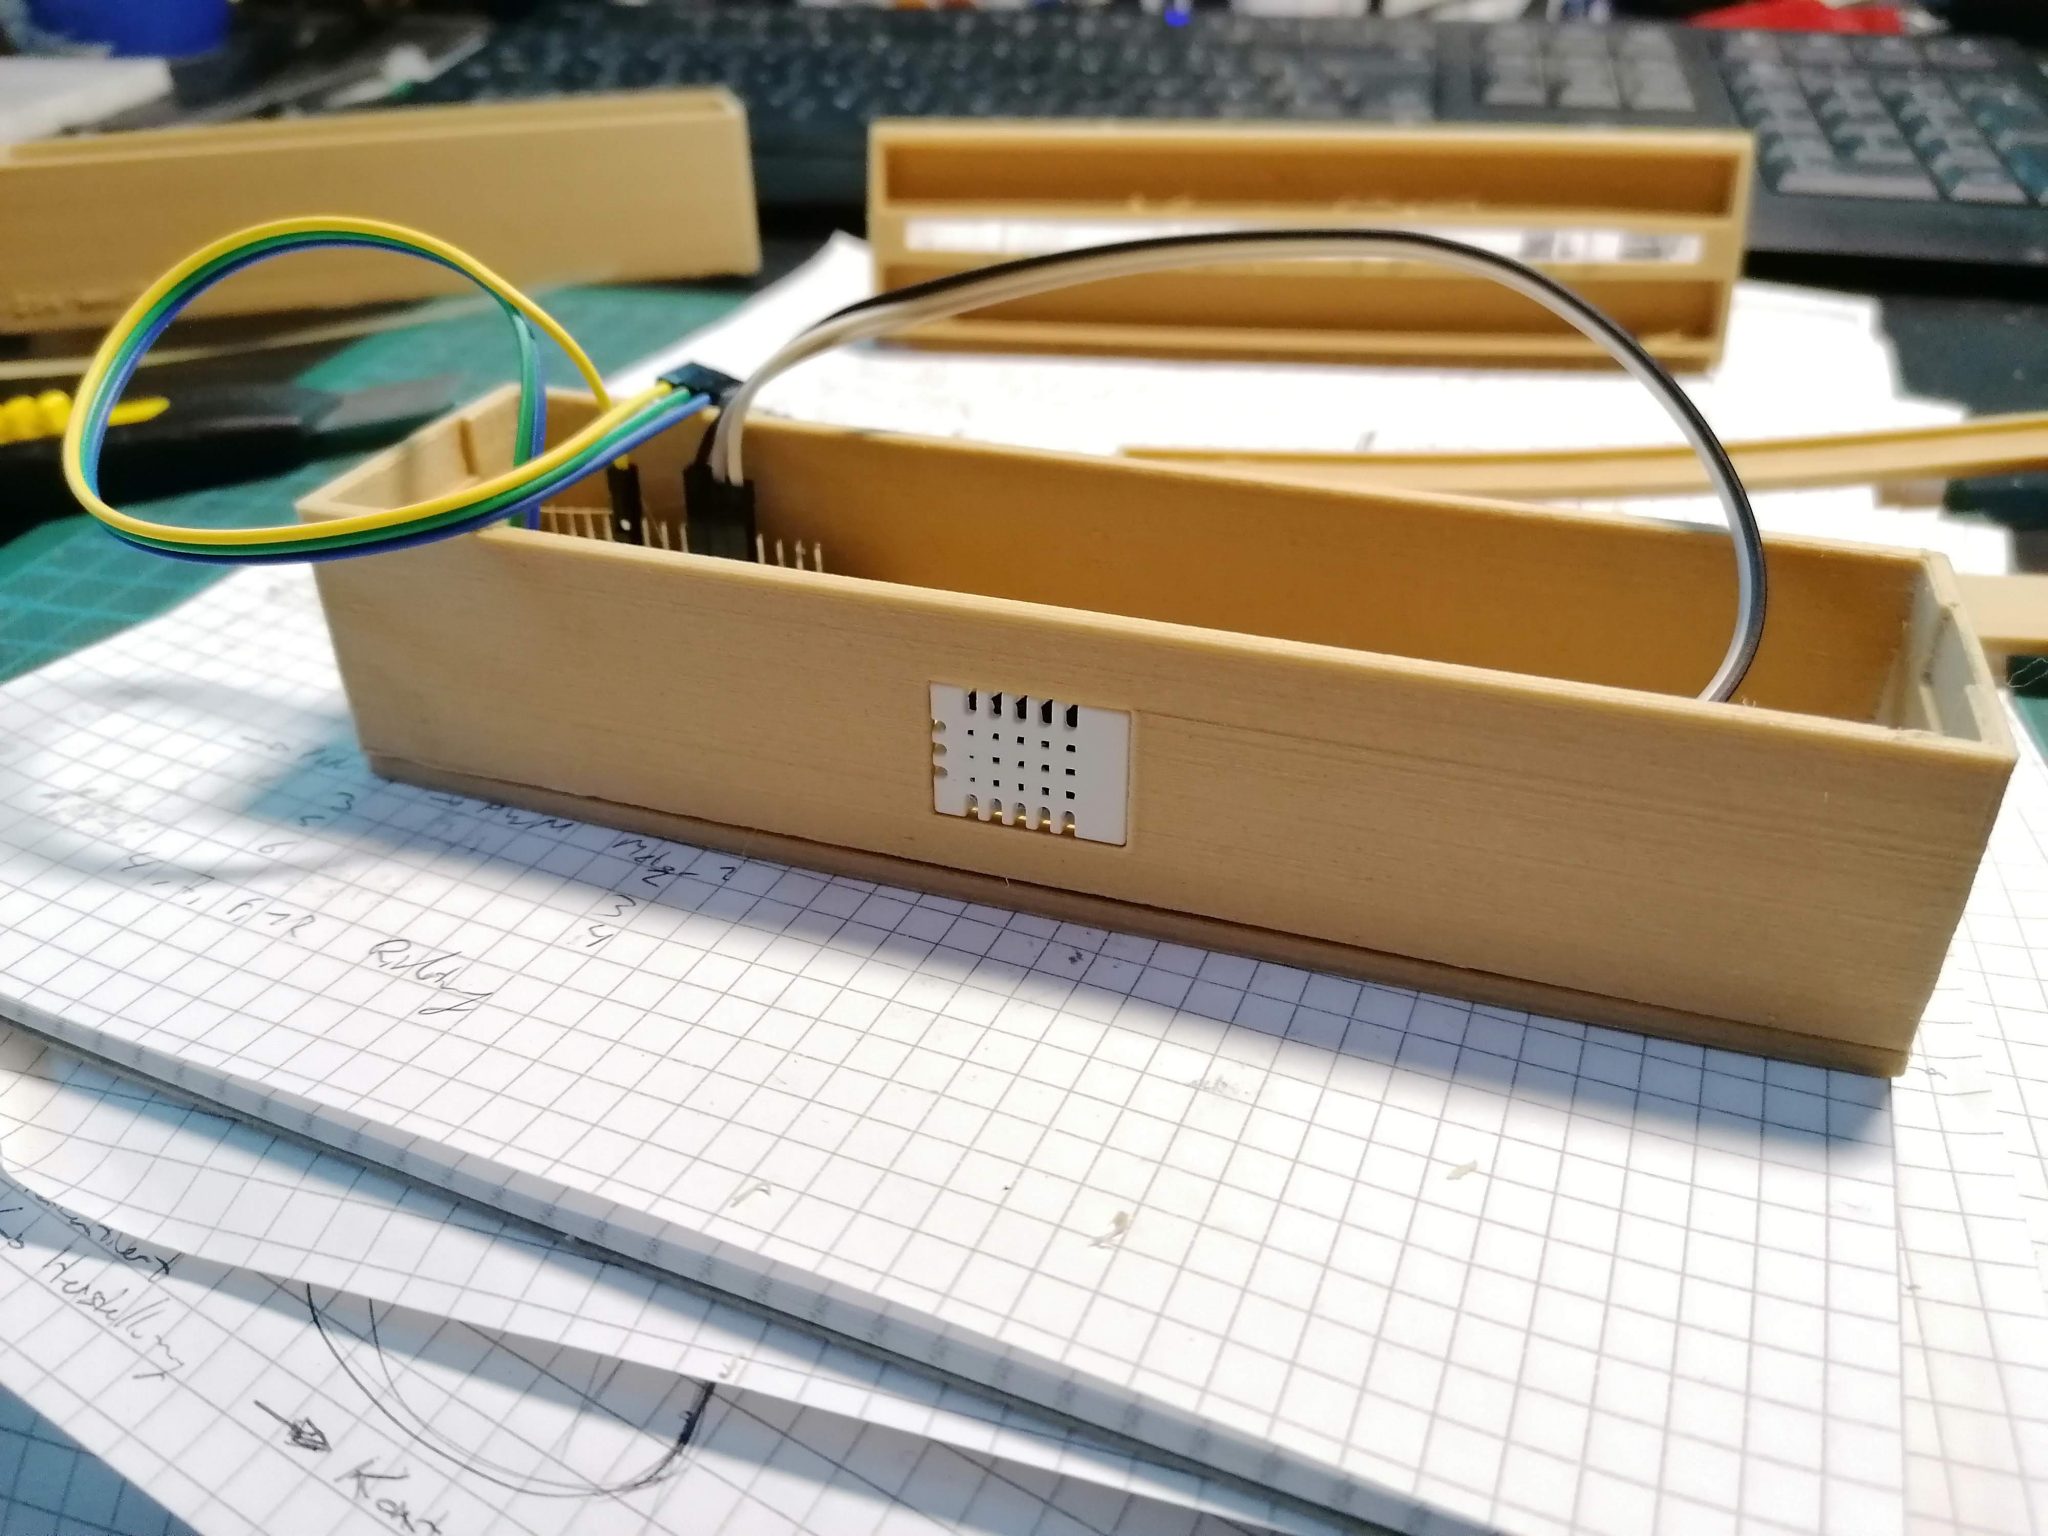
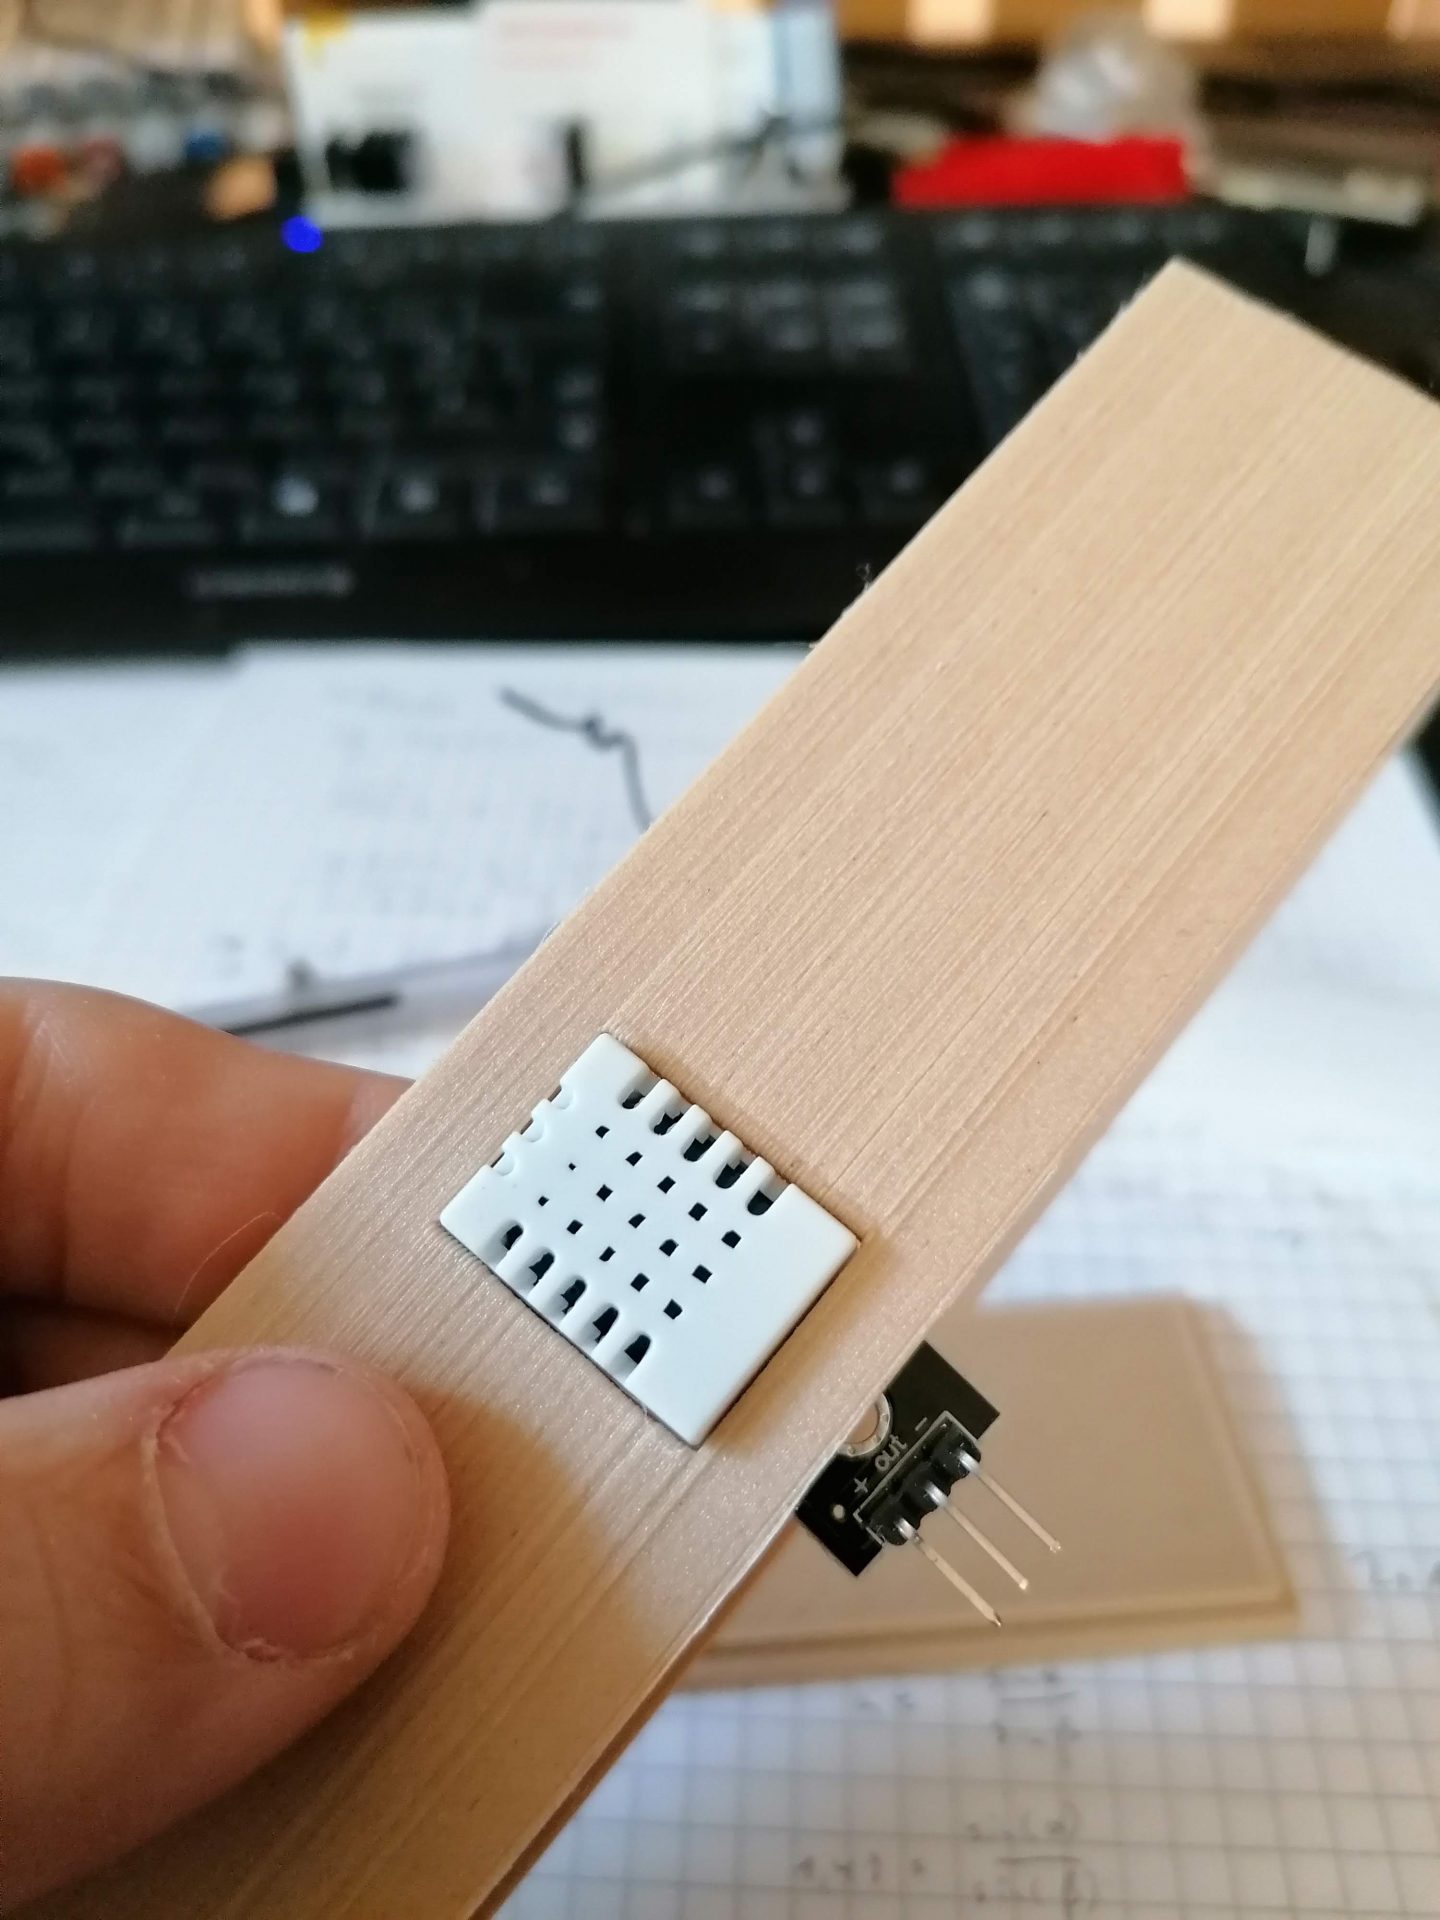
DHT22
In meiner Version der Wetterstation nutze ich den DHT22, ich habe aber auch ein Case für den DHT11 konstruiert. Die Teile sind modular, so dass sie unterschiedlich kombiniert werden können (ESP32 / DHT 11, etc).
Der Sensor wird einfach in die Öffnung gesteckt und per Jumper mit dem ESP verbunden. Er sollte durch Reibung halten.

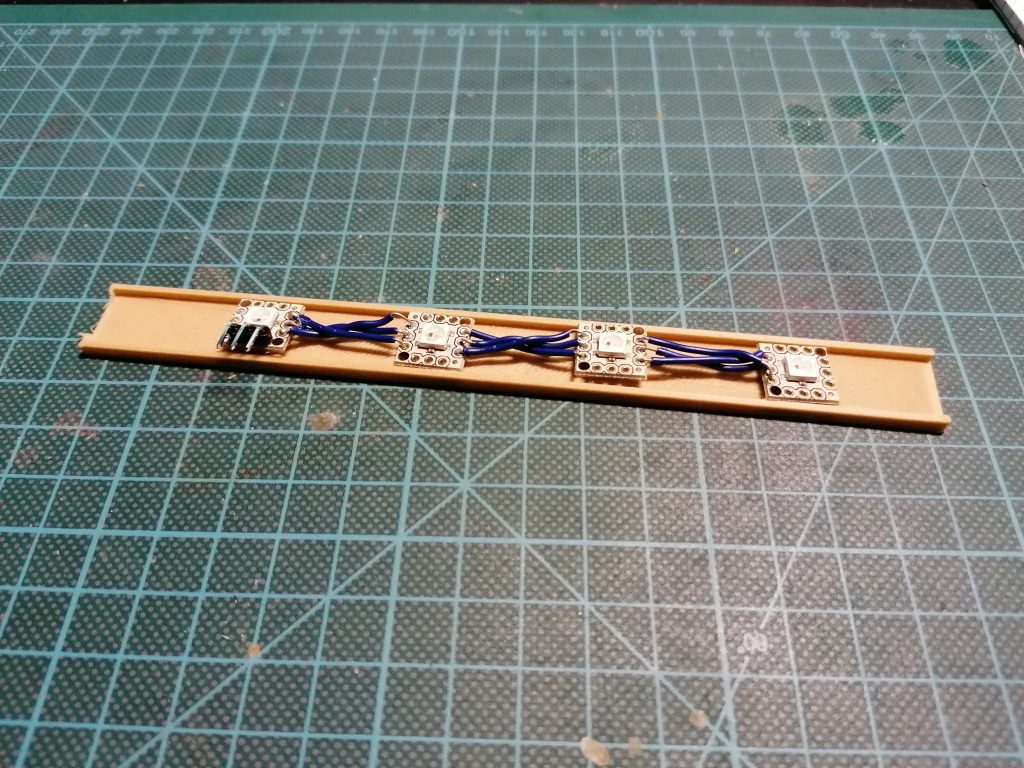
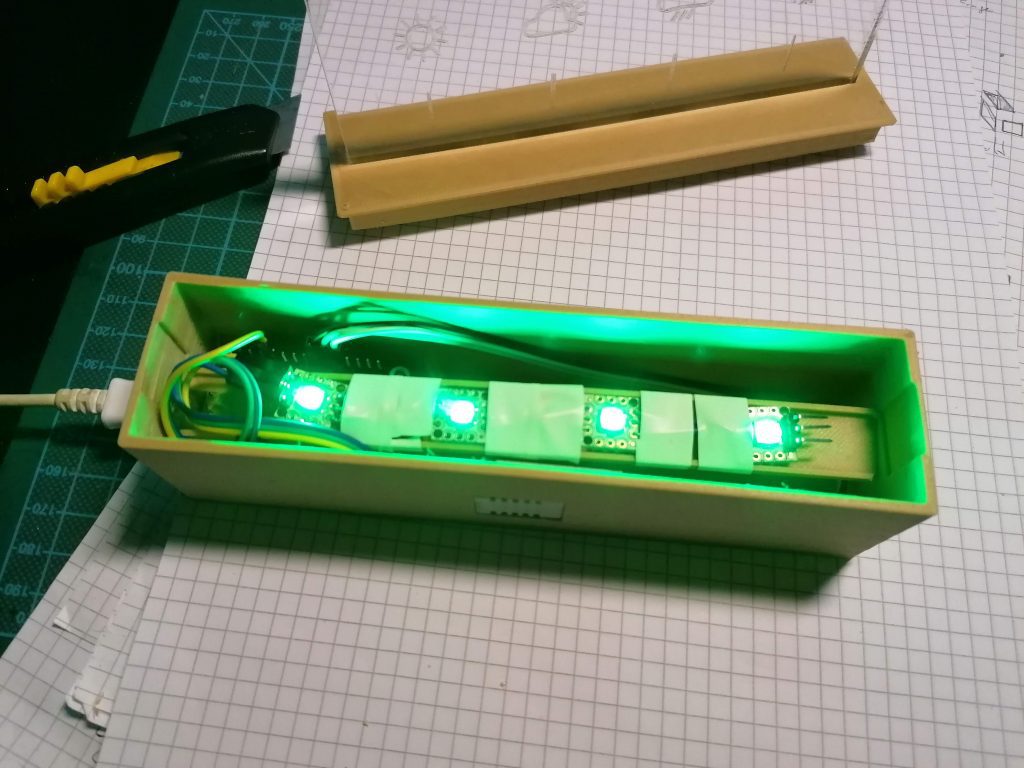
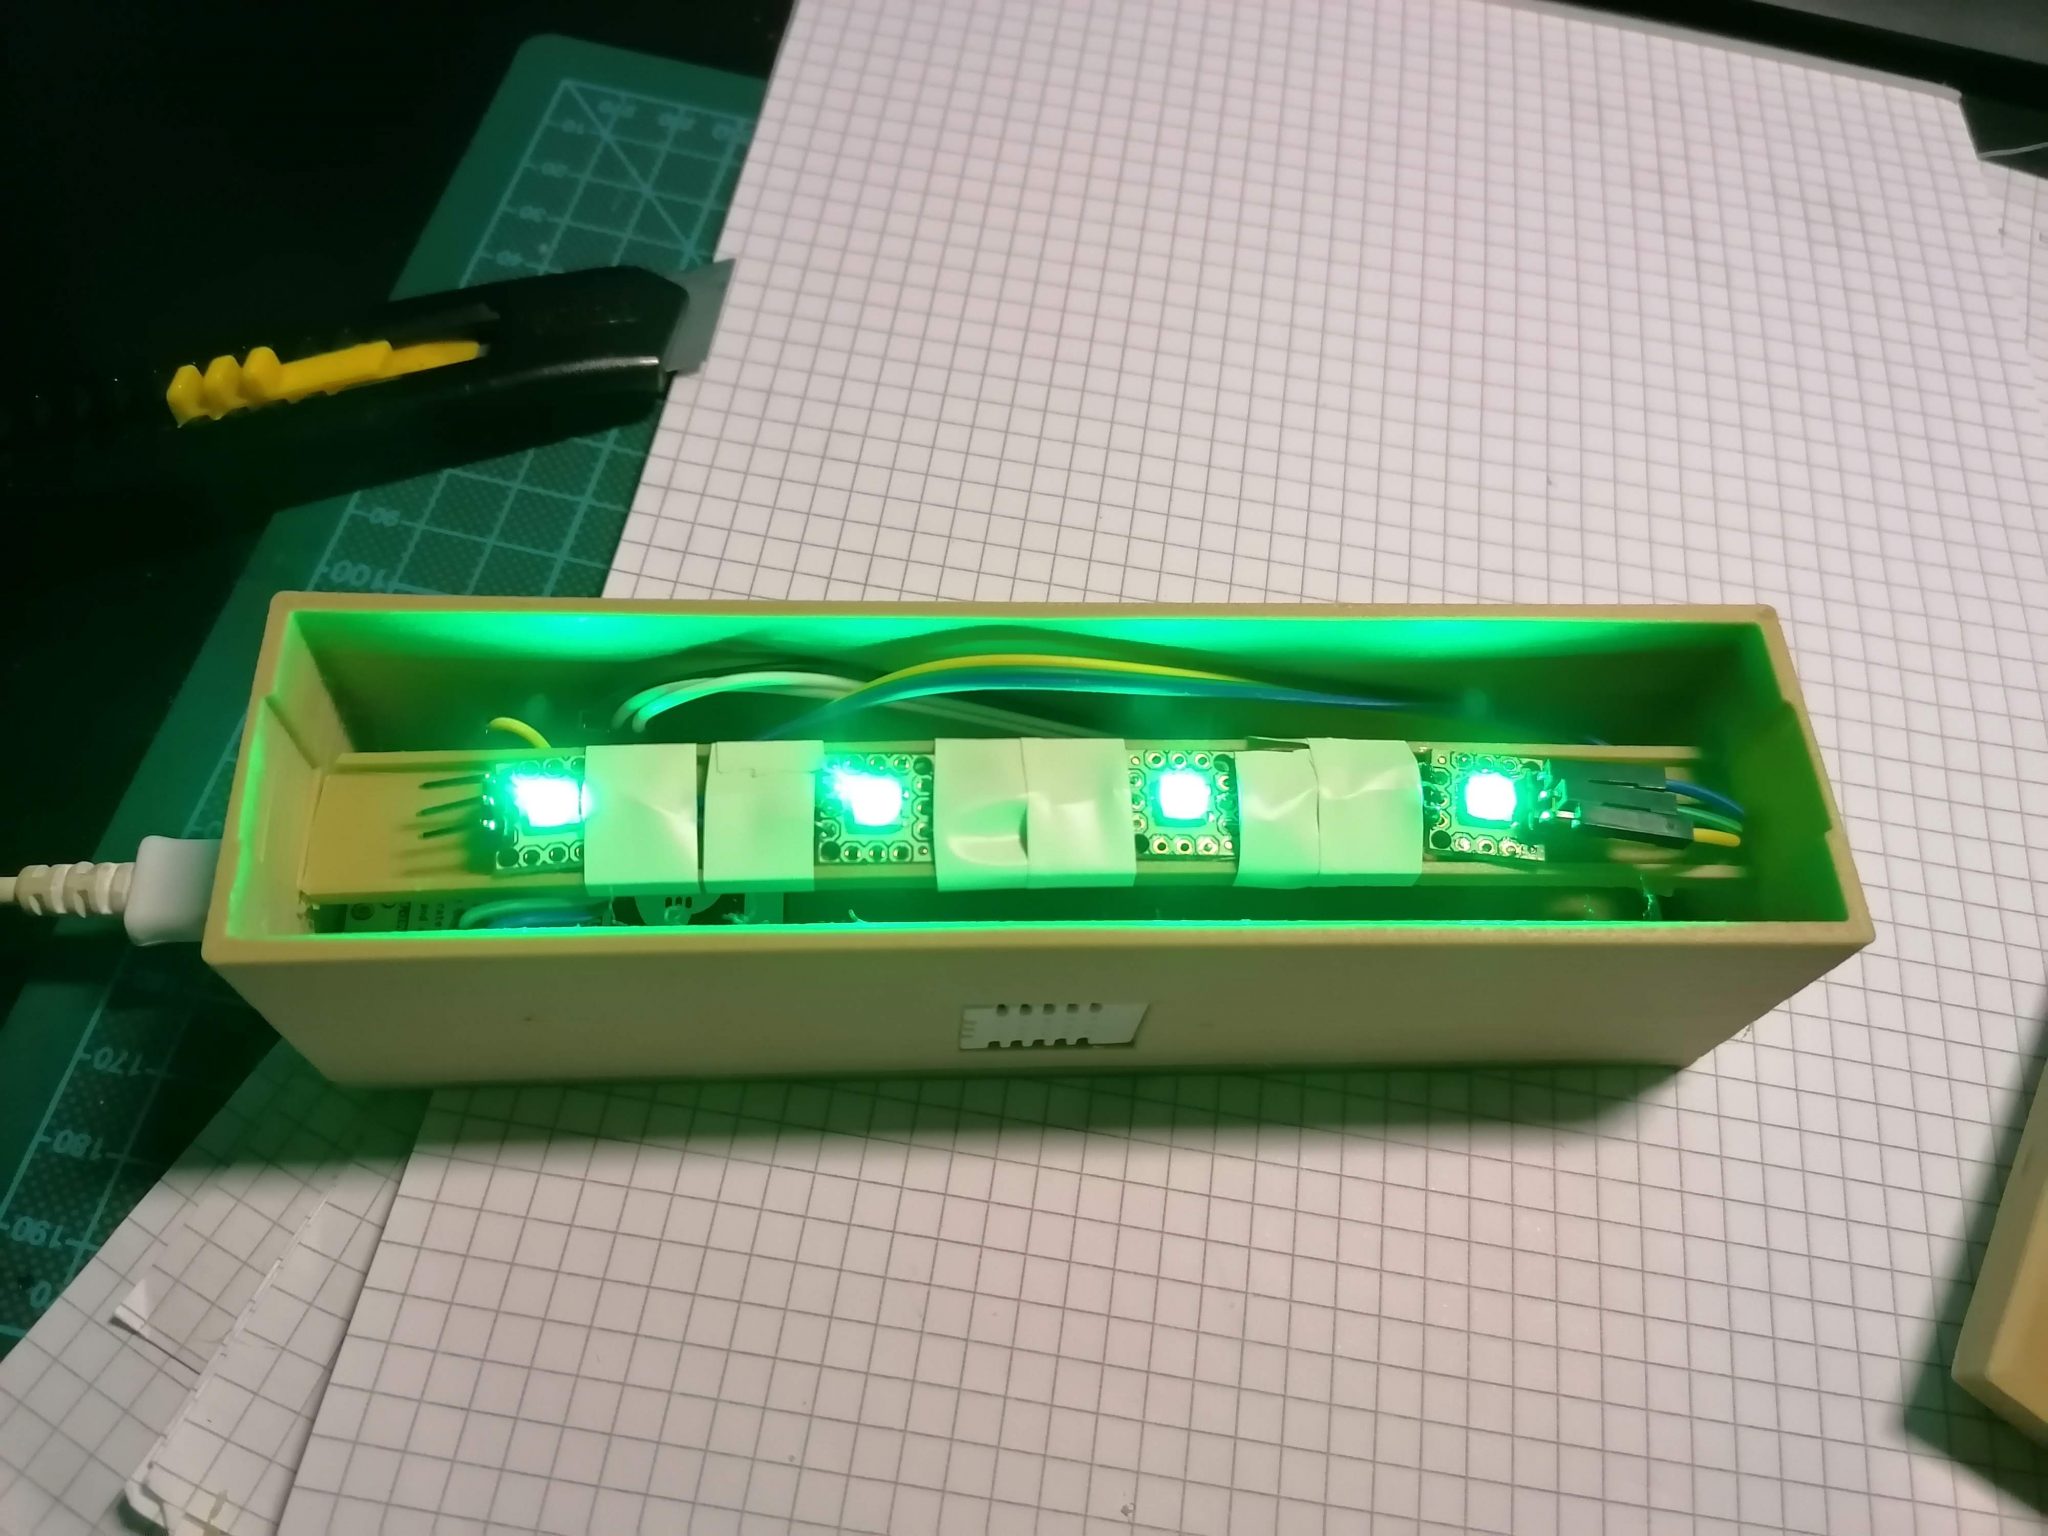
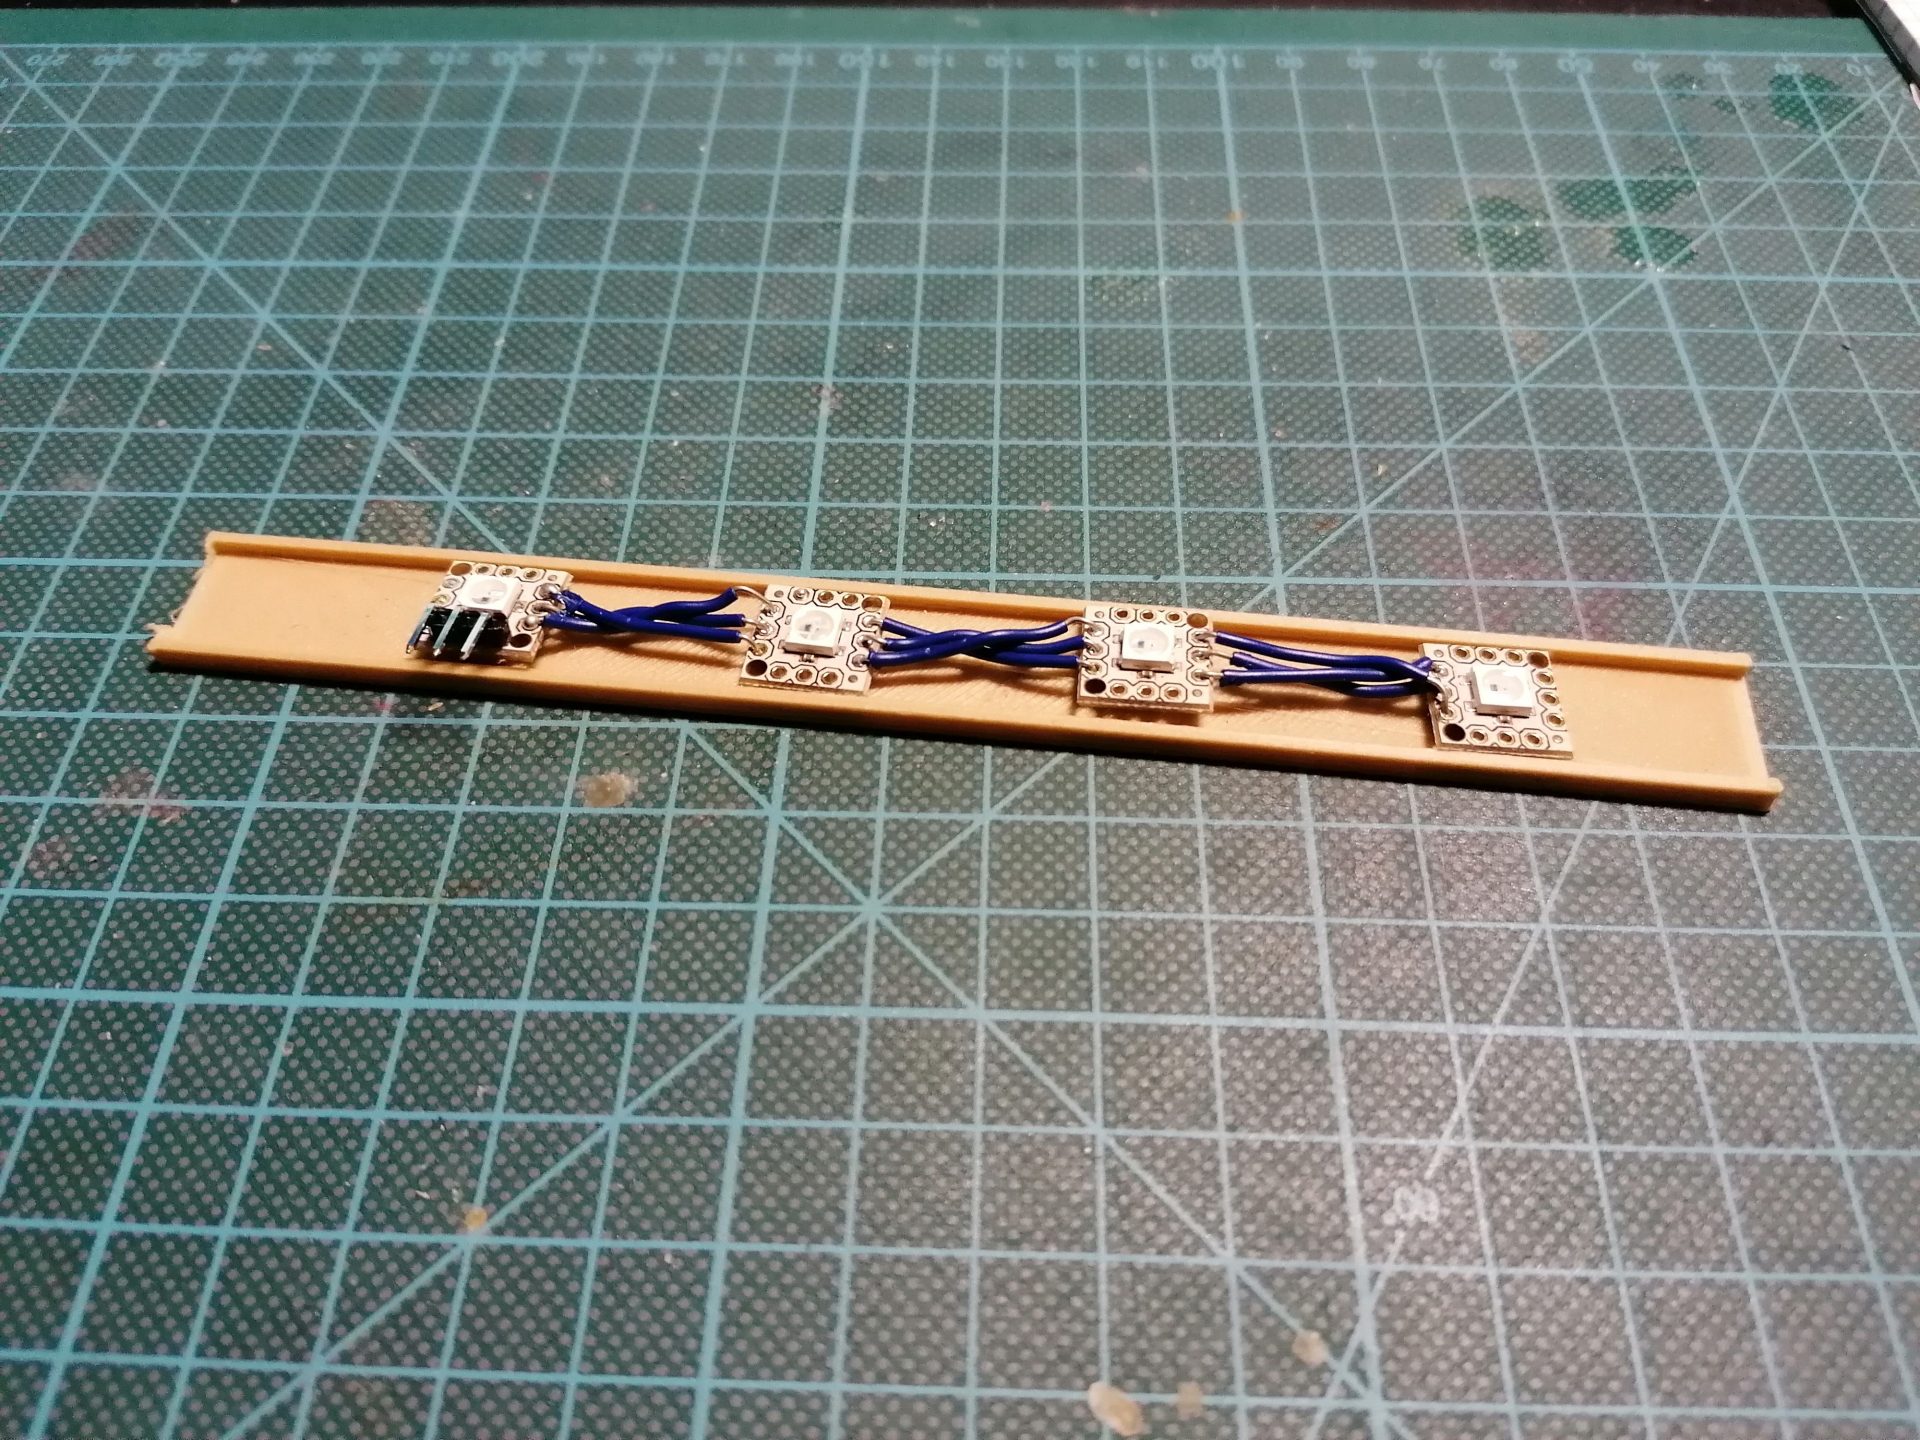
LED Stripe
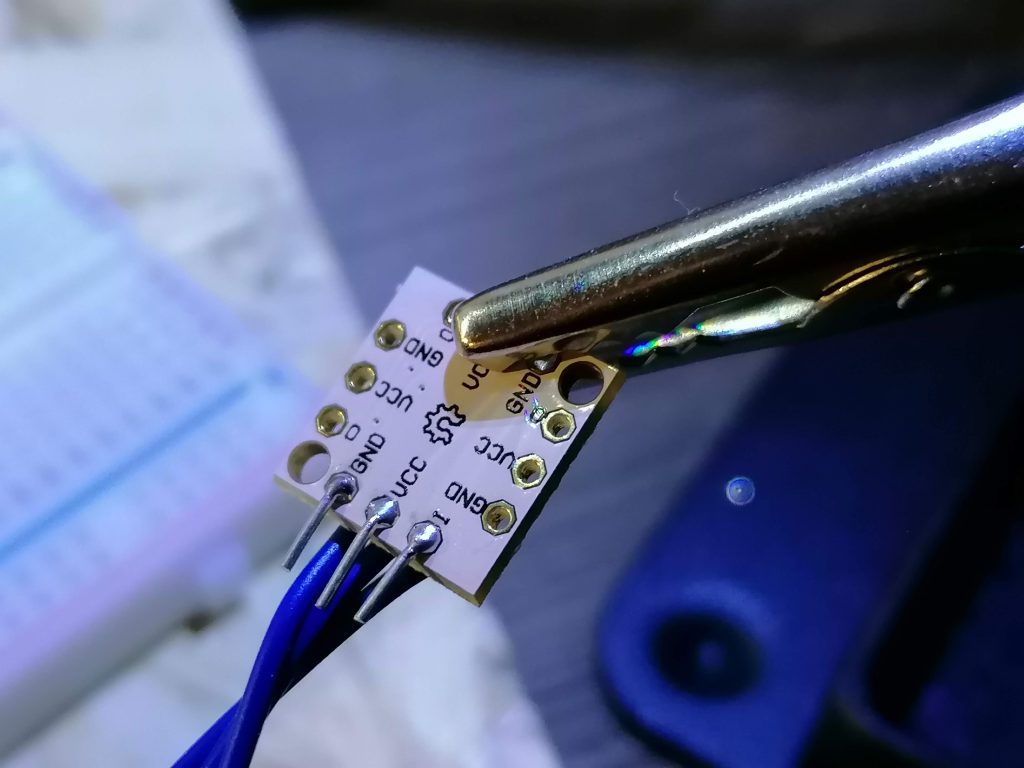
Ich habe vier WS2812 LEDs benutzt. Das schöne bei diesen LEDs ist, dass man nur einen digitalen Pin braucht, um diese RGB LEDs anzusteuern. Wir gucken also dass wir uns passend zum PMMA Display einen LED Strip basteln. Dazu legen wir die LEDs unter die Kollimatoren und suchen uns passende Kabel heraus, bzw. kürzen diese entsprechend.
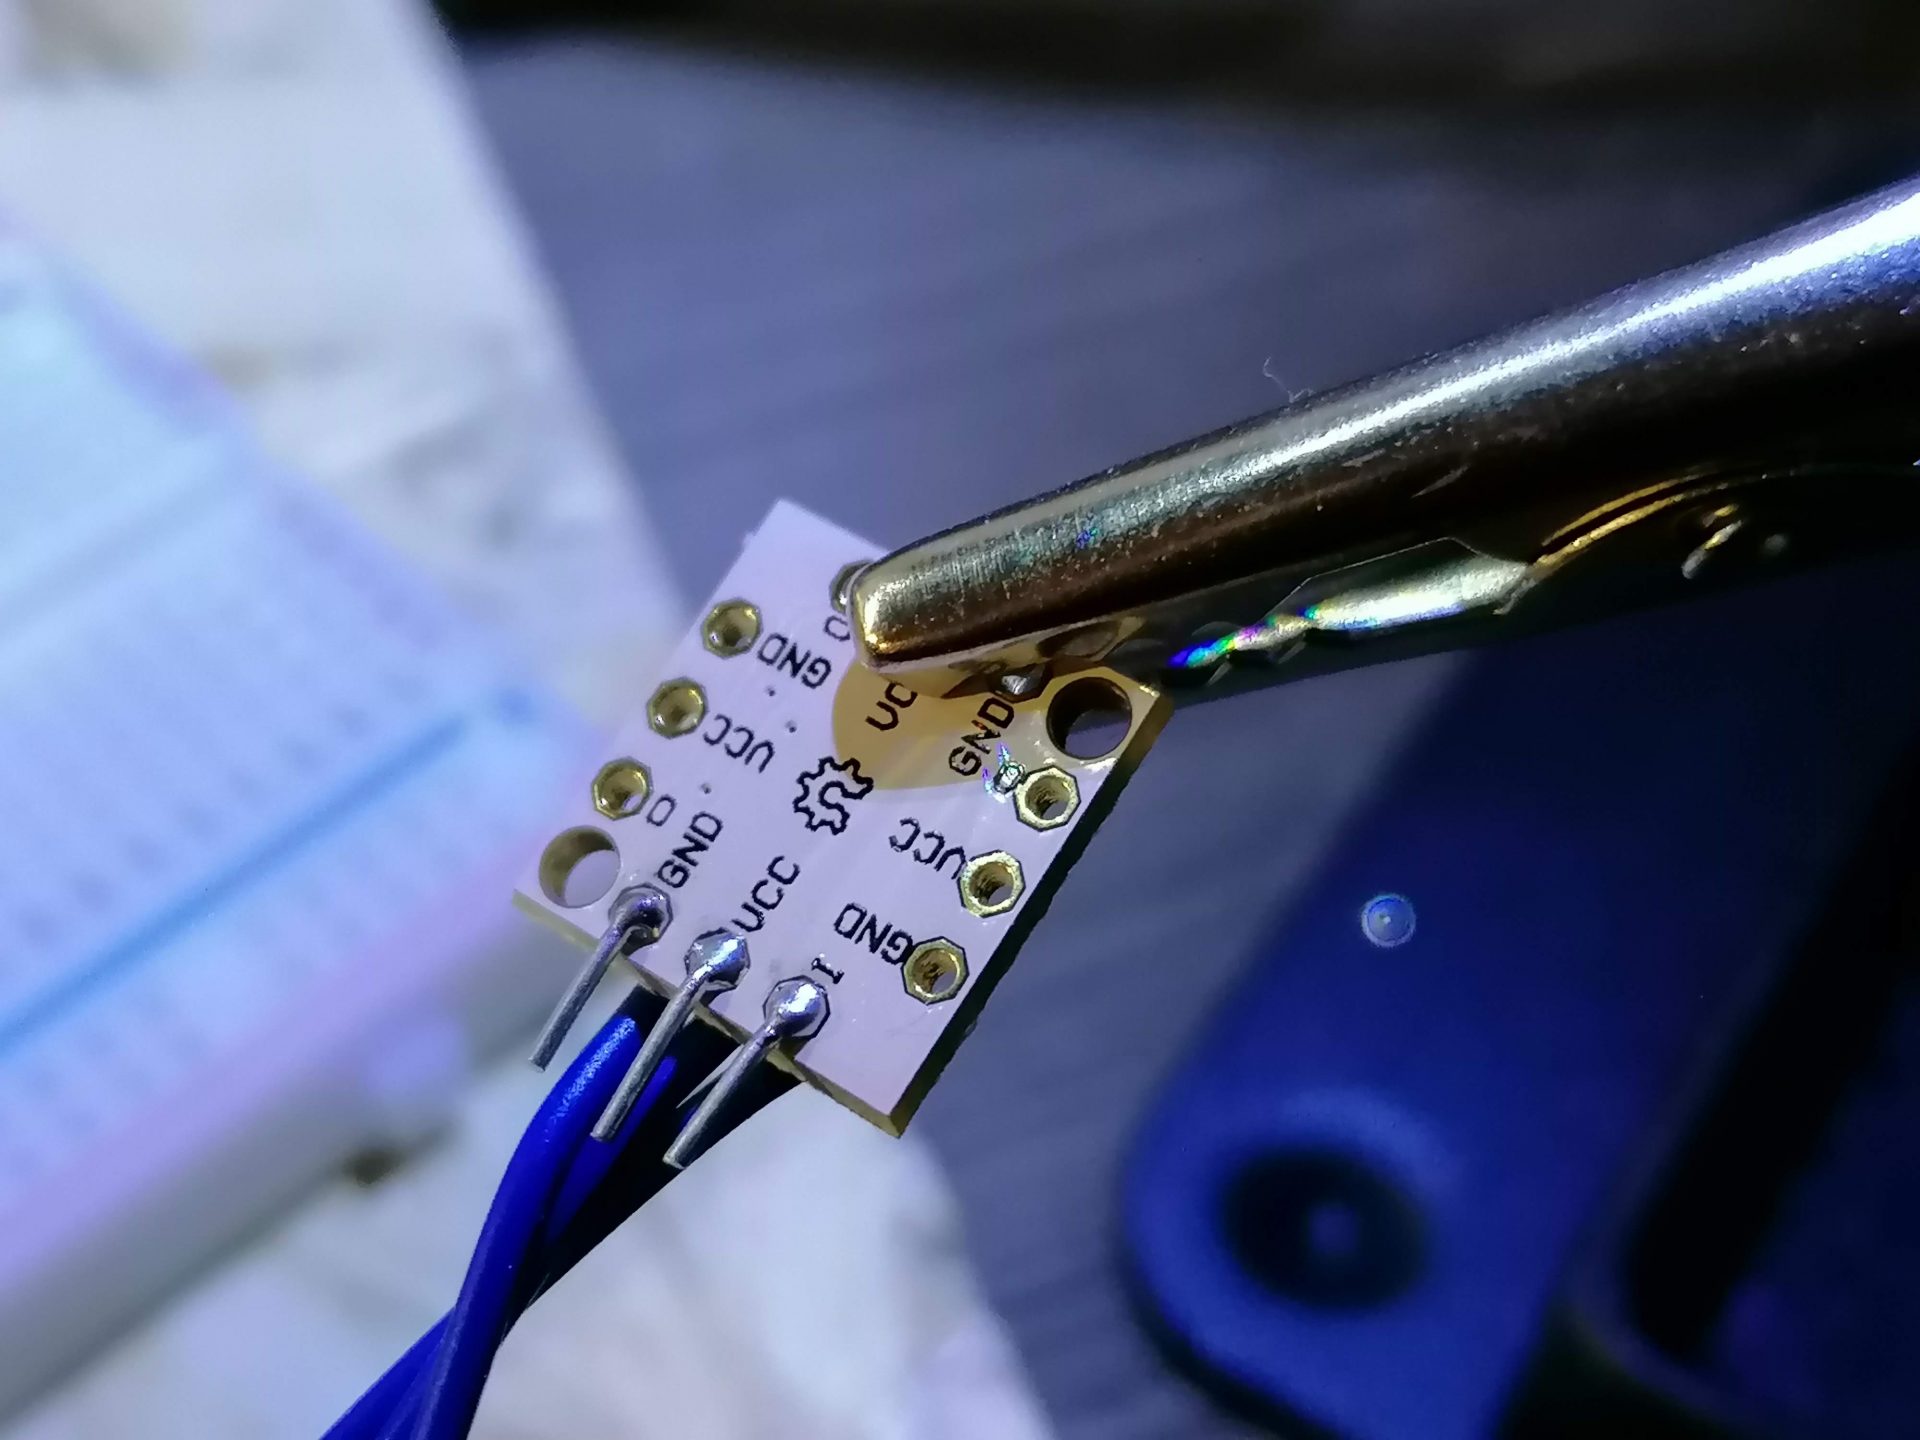
Bei meiner LED Version gibt es jeweils eine Seite auf der Platine an der der Dateneingang ist, die anderen drei sind Ausgänge. Hier habe ich Pins angelötet. Achtet darauf + und – korrekt zu verlöten.
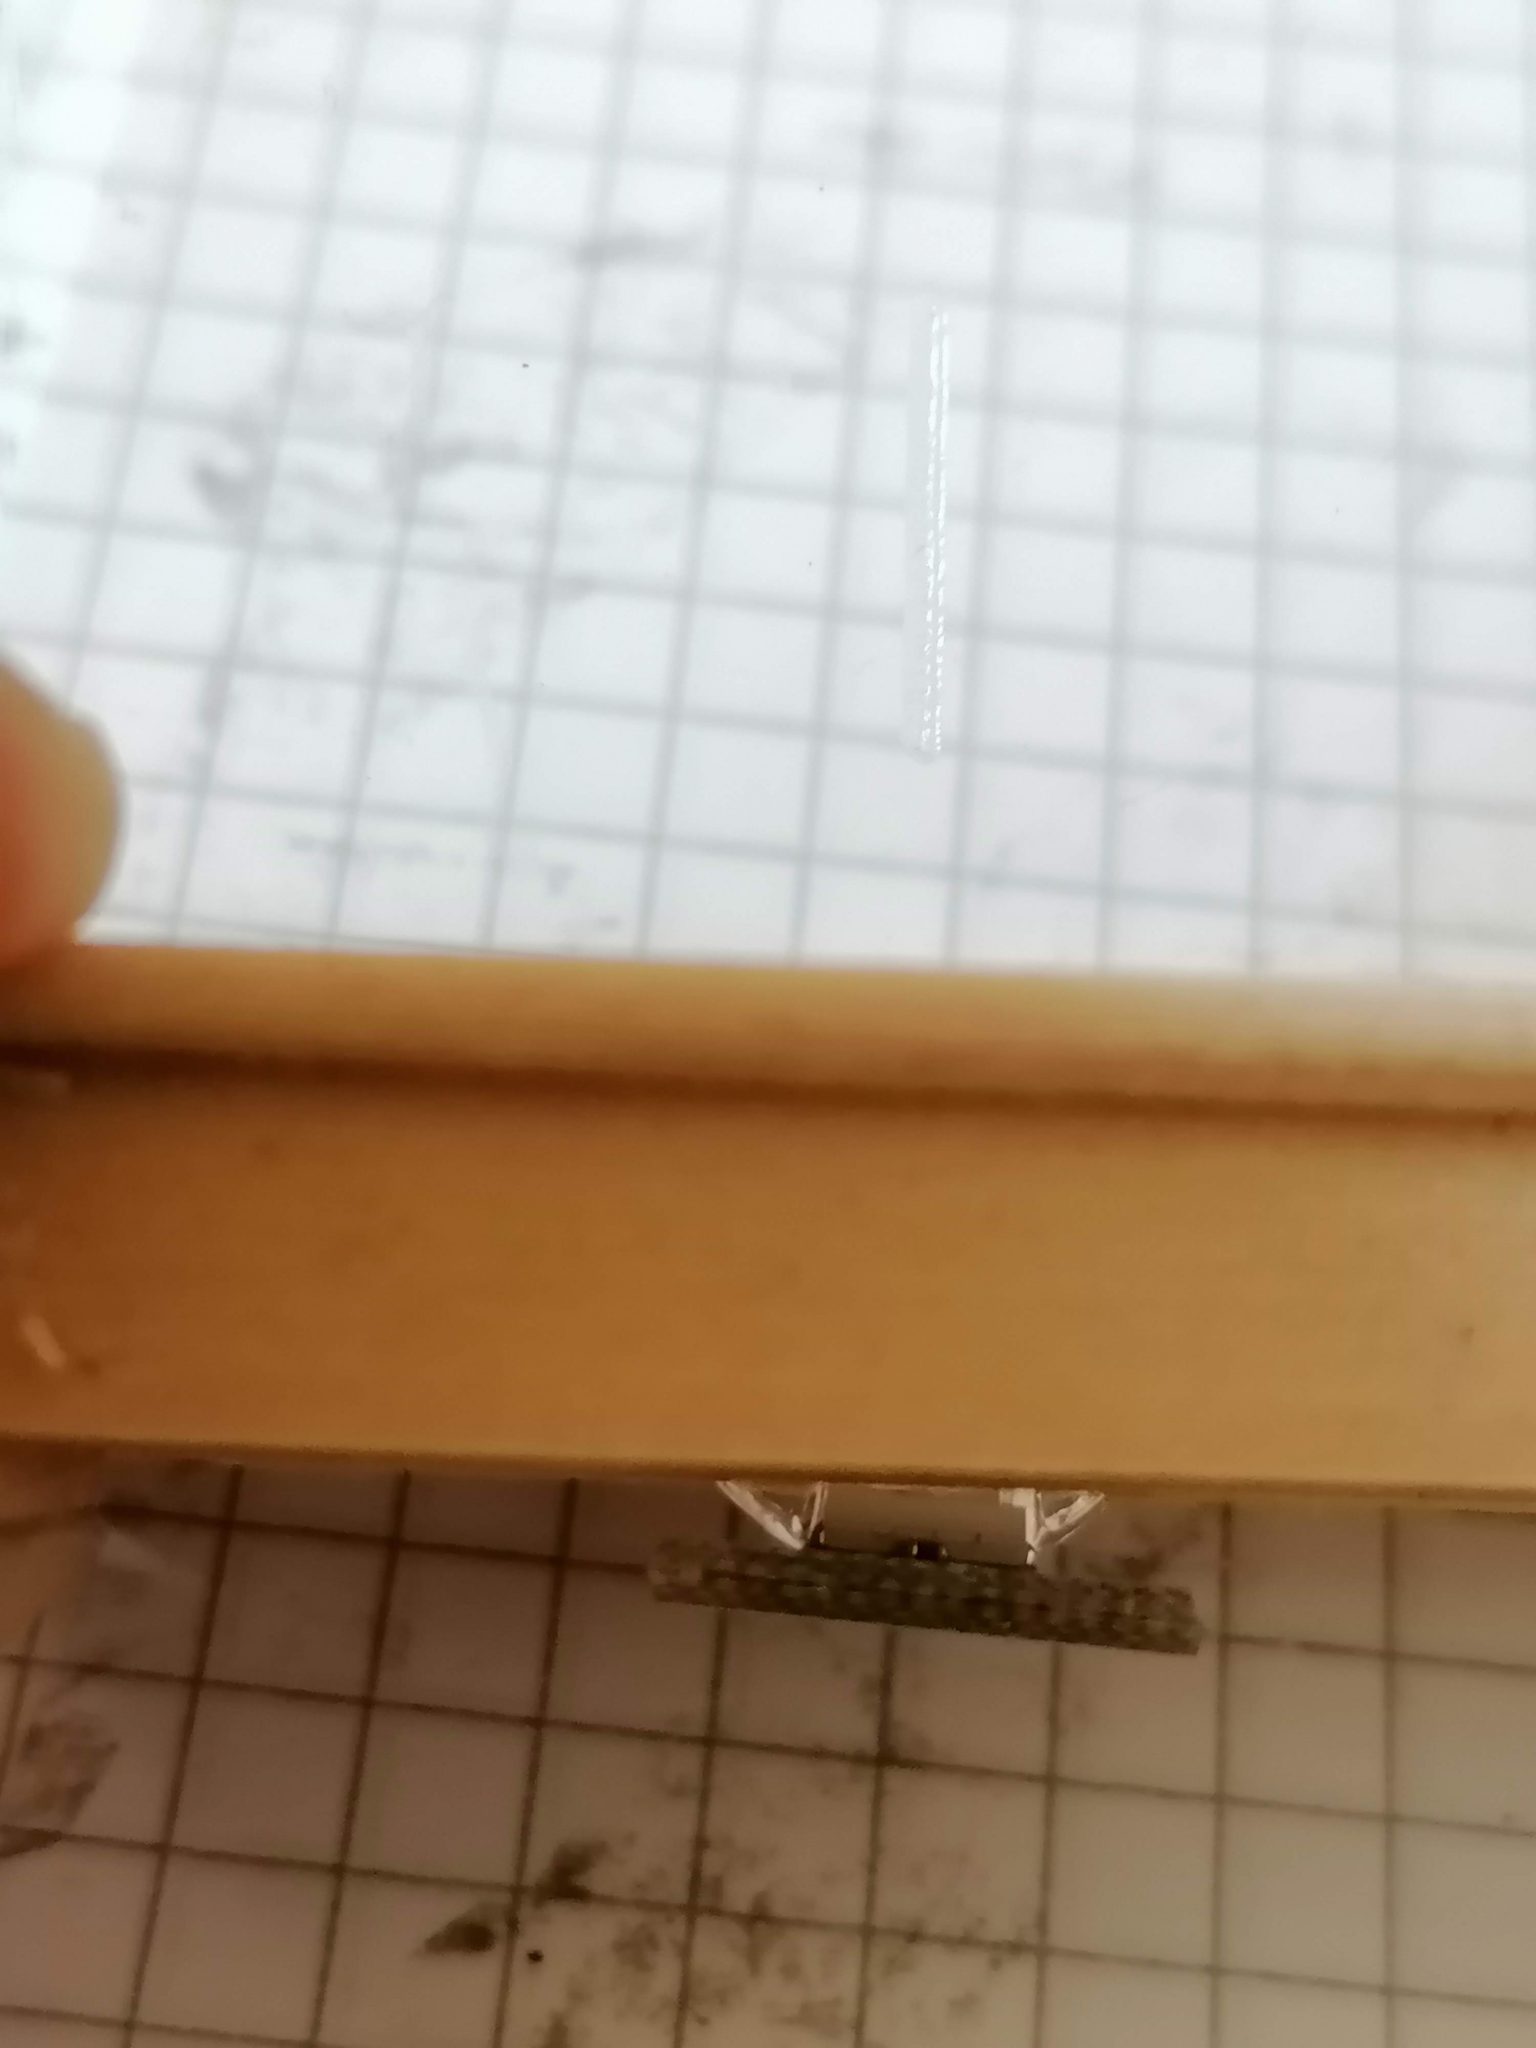
Als mein Lightstrip fertig war, habe ich zunächst getestet, ob er funktioniert und die LEDs an die Positionen passen. Dann hab ich ihn mit Isolierband an der LED Brücke befestigt und diese in den vorbereiteten Sockel gesteckt. Das ganze sollte auf Reibung halten.
Zum Schluss kann einfach der Deckel mit Scheibe eingesteckt werden, welcher auch durch Reibung halten sollte. Damit ist die Hardware der Wetterstation zusammengebaut.

Code
Der Code ist doch recht umfangreich geworden, da ich mir vom DHT die Werte noch per MQTT an mein openHAB senden lasse und so direkt die Küche mit Loggen kann. Außerdem habe ich ein kleines Easter-Egg eingebaut 🙂 Ich poste hier mal den gesamten Sketch und gehe dann auf die einzelnen Abschnitte ein. Da der Code so lang ist, gibt es hier einen Seitenumbruch.
/* Open Weather - the open source weatherbeacon that also looks good.
We connect to your home wifi and send a http request to open weathermap every hour to update the free 3 hour forecast.
depending on the weather-id (https://openweathermap.org/weather-conditions#Weather-Condition-Codes-2) another led will light up
in a predefined colour to resemble weather and temperature and hightlight the respective icon.
See Full documentation on https://daniel-strohbach.de/diy-esp8266-wetterstation
Parts needed:
- ESP8266 or ESP32 Board, alternatively arduino nano with wifi shield will do as well but not coded here
- Optional: DHT22 or DHT11 Sensor to measure Indoor Temp and Humidity
- 4x WS2812 (aka NeoPixel) LED
Solder the 4 LEDs into a tiny LED Strip and connect to Dev Board:
Board LED   LED   LED   LED
3V3 - VCC - VCC - VCC - VCC
GND - GND - GND - GND - GND
D8 -  I/0 - I/O - I/O - I
Connect DHT22 / DHT11 to
Board DHT
3V3 - +
GND - -
D4  - OUT
Pixel-ID Icon reference (take care when assembling or switch in the code
0 - clear sky
1 - cloudy
2 - rainy
3 - snow
Outdoortemperature & Colours:
> 30°C - Red
> 21°C - Warm yellow
< 18°C - Light blue
< 00°C - Blue
Thunderstorm: Yellow
Fog: White
Red: Wifi related error
green: connecting
Optional: Send the measured DHT Data to an MQTT Broker
Made By Daniel Strohbach www.daniel-strohbach.de/
*/
//--- USER CONFIG ---
//Do you want to use MQTT?
#define USEMQTT
//Do you want to use DHT?
#define USEDHT
//Do you use ESP8266 or ESP32?
#define ESP8266
//Do you want to use Serial Monitor for Debugging?
#define DEBUGING
#ifdef ESP8266
#include <ESP8266WiFi.h> // for WiFi functionality
#include <ESP8266HTTPClient.h> //for the API-Request
#endif
#ifdef ESP32
#include <WiFi.h> //in case you are on esp32 we switch to this line
#include <HTTPClient.h>
#endif
// Please Change to your WIFI-Credentials
const char* ssid = "YOUR WIFI";
const char* password = "YOUR PW";
//What citiy you want to receive the weather from?
const char* city = "Oldenburg,de"; //City and Country like this Oldenburg,de
//Here please add your Open Weathermap API Key from https://home.openweathermap.org/api_keys
const char* openWeatherAPI = "YOUR API";
//What units do you use?
const char* unitSystem = "metric";
#include <ArduinoJson.h> //JSON String conversion for Open Weathermap API Request
// We use Neopixel to Control the WS2812. In my build i use a node mcu esp8266 and pin d8 to drive the pixels
#include <Adafruit_NeoPixel.h>
#define LEDPIN D8 //neopixels to pin d8
#define NUMPIXELS 4 // My Vesion has 4 Pixels
Adafruit_NeoPixel pixels(NUMPIXELS, LEDPIN, NEO_GRB + NEO_KHZ800); //build the neopixel constructor
//--- MQTT ---
#ifdef USEMQTT
#include <PubSubClient.h>
const char* mqttServer = "YOUR MQTT IP";
const char* mqttUsername = "MQTT USERNAME";
const char* mqttPassword = "YOUR PSK";
const char* mqttDeviceId = "openWeather"; //you can pick any name here
//i use something quite similar to tasmota, but feel free to change
const char* subTopic = "cmnd/openWeather/command";
const char* temperatureTopic = "stat/openWeather/Temperatur";
const char* humidityTopic = "stat/openWeather/Feuchtigkeit" ;
const char* heatIndexTopic = "stat/openWeather/HeatIndex";
unsigned long lastMsg = 0;
WiFiClient openWeather;
PubSubClient client(openWeather);
#endif
//--- DHT ---
#ifdef USEDHT
#include "DHTesp.h"
#define DHTPIN D4
DHTesp dht;
//--- Global Variables for Sensor storage---
float temperature, humidity, heatIndex;
#endif
//--- Timer Stuff ---
unsigned long previousMillisMes; //previous timer time
unsigned long previousMillisPub; //
unsigned long previousMillisReq;
const unsigned long measureIntervall = 500; //update sensor every 500ms
const unsigned long publishIntervall = 5000; //publish mqtt every 5 sekonds
const unsigned long requestIntervall = 3600000; //drive http request every hour
int modus = 0;
bool firstloop = true;
//--- ARDUINO SETUP ---
void setup() {
//Begin serial connection
#ifdef DEBUGING
Serial.begin(9600);
//Welcome to Serial Monitor
Serial.println("openWeather: Erfasse Wetter, Temperatur, Feuchtigkeit on: ");
String thisBoard = ARDUINO_BOARD;
Serial.println(thisBoard);
#endif
//--Neopixel
pixels.begin(); // INITIALIZE NeoPixel strip object
pixels.clear(); // Set all pixel colors to 'off'
//--Wifi
setup_wifi();
//--MQTT
#ifdef USEMQTT
client.setServer(mqttServer, 1883);
client.setCallback(callback);
#endif
//--DHT
#ifdef USEDHT
dht.setup(DHTPIN, DHTesp::DHT22); // Connect DHT sensor to GPIO 17
#endif
}
//--- ARDUINO LOOP ---
void loop() {
#ifdef DEBUGING
Serial.println("void loop: Started... ");
#endif
if (!client.connected()) {
reconnect();
#ifdef DEBUGING
Serial.println("void loop: Lost MQTT... ");
#endif
}
client.loop();
#ifdef DEBUGING
Serial.print("void loop: Modus: ");
Serial.println(modus);
#endif
//if we are in the first loop, we already want to fetch the weather data, afterwards only every hour
if (firstloop) {
getWeather();
firstloop=false;
}
//get Weatherdata
if (millis() - previousMillisReq >= requestIntervall) {
previousMillisReq = millis();
if (modus == 0) {
getWeather();
}
}
//read sensor
if (millis() - previousMillisMes >= measureIntervall) {
previousMillisMes = millis();
getDHT();
}
//publish to MQTT Broker
if (millis() - previousMillisPub >= publishIntervall) {
previousMillisPub = millis();
publishMQTT();
}
if (modus == 1) {
pixelParty();
}
if (modus == 2) {
rainbowFade(3, 3, 1);
}
}
//--- CUSTOM CLASSES ---
//--Wifi
void setup_wifi() {
#ifdef DEBUGING
Serial.println("setup_wifi: Started... ");
delay(10);
// We start by connecting to a WiFi network
Serial.println();
Serial.print("Connecting to: ");
Serial.println(ssid);
#endif
WiFi.mode(WIFI_STA);
WiFi.begin(ssid, password);
while (WiFi.status() != WL_CONNECTED) {
delay(500);
#ifdef DEBUGING
Serial.print(".");
#endif
//Signal wifi connecting with green animation
for (int i = 0; i < NUMPIXELS; i++) { // For each pixel...
// pixels.Color() takes RGB values, from 0,0,0 up to 255,255,255
// Here we're using a moderately bright green color:
pixels.setPixelColor(i, pixels.Color(0, 255, 0));
pixels.show();   // Send the updated pixel colors to the hardware.
delay(500); // Pause before next pass through loop
}
}
#ifdef DEBUGING
Serial.println("");
Serial.println("WiFi connected");
Serial.println("IP address: ");
Serial.println(WiFi.localIP());
#endif
}
//----------------------------------- RECONNECT MQTT ---------------------
#ifdef USEMQTT
void reconnect() {
// Loop until we're reconnected
#ifdef DEBUGING
Serial.println("reconnect: ");
#endif
while (!client.connected()) {
#ifdef DEBUGING
Serial.println("Attempting MQTT connection...");
#endif
pixels.clear();
for (int i = 0; i < NUMPIXELS; i++) { // For each pixel...
// pixels.Color() takes RGB values, from 0,0,0 up to 255,255,255
// Here we're using a moderately bright green color:
pixels.setPixelColor(i, pixels.Color(0, 0, 255));
pixels.show();   // Send the updated pixel colors to the hardware.
delay(500); // Pause before next pass through loop
}
// Attempt to connect
if (client.connect(mqttDeviceId, mqttUsername, mqttPassword)) {
#ifdef DEBUGING
Serial.println("connected");
#endif
client.subscribe(subTopic);
} else {
#ifdef DEBUGING
Serial.print("failed, rc=");
Serial.print(client.state());
Serial.println(" try again in 5 seconds");
#endif
// Wait 5 seconds before retrying
delay(5000);
}
}
}
#endif
//----------------------------------- CALLBACK MQTT ---------------------
// you can use this to send commands to the weather beacon.
#ifdef USEMQTT
void callback(char* topic, byte* message, unsigned int length) {
#ifdef DEBUGING
Serial.println("callback: ");
Serial.print("Message arrived on topic: ");
Serial.print(topic);
Serial.print(". Message: ");
#endif
String messageTemp;
for (int i = 0; i < length; i++) {
#ifdef DEBUGING
Serial.print((char)message[i]);
#endif
messageTemp += (char)message[i];
}
#ifdef DEBUGING
Serial.println();
#endif
// Feel free to add more if statements to control more GPIOs with MQTT
// If a message is received on the topic, you check if the message is either "on" or "off".
// Changes the output state according to the message
if (String(topic) == subTopic) {
#ifdef DEBUGING
Serial.print("Changing output to ");
#endif
if (messageTemp == "PixelParty1") {
#ifdef DEBUGING
Serial.println("PixelParty1");
#endif
modus = 1;
}
else if (messageTemp == "PixelParty2") {
#ifdef DEBUGING
Serial.println("PixelParty2");
#endif
modus = 2;
}
else if (messageTemp == "endParty") {
#ifdef DEBUGING
Serial.println("The Party is over");
#endif
modus = 0;
firstloop = true;
}
}
}
#endif
//----------------------------------- Publish MQTT ---------------------
#ifdef USEMQTT
void publishMQTT() {
#ifdef DEBUGING
Serial.println("publishMQTT: Sende Nachrichten...");
#endif
unsigned long now = millis();
if (now - lastMsg > 5000) { //Sending every 5 seconds
lastMsg = now;
client.publish(temperatureTopic, String(temperature).c_str());
client.publish(humidityTopic, String(humidity).c_str());
client.publish(heatIndexTopic, String(heatIndex).c_str());
}
}
#endif
//-- Get the Weather from Open Weather Map --
void getWeather() {
pixels.clear();
#ifdef DEBUGING
Serial.println("getWeather: Stelle OpenWeathermap HTTP Request...");
#endif
if ((WiFi.status() == WL_CONNECTED)) { //Checks if we are connected to a wifi
#ifdef DEBUGING
Serial.println("getWeather: Wifi stabil...");
#endif
HTTPClient http; //starting an instance of httpclient named http
#ifdef DEBUGING
Serial.println("getWeather: Starte HTTPClient...");
#endif
http.begin("http://api.openweathermap.org/data/2.5/weather?q=" + String(city) + "&units=" + String(unitSystem) +"&appid=" + String(openWeatherAPI)); //URL für die Abfrage
#ifdef DEBUGING
Serial.println("getWeather: Verbinde zu URL: ");
Serial.println("http://api.openweathermap.org/data/2.5/weather?q=" + String(city) + "&units=" + String(unitSystem) + "&appid=" + String(openWeatherAPI));
#endif
int httpCode = http.GET(); //get answer from server
#ifdef DEBUGING
Serial.print("getWeather: Antwort des Servers: ");
Serial.println(httpCode); //print the answer to serial monitor
#endif
if (httpCode == 200) { //if the answer is 200
String payload = http.getString(); //Store the string from server to string payload on esp
const size_t capacity = JSON_ARRAY_SIZE(1) + 2 * JSON_OBJECT_SIZE(1) + 2 * JSON_OBJECT_SIZE(2) + JSON_OBJECT_SIZE(4) + JSON_OBJECT_SIZE(5) + JSON_OBJECT_SIZE(6) + JSON_OBJECT_SIZE(14) + 290;
DynamicJsonDocument doc(capacity); //dynamic switch size for json string buffer
DeserializationError error = deserializeJson(doc, payload); //JSON parsing
http.end(); //End Serverconnection.
if (error) { //Fehlermeldung bei fehlerhafter Verarbeitung
#ifdef DEBUGING
Serial.print(F("deserializeJson() failed: "));
Serial.println(error.c_str());
#endif
return;
}
//---Temperature LOGIC ---
JsonObject main = doc["main"];
int outdoor_temp = (int)main["temp"]; // Convert data to type INT and store to outdoor_temp
#ifdef DEBUGING
Serial.print("Received Outdoor Temperature: ");
if (unitSystem == "metric") {
Serial.println(String(outdoor_temp) + " °C"); //add a nice little c for celsius
} else if (unitSystem == "imperial") {
Serial.println(String(outdoor_temp) + " °F"); //or F for Fahrenheit
}
#endif
int colourR, colourG, colourB;
//if temperature is below zero °C
if (outdoor_temp < 0) {
colourR = 30;
colourG = 50;
colourB = 255;
}
//if it is below 10 °C
else if (outdoor_temp < 10) {
colourR = 50;
colourG = 150;
colourB = 220;
}
//if it is below 20 °C
else if (outdoor_temp < 20) {
colourR = 100;
colourG = 150;
colourB = 150;
}
//if it is above 25 °C
else if (outdoor_temp > 25) {
colourR = 240;
colourG = 150;
colourB = 20;
}
//if it is above 30 °C
else if (outdoor_temp > 30) {
colourR = 230;
colourG = 130;
colourB = 35;
}
//if it is above 40 °C
else if (outdoor_temp > 30) {
colourR = 230;
colourG = 80;
colourB = 60;
}
//--- Weather LOGIC ---
JsonObject weather_0 = doc["weather"][0]; //here we figure out which kind of weather we will get
int weather_0_id = weather_0["id"];       // Weather-ID
#ifdef DEBUGING
Serial.print("Received Weather ID: ");
Serial.println(weather_0_id);
#endif
//Cloudy
if (weather_0_id > 800 && weather_0_id <= 804) {
pixels.setPixelColor(1, pixels.Color(colourR, colourG, colourB)); //Set color of Pixel 1 to temperature dependend colour
}
//Different types of Rain
else if (weather_0_id >= 300 && weather_0_id < 600) {
pixels.setPixelColor(2, pixels.Color(colourR, colourG, colourB)); //Set color of Pixel 2 to temperature dependend colour
}
//Thunderstorm
else if (weather_0_id >= 200 && weather_0_id < 300) {
colourR = 241;
colourG = 196;
colourB = 15;
pixels.setPixelColor(2, pixels.Color(colourR, colourG, colourB)); //Set color of Pixel 2 to overwritten thunderstorm colour
}
//Snow
else if (weather_0_id >= 600 && weather_0_id < 700) {
pixels.setPixelColor(3, pixels.Color(colourR, colourG, colourB)); //Set color of Pixel 2 to temperature dependend colour
}
//Atmosphere Stuff (Mist, Dust, and so on) -> setting LED Colour to White
else if (weather_0_id >= 700 && weather_0_id < 800) {
colourR = 255;
colourG = 255;
colourB = 255;
}
//Weathergroup 800 = Clear Sky
else if (weather_0_id == 800) {
pixels.setPixelColor(0, pixels.Color(colourR, colourG, colourB)); //Clear sky is Pixel 0
}
} // End if HTTP Succesfull
pixels.show();   // Send the updated pixel colors to the hardware.
} //End of if (is wifi connected)
else { //if we get an error we can signal via an led animation (Red ...)
#ifdef DEBUGING
Serial.println("Error on HTTP request");
#endif
for (int i = 0; i < NUMPIXELS; i++) { // For each pixel...
// pixels.Color() takes RGB values, from 0,0,0 up to 255,255,255
// Here we're using a moderately bright green color:
pixels.setPixelColor(i, pixels.Color(255, 0, 0));
pixels.show();   // Send the updated pixel colors to the hardware.
delay(500); // Pause before next pass through loop
}
}
}
//--- DHT ---
#ifdef USEDHT
void getDHT() {
delay(dht.getMinimumSamplingPeriod());
humidity = dht.getHumidity();
temperature = dht.getTemperature();
heatIndex = dht.computeHeatIndex(temperature, humidity, false);
}
#endif
//--- Fun Stuff (from neopixel example) ---
void pixelParty() {
colorWipe(pixels.Color(255,   0,   0)     , 50); // Red
colorWipe(pixels.Color(  0, 255,   0)     , 50); // Green
colorWipe(pixels.Color(  0,   0, 255)     , 50); // Blue
colorWipe(pixels.Color(  0,   0,   0, 255), 50); // True white (not RGB white)
}
void colorWipe(uint32_t color, int wait) {
for (int i = 0; i < pixels.numPixels(); i++) { // For each pixel in strip...
pixels.setPixelColor(i, color);         //  Set pixel's color (in RAM)
pixels.show();                          //  Update strip to match
delay(wait);                           //  Pause for a moment
}
}
void rainbowFade(int wait, int rainbowLoops, int whiteLoops) {
int fadeVal = 0, fadeMax = 100;
// Hue of first pixel runs 'rainbowLoops' complete loops through the color
// wheel. Color wheel has a range of 65536 but it's OK if we roll over, so
// just count from 0 to rainbowLoops*65536, using steps of 256 so we
// advance around the wheel at a decent clip.
for (uint32_t firstPixelHue = 0; firstPixelHue < rainbowLoops * 65536;
firstPixelHue += 256) {
for (int i = 0; i < pixels.numPixels(); i++) { // For each pixel in strip...
// Offset pixel hue by an amount to make one full revolution of the
// color wheel (range of 65536) along the length of the strip
// (pixels.numPixels() steps):
uint32_t pixelHue = firstPixelHue + (i * 65536L / pixels.numPixels());
// pixels.ColorHSV() can take 1 or 3 arguments: a hue (0 to 65535) or
// optionally add saturation and value (brightness) (each 0 to 255).
// Here we're using just the three-argument variant, though the
// second value (saturation) is a constant 255.
pixels.setPixelColor(i, pixels.gamma32(pixels.ColorHSV(pixelHue, 255,
255 * fadeVal / fadeMax)));
}
pixels.show();
delay(wait);
if (firstPixelHue < 65536) {                             // First loop,
if (fadeVal < fadeMax) fadeVal++;                      // fade in
} else if (firstPixelHue >= ((rainbowLoops - 1) * 65536)) { // Last loop,
if (fadeVal > 0) fadeVal--;                            // fade out
} else {
fadeVal = fadeMax; // Interim loop, make sure fade is at max
}
}
for (int k = 0; k < whiteLoops; k++) {
for (int j = 0; j < 256; j++) { // Ramp up 0 to 255
// Fill entire strip with white at gamma-corrected brightness level 'j':
pixels.fill(pixels.Color(0, 0, 0, pixels.gamma8(j)));
pixels.show();
}
delay(1000); // Pause 1 second
for (int j = 255; j >= 0; j--) { // Ramp down 255 to 0
pixels.fill(pixels.Color(0, 0, 0, pixels.gamma8(j)));
pixels.show();
}
}
}
Außerdem habe ich eine GitHub Repo erstellt. Dort gibt es auch die anderen Files. Also die STLs und die DXF.
Update:
Ich hab das Teil aktuell mal wieder in die Hand genommen, um es auf unser neues Wifi-Upzudaten. Da ist mir aufgefallen, dass es eine Änderung in der Syntax für den HTPP request gibt. Außerdem will ich euch noch kurz erläutern, wie ihr die Arduino-Entwicklungsumgebung einrichtet.
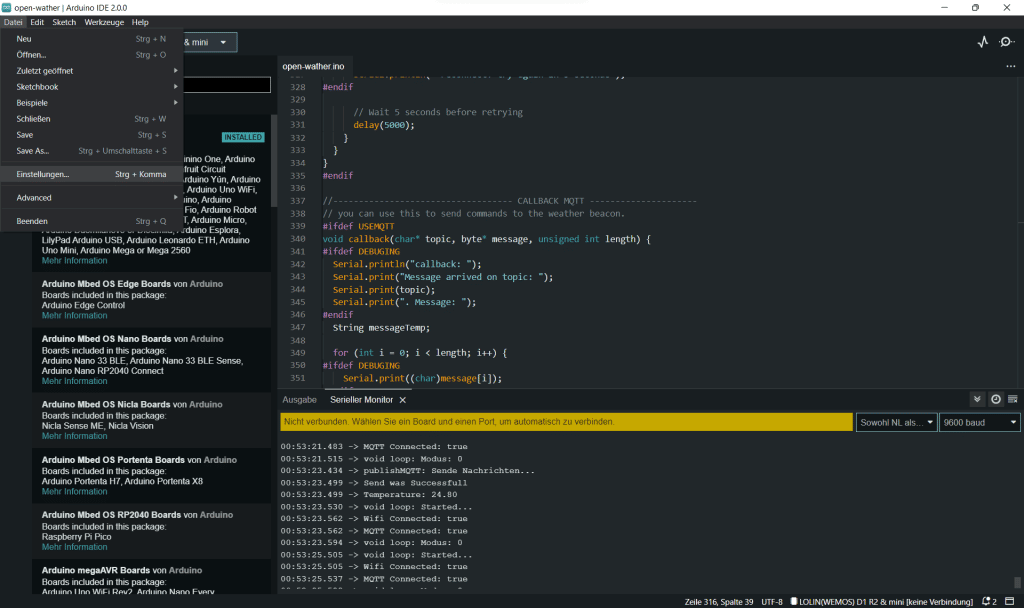
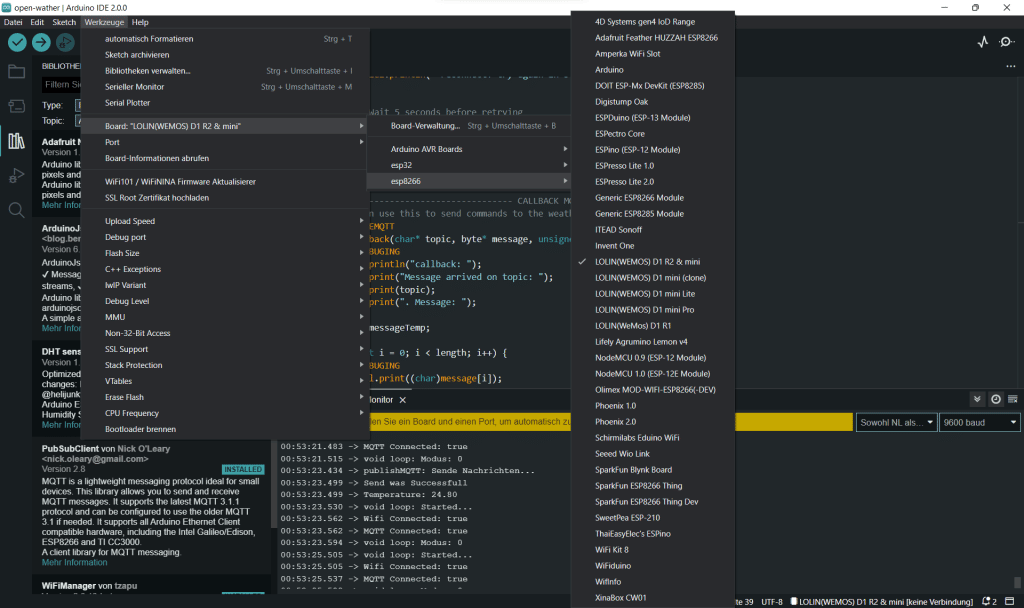
Arduino
Auf der Arduino Website – im Software bereich könnt ihr euch für euer Betriebssystem die korrekte Version herunterladen. Mitlerweile ist das Interface auch ganz ungewohnt. Es gibt einen Darkmode
Wir gehen in die Einstellungen und fügen die folgenden zwei URLs in unsere zusätzlichen Board-verwalter URLS ein, die auf dem Screenshot unten zu sehen sind.
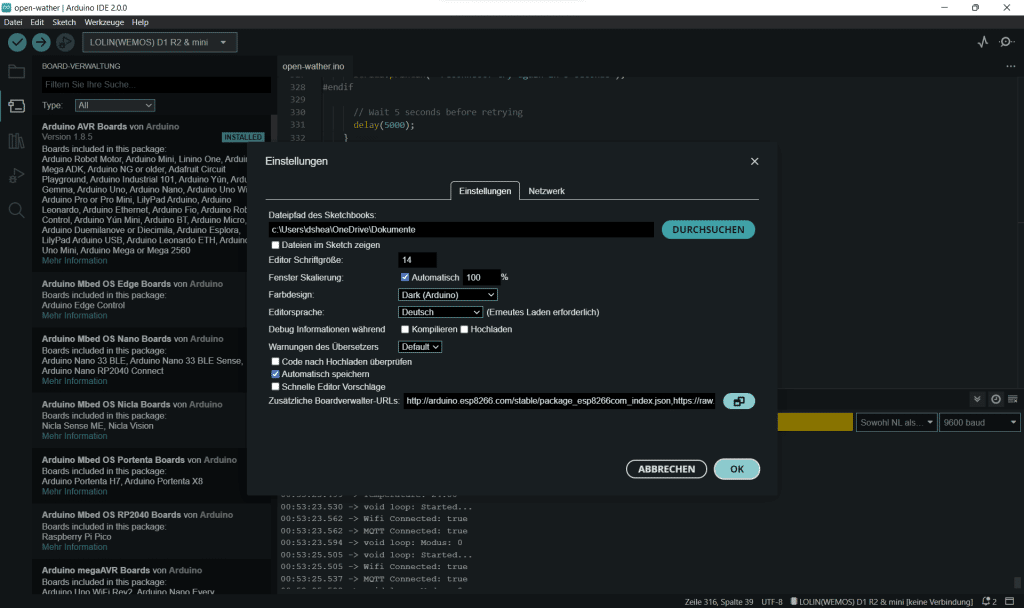
Für eine bessere Ansicht, kann man noch auf den kleinen Button rechts daneben klicken. Dann öffnet sich eine Listenansicht für die Einträge.
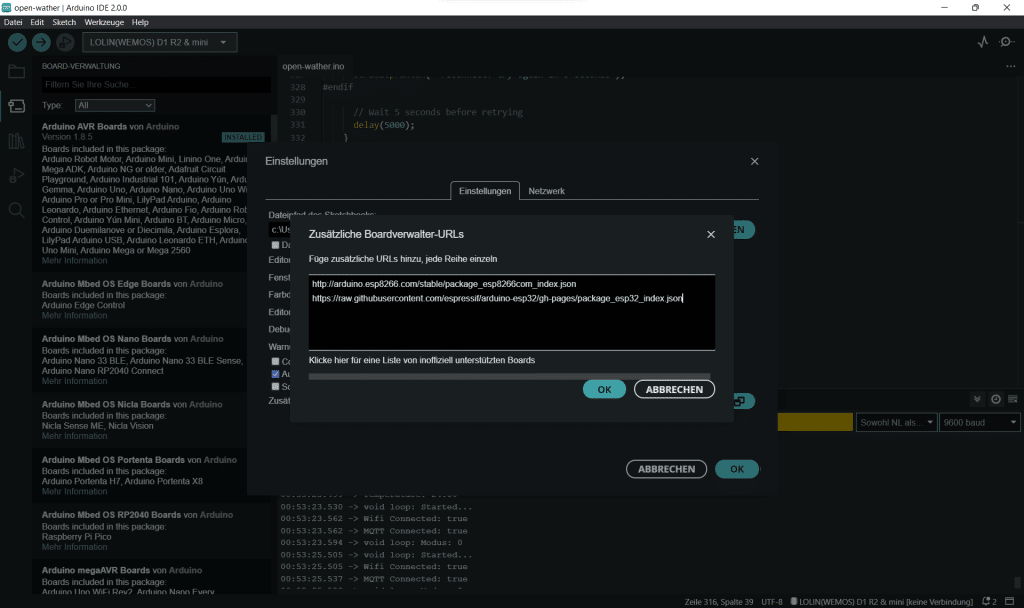
http://arduino.esp8266.com/stable/package_esp8266com_index.json
https://raw.githubusercontent.com/espressif/arduino-esp32/gh-pages/package_esp32_index.json
Als nächtes wechseln wir in die Bibliotheken und installieren die Pakete für ESP8266 und ESP32. Ohne die URLS würden wir diese nicht finden. Dazu suchen wir einfach die Stichworte ESP8266 bzw. ESP32 und klicken in den Paketen auf installieren. Ab jetzt sind in der Ansicht unter den Boards, die entsprechenden Entwicklerboards und DEV-Kits gelistet.
Weitere Bibliotheken
Damit wir den Code compilieren können, brauchen wir noch die folgenden Bibliotheken:
- Adafruit NeoPixel von Adafruit (bei mir V.1.10.6)
- ArduinoJson von Benoit Blanchon (6.19.4)
- DHT Sensor Library for ESPx von beegee_tokyo (1.18)
- PubSubClient von Nick O’Leary (2.8)
- WiFiManager von tzapu
- LittleFS / SPIFFS (sollte im Core enthalten sein
Code
Der neue Arduino Sketch lautet Momentan so:
/* Open Weather - the open source weatherbeacon that also looks good.
We connect to your home wifi and send a http request to open weathermap every hour to update the free 3 hour forecast.
depending on the weather-id (https://openweathermap.org/weather-conditions#Weather-Condition-Codes-2) another led will light up
in a predefined colour to resemble weather and temperature and hightlight the respective icon.
See Full documentation on https://daniel-strohbach.de/diy-esp8266-wetterstation
Parts needed:
- ESP8266 or ESP32 Board, alternatively arduino nano with wifi shield will do as well but not coded here
- Optional: DHT22 or DHT11 Sensor to measure Indoor Temp and Humidity
- 4x WS2812 (aka NeoPixel) LED
Solder the 4 LEDs into a tiny LED Strip and connect to Dev Board:
Board LED   LED   LED   LED
3V3 - VCC - VCC - VCC - VCC
GND - GND - GND - GND - GND
D8 -  I/0 - I/O - I/O - I
Connect DHT22 / DHT11 to
Board DHT
3V3 - +
GND - -
D4  - OUT
Pixel-ID Icon reference (take care when assembling or switch in the code
0 - clear sky
1 - cloudy
2 - rainy
3 - snow
Outdoortemperature & Colours:
> 30°C - Red
> 21°C - Warm yellow
< 18°C - Light blue
< 00°C - Blue
Thunderstorm: Yellow
Fog: White
Red: Wifi related error
green: connecting
Optional: Send the measured DHT Data to an MQTT Broker (topics are customizable within captive portal)
receive Data:
temperature: stat/openWeather/Temperatur
Humidity: stat/openWeather/Feuchtigkeit
HeatIndex: stat/openWeather/HeatIndex
control openWeather:
light on: cmnd/openWeather/power - payload on
light off: cmnd/openWeather/power - payload off
switch to party mode: cmnd/openWeather/state - PixelParty1 or PixelParty2
upon receiving a command it sends back on stat/openWeather/power and stat/openWeather/state which mode it is in.
Dependencies:
PubSubClient
ArduinoJson
ESP8266 Libs
ESP32 Libs
DHT Sensor library for ESPx
WifiManager
LittleFS
Now with Wifi Manager or HardCoded Wifi credentials optional.
Thanks to https://github.com/CurlyWurly-1/ESP8266-WIFIMANAGER-MQTT/blob/master/MQTT_with_WiFiManager.ino
Made By Daniel Strohbach www.daniel-strohbach.de/
*/
//--- USER CONFIG ---
//Do you want to use MQTT?
#define USEMQTT
//Do you want to use Managed WIFI or Hardcoded Wifi?
#define USEWIFIMANAGER
// #define USEWIFI //if so, do not forget to enter your credentials in line 116/117
//Do you want to use DHT?
#define USEDHT
//Do you use ESP8266 or ESP32? -> Switch to the correct one, if needed
#define ESP8266
//Do you want to use Serial Monitor for Debugging?
#define DEBUGING
//Which Board?
#ifdef ESP8266
#include <ESP8266WiFi.h>        // for WiFi functionality
#include <ESP8266HTTPClient.h>  //for the API-Request
#include <ESP8266WebServer.h>
//#include "SPIFFS.h"
#include <LittleFS.h>  //for ESP82
#define SPIFFS LittleFS
#endif
#ifdef ESP32
#include <WiFi.h>  //in case you are on esp32 we switch to this line
#include <HTTPClient.h>
#include <ESP32WebServer.h>
//#include "SPIFFS.h"
#include <LITTLEFS.h>  //for ESP32
#define SPIFFS LITTLEFS
#endif
//WIfi-Manager and Captive Portal
#include <DNSServer.h>
#include <WiFiManager.h>  // https://github.com/tzapu/WiFiManager
//Colours and Position
int GcolourR, GcolourG, GcolourB, Gposition;
// Please Change to your WIFI-Credentials
#ifdef USEWIFI
const char* ssid = "SSID";
const char* password = "PW";
#endif
//What citiy you want to receive the weather from?
const char* city = "Munich,de";  //City and Country like this Oldenburg,de
//Here please add your Open Weathermap API Key from https://home.openweathermap.org/api_keys
#define openWeatherAPI "API"
//What units do you use?
const char* unitSystem = "metric";
#include <ArduinoJson.h>  //JSON String conversion for Open Weathermap API Request
// We use Neopixel to Control the WS2812. In my build i use a node mcu esp8266 and pin d8 to drive the pixels
#include <Adafruit_NeoPixel.h>
#define LEDPIN D8    //neopixels to pin d8
#define NUMPIXELS 4  // My Vesion has 4 Pixels
Adafruit_NeoPixel pixels(NUMPIXELS, LEDPIN, NEO_GRB + NEO_KHZ800);  //build the neopixel constructor
#ifdef USEWIFIMANAGER
WiFiManager wifiManager;
#endif
//--- MQTT ---
#ifdef USEMQTT
#include <PubSubClient.h>
bool mqttConnected = false;
//define your default values here, if there are different values in config.json, they are overwritten.
#define mqttServer "192.168.178.XX"
#define mqttUsername "mqtt-user"
#define mqttPassword "PW"
#define mqttPort "1883"
#define mqttDeviceID "openWeather"
//i use something quite similar to tasmota, but feel free to change
#define subTopic "cmnd/openWeather/state"
#define subTopic1 "cmnd/openWeather/power"
#define resTopic "stat/openWeather/state"
#define resTopic1 "stat/openWeather/power"
#define temperatureTopic "stat/openWeather/Temperatur"
#define humidityTopic "stat/openWeather/Feuchtigkeit"
#define heatIndexTopic "stat/openWeather/HeatIndex"
unsigned long lastMsg = 0;
WiFiClient openWeather;
PubSubClient MQTTclient(openWeather);
void callback(char* topic, byte* message, unsigned int length);
#endif
//--- DHT ---
#ifdef USEDHT
#include "DHTesp.h"
#define DHTPIN D4
DHTesp dht;
//--- Global Variables for Sensor storage--- // not elegant, but it works :)
float temperature, humidity, heatIndex;
#endif
//--- Timer Stuff ---
unsigned long previousMillisMes;  //previous timer time
unsigned long previousMillisPub;  //
unsigned long previousMillisReq;
const unsigned long measureIntervall = 500;      //update sensor every 500ms
const unsigned long publishIntervall = 5000;     //publish mqtt every 5 sekonds
const unsigned long requestIntervall = 3600000;  //drive http request every hour
int modus = 0;
bool firstloop = true;
//flag for saving data
bool shouldSaveConfig = false;
//--- ARDUINO SETUP ---
void setup() {
//Begin serial connection
#ifdef DEBUGING
Serial.begin(9600);
Serial.println();
Serial.println();
//Welcome to Serial Monitor
Serial.println("openWeather: Erfasse Wetter, Temperatur, Feuchtigkeit on: ");
String thisBoard = ARDUINO_BOARD;
Serial.println(thisBoard);
#endif
//--Neopixel
pixels.begin();  // INITIALIZE NeoPixel strip object
pixels.clear();  // Set all pixel colors to 'off'
#ifdef USEWIFIMANAGER
//Wifi-Manager
setup_wifimanager();
#endif
#ifdef USEWIFI
//--Wifi
setup_wifi();
#endif
//--MQTT
#ifdef USEMQTT
MQTTclient.setServer(mqttServer, atoi(mqttPort));
#ifdef DEBUGING
Serial.println("MQTT Setup: Server and Port are Set to: ");
#endif
MQTTclient.setCallback(callback);
#ifdef DEBUGING
Serial.println("MQTT Setup: callback function set");
#endif
MQTTclient.subscribe(subTopic);
#ifdef DEBUGING
Serial.println("MQTT Setup: subscribed to subTopic");
#endif
MQTTclient.setKeepAlive(90);
#ifdef DEBUGING
Serial.println("MQTT Setup: set KeepAlive to 90");
#endif
reconnect();  //establish connection to mqtt server
#ifdef DEBUGING
Serial.println("MQTT Setup: finished");
#endif
#endif
//--DHT
#ifdef USEDHT
dht.setup(DHTPIN, DHTesp::DHT22);  // Connect DHT sensor to GPIO 17
#ifdef DEBUGING
Serial.println("DHT Setup: Sensor connected to GPIO");
#endif
#endif
}  // end of void setup
//--- ARDUINO LOOP ---
void loop() {
#ifdef DEBUGING
Serial.println("void loop: Started... ");
Serial.print("Wifi Connected: ");
if ((WiFi.status() == WL_CONNECTED)) {
Serial.println("true");
} else {
Serial.println("false");
}
#ifdef USEMQTT
Serial.print("MQTT Connected: ");
if ((MQTTclient.state() == 0)) {
Serial.println("true");
} else {
Serial.println("false");
}
#endif
#endif
//if mqtt is not connected, try again
#ifdef USEMQTT
if ((!MQTTclient.state() == 0)) {
reconnect();
}
#endif
//what mode are we in? (light on or off, party mode or not)
#ifdef DEBUGING
Serial.print("void loop: Modus: ");
Serial.println(modus);
#endif
//if we are in the first loop, we already want to fetch the weather data, afterwards only every hour
if (firstloop) {
getWeather();
firstloop = false;
}
//get Weatherdata every hour (or what you did custom)
if (millis() - previousMillisReq >= requestIntervall) {
previousMillisReq = millis();
if (modus == 0) {
getWeather();
}
}
//read sensor data
#ifdef USEDHT
//read sensor
if (millis() - previousMillisMes >= measureIntervall) {
previousMillisMes = millis();
getDHT();
}
#endif
//send the data to mqtt broker
#ifdef USEMQTT
//publish to MQTT Broker
if (millis() - previousMillisPub >= publishIntervall) {
previousMillisPub = millis();
publishMQTT();
}
#endif
//keep mqtt connection alive
#ifdef USEMQTT
if (MQTTclient.loop()) {
#ifdef DEBUGING
Serial.println("MQTT Client.loop called successfull");
#endif
} else {
#ifdef DEBUGING
Serial.println("MQTT Client.loop call failed");
#endif
}
#endif
//some remote control for different uses - maybe switch case is better?!
if (modus == 1) {
pixelParty();
}
if (modus == 2) {
rainbowFade(3, 3, 1);
}
if (modus == 3) {  //weather icon is off
pixels.clear();
pixels.show();
}
if (modus == 0) {  // weather icon is on again
pixels.clear();
showWeather();
}
}  //end of void loop
//--- CUSTOM CLASSES ---
//--callback notifying us of the need to save config
void saveConfigCallback() {
Serial.println("Should save config");
shouldSaveConfig = true;
}
//------------------------Wifi-Manager-----------------------------
#ifdef USEWIFIMANAGER
void setup_wifimanager() {
//clean FS for testing
//  SPIFFS.format();
//read configuration from FS json
#ifdef DEBUGING
Serial.println("mounting FS...");
#endif
if (SPIFFS.begin()) {
#ifdef DEBUGING
Serial.println("mounted file system");
#endif
if (SPIFFS.exists("/config.json")) {
//file exists, reading and loading
#ifdef DEBUGING
Serial.println("reading config file");
#endif
File configFile = SPIFFS.open("/config.json", "r");
if (configFile) {
#ifdef DEBUGING
Serial.println("opened config file");
#endif
size_t size = configFile.size();
// Allocate a buffer to store contents of the file.
std::unique_ptr<char[]> buf(new char[size]);
configFile.readBytes(buf.get(), size);
DynamicJsonDocument doc(2048);
deserializeJson(doc, buf.get());
auto error = serializeJson(doc, Serial);
if (!error) {
#ifdef DEBUGING
Serial.println("\nparsed json");
#endif
strcpy(mqttServer, doc["mqttServer"]);
strcpy(mqttPort, doc["mqttPort"]);
strcpy(mqttUsername, doc["mqttUsername"]);
strcpy(mqttPassword, doc["mqttPassword"]);
strcpy(mqttDeviceID, doc["mqttDeviceID"]);
strcpy(openWeatherAPI, doc["openWeatherAPI"]);
strcpy(subTopic, doc["subTopic"]);
strcpy(subTopic1, doc["subTopic1"]);
strcpy(resTopic, doc["resTopic"]);
strcpy(resTopic1, doc["resTopic1"]);
strcpy(temperatureTopic, doc["temperatureTopic"]);
strcpy(humidityTopic, doc["humidityTopic"]);
strcpy(heatIndexTopic, doc["heatIndexTopic"]);
} else {
#ifdef DEBUGING
Serial.println("failed to load json config");
#endif
}
}
}
} else {
#ifdef DEBUGING
Serial.println("failed to mount FS");
#endif
}
//end read
// The extra parameters to be configured (can be either global or just in the setup)
// After connecting, parameter.getValue() will get you the configured value
// id/name placeholder/prompt default length
WiFiManagerParameter custom_mqttServer("server", "mqtt server", mqttServer, 100);
WiFiManagerParameter custom_mqttPort("port", "mqtt port", mqttPort, 20);
WiFiManagerParameter custom_mqttUsername("user", "mqtt user", mqttUsername, 100);
WiFiManagerParameter custom_mqttPassword("pass", "mqtt pass", mqttPassword, 100);
WiFiManagerParameter custom_mqttDeviceID("deviceID", "mqtt deviceid", mqttDeviceID, 100);
WiFiManagerParameter custom_openWeatherAPI("API", "openWeather API", openWeatherAPI, 160);
WiFiManagerParameter custom_subTopic("Sub", "Sub Topic", subTopic, 100);
WiFiManagerParameter custom_subTopic1("Sub1", "Sub Topic1", subTopic1, 100);
WiFiManagerParameter custom_resTopic("res", "Res Topic", resTopic, 100);
WiFiManagerParameter custom_resTopic1("res1", "Res Topic1", resTopic1, 100);
WiFiManagerParameter custom_temperatureTopic("temp", "Temperature Topic", temperatureTopic, 100);
WiFiManagerParameter custom_humidityTopic("humid", "Humidity Topic", humidityTopic, 100);
WiFiManagerParameter custom_heatIndexTopic("HI", "Heat Index Topic", heatIndexTopic, 100);
//Wifi-Manager
WiFiManager wifiManager;
//wifiManager.autoConnect("openWeather-AP");
//Reset Wifi settings for testing
// wifiManager.resetSettings();
//set config save notify callback
wifiManager.setSaveConfigCallback(saveConfigCallback);
//add all your parameters here
wifiManager.addParameter(&custom_mqttServer);
wifiManager.addParameter(&custom_mqttPort);
wifiManager.addParameter(&custom_mqttUsername);
wifiManager.addParameter(&custom_mqttPassword);
wifiManager.addParameter(&custom_mqttDeviceID);
wifiManager.addParameter(&custom_openWeatherAPI);
wifiManager.addParameter(&custom_subTopic);
wifiManager.addParameter(&custom_subTopic1);
wifiManager.addParameter(&custom_resTopic);
wifiManager.addParameter(&custom_resTopic1);
wifiManager.addParameter(&custom_temperatureTopic);
wifiManager.addParameter(&custom_humidityTopic);
wifiManager.addParameter(&custom_heatIndexTopic);
//reset settings - for testing
// wifiManager.resetSettings();
//set minimum quality of signal so it ignores AP's under that quality
//defaults to 8%
//wifiManager.setMinimumSignalQuality();
//sets timeout until configuration portal gets turned off
//useful to make it all retry or go to sleep
//in seconds
//wifiManager.setTimeout(120);
//little animation to signal whats going on
//Signal wifi connecting with green animation
for (int i = 0; i < NUMPIXELS; i++) {  // For each pixel...
// pixels.Color() takes RGB values, from 0,0,0 up to 255,255,255
// Here we're using a moderately bright green color:
pixels.setPixelColor(i, pixels.Color(0, 255, 0));
pixels.show();  // Send the updated pixel colors to the hardware.
delay(500);  // Pause before next pass through loop
}
//fetches ssid and pass and tries to connect
//if it does not connect it starts an access point with the specified name
//and goes into a blocking loop awaiting configuration
if (!wifiManager.autoConnect("openWeather-Accesspoint")) {
Serial.println("failed to connect and hit timeout");
delay(3000);
//reset and try again, or maybe put it to deep sleep
ESP.reset();
delay(5000);
}
//if you get here you have connected to the WiFi
Serial.println("connected to wifi: ");
//read updated parameters
strcpy(mqttServer, custom_mqttServer.getValue());
strcpy(mqttPort, custom_mqttPort.getValue());
strcpy(mqttUsername, custom_mqttUsername.getValue());
strcpy(mqttPassword, custom_mqttPassword.getValue());
strcpy(mqttDeviceID, custom_mqttDeviceID.getValue());
strcpy(openWeatherAPI, custom_openWeatherAPI.getValue());
strcpy(subTopic, custom_subTopic.getValue());
strcpy(subTopic1, custom_subTopic1.getValue());
strcpy(resTopic, custom_resTopic.getValue());
strcpy(resTopic1, custom_resTopic1.getValue());
strcpy(temperatureTopic, custom_temperatureTopic.getValue());
strcpy(humidityTopic, custom_temperatureTopic.getValue());
strcpy(heatIndexTopic, custom_heatIndexTopic.getValue());
//save the custom parameters to FS
if (shouldSaveConfig) {
Serial.println("saving config: ");
DynamicJsonDocument json(1024);
json["mqttServer"] = mqttServer;
json["mqttPort"] = mqttPort;
json["mqttUsername"] = mqttUsername;
json["mqttPassword"] = mqttPassword;
json["mqttDeviceID"] = mqttDeviceID;
json["openWeatherAPI"] = openWeatherAPI;
json["subTopic"] = subTopic;
json["subTopic1"] = subTopic1;
json["resTopic"] = resTopic;
json["resTopic1"] = resTopic1;
json["temperatureTopic"] = temperatureTopic;
json["humidityTopic"] = humidityTopic;
json["heatIndexTopic"] = heatIndexTopic;
File configFile = SPIFFS.open("/config.json", "w");
if (!configFile) {
Serial.println("failed to open config file for writing");
}
serializeJson(json, Serial);
serializeJson(json, configFile);
configFile.close();
//end save
}
#ifdef DEBUGING
Serial.print("local ip: ");
Serial.println(WiFi.localIP());
#endif
}
#endif
//--------------------------------------------Wifi------------------------------------
#ifdef USEWIFI
void setup_wifi() {
#ifdef DEBUGING
Serial.println("setup_wifi: Started... ");
delay(10);
// We start by connecting to a WiFi network
Serial.println();
Serial.print("Connecting to: ");
Serial.println(ssid);
#endif
WiFi.mode(WIFI_STA);
WiFi.begin(ssid, password);
//Signal wifi connecting with green animation
for (int i = 0; i < NUMPIXELS; i++) {  // For each pixel...
// pixels.Color() takes RGB values, from 0,0,0 up to 255,255,255
// Here we're using a moderately bright green color:
pixels.setPixelColor(i, pixels.Color(0, 255, 0));
pixels.show();  // Send the updated pixel colors to the hardware.
delay(500);  // Pause before next pass through loop
}
#ifdef DEBUGING
Serial.println("");
Serial.println("WiFi connected");
Serial.println("IP address: ");
Serial.println(WiFi.localIP());
#endif
}
#endif
//----------------------------------- RECONNECT MQTT ---------------------
#ifdef USEMQTT
void reconnect() {
// Loop until we're reconnected
#ifdef DEBUGING
Serial.println("MQTT reconnect: ");
#endif
int errorcounter = 0;
while (!MQTTclient.connected()) {
#ifdef DEBUGING
Serial.println("MQTT reconnect: Attempting MQTT connection...");
Serial.println("Credentials:");
Serial.print("MQTT Server: ");
Serial.println(mqttServer);
Serial.print("MQTT Port: ");
Serial.println(mqttPort);
Serial.print("MQTT Username: ");
Serial.println(mqttUsername);
Serial.print("MQTT Password: ");
Serial.println(mqttPassword);
Serial.print("MQTT DeviceID: ");
Serial.println(mqttDeviceID);
#endif
//connection animation - did cause some errors
// pixels.clear();
// for (int i = 0; i < NUMPIXELS; i++) {  // For each pixel...
//   // pixels.Color() takes RGB values, from 0,0,0 up to 255,255,255
//   // Here we're using a moderately bright green color:
//   pixels.setPixelColor(i, pixels.Color(0, 0, 255));
//   pixels.show();  // Send the updated pixel colors to the hardware.
//   delay(500);  // Pause before next pass through loop
// }
// Attempt to connect
if (MQTTclient.connect(mqttDeviceID, mqttUsername, mqttPassword)) {
mqttConnected = true;
//keep alive
MQTTclient.loop();
//connect callback function
MQTTclient.setCallback(callback);
#ifdef DEBUGING
Serial.println("MQTT reconnect: callback function set");
#endif
//subscribe to command topics
MQTTclient.subscribe(subTopic);
MQTTclient.subscribe(subTopic1);
#ifdef DEBUGING
Serial.println("MQTT reconnect: subscribed to subTopic");
#endif
#ifdef DEBUGING
Serial.println("MQTT reconnect: connected");
#endif
} else {
mqttConnected = false;
#ifdef DEBUGING
Serial.print("MQTT reconnect: failed, rc=");
Serial.print(MQTTclient.state());
Serial.println(" MQTT reconnect: try again in 5 seconds");
#endif
// Wait 5 seconds before retrying
delay(5000);
errorcounter++;
if (errorcounter = 5) {
errorcounter = 0;
#ifdef DEBUGING
Serial.println("5 Wrong tries, resetting to AP Mode...");
#endif
wifiManager.resetSettings();
ESP.reset();
}
}
}
}
#endif
//----------------------------------- CALLBACK MQTT ---------------------
// you can use this to send commands to the weather beacon.
#ifdef USEMQTT
void callback(char* topic, byte* message, unsigned int length) {
#ifdef DEBUGING
Serial.println("callback: ");
Serial.print("Message arrived on topic: ");
Serial.print(topic);
Serial.print(". Message: ");
#endif
String messageTemp;
for (int i = 0; i < length; i++) {
#ifdef DEBUGING
Serial.print((char)message[i]);
#endif
messageTemp += (char)message[i];
}
#ifdef DEBUGING
Serial.println();
#endif
// Feel free to add more if statements to control more GPIOs with MQTT
// If a message is received on the topic, you check if the message is either "on" or "off".
// Changes the output state according to the message
if (String(topic) == subTopic || String(topic) == subTopic1) {
#ifdef DEBUGING
Serial.print("Changing output to ");
#endif
if (messageTemp == "PixelParty1") {
MQTTclient.publish("stat/openWeather/state", "PixelParty1");
#ifdef DEBUGING
Serial.println("PixelParty1");
#endif
modus = 1;
} else if (messageTemp == "PixelParty2") {
MQTTclient.publish("stat/openWeather/state", "PixelParty2");
#ifdef DEBUGING
Serial.println("PixelParty2");
#endif
modus = 2;
} else if (messageTemp == "off") {
MQTTclient.publish("stat/openWeather/power", "off");
#ifdef DEBUGING
Serial.println("Off");
#endif
modus = 3;
pixels.clear();
} else if (messageTemp == "endParty" || messageTemp == "on") {
MQTTclient.publish("stat/openWeather/power", "on");
#ifdef DEBUGING
Serial.println("The Party is over");
#endif
modus = 0;
pixels.clear();
//firstloop = true;
}
}
}
#endif
//----------------------------------- Publish MQTT ---------------------
#ifdef USEMQTT
void publishMQTT() {
#ifdef DEBUGING
Serial.println("publishMQTT: Sende Nachrichten...");
#endif
unsigned long now = millis();
if (now - lastMsg > 5000) {  //Sending every 5 seconds
lastMsg = now;
if (MQTTclient.state() == 0) {
if (MQTTclient.publish(temperatureTopic, String(temperature).c_str())) {
Serial.println("Send was Successfull");
}
#ifdef DEBUGING
Serial.print("Temperature: ");
Serial.println(String(temperature).c_str());
#endif
MQTTclient.publish(humidityTopic, String(humidity).c_str());
MQTTclient.publish(heatIndexTopic, String(heatIndex).c_str());
} else {
MQTTclient.connect(mqttDeviceID, mqttUsername, mqttPassword);
if (MQTTclient.publish(temperatureTopic, String(temperature).c_str())) {
Serial.println("Send was Successfull");
}
#ifdef DEBUGING
Serial.print("Temperature: ");
Serial.println(String(temperature).c_str());
#endif
}
}
}
#endif
//-- Get the Weather from Open Weather Map --
void getWeather() {
pixels.clear();
#ifdef DEBUGING
Serial.println("getWeather: Stelle OpenWeathermap HTTP Request...");
#endif
if ((WiFi.status() == WL_CONNECTED)) {  //Checks if we are connected to a wifi
#ifdef DEBUGING
Serial.println("getWeather: Wifi stabil...");
#endif
HTTPClient http;  //starting an instance of httpclient named http
#ifdef DEBUGING
Serial.println("getWeather: Starte HTTPClient...");
#endif
http.begin(openWeather, "http://api.openweathermap.org/data/2.5/weather?q=" + String(city) + "&units=" + String(unitSystem) + "&appid=" + String(openWeatherAPI));  //URL für die Abfrage
#ifdef DEBUGING
Serial.println("getWeather: Verbinde zu URL: ");
Serial.println("http://api.openweathermap.org/data/2.5/weather?q=" + String(city) + "&units=" + String(unitSystem) + "&appid=" + String(openWeatherAPI));
#endif
int httpCode = http.GET();  //get answer from server
#ifdef DEBUGING
Serial.print("getWeather: Antwort des Servers: ");
Serial.println(httpCode);  //print the answer to serial monitor
#endif
if (httpCode == 200) {  //if the answer is 200
String payload = http.getString();  //Store the string from server to string payload on esp
const size_t capacity = JSON_ARRAY_SIZE(1) + 2 * JSON_OBJECT_SIZE(1) + 2 * JSON_OBJECT_SIZE(2) + JSON_OBJECT_SIZE(4) + JSON_OBJECT_SIZE(5) + JSON_OBJECT_SIZE(6) + JSON_OBJECT_SIZE(14) + 290;
DynamicJsonDocument doc(capacity);  //dynamic switch size for json string buffer
DeserializationError error = deserializeJson(doc, payload);  //JSON parsing
http.end();  //End Serverconnection.
if (error) {  //Fehlermeldung bei fehlerhafter Verarbeitung
#ifdef DEBUGING
Serial.print(F("deserializeJson() failed: "));
Serial.println(error.c_str());
#endif
return;
}
//---Temperature LOGIC ---
JsonObject main = doc["main"];
int outdoor_temp = (int)main["temp"];  // Convert data to type INT and store to outdoor_temp
#ifdef DEBUGING
Serial.print("Received Outdoor Temperature: ");
if (unitSystem == "metric") {
Serial.println(String(outdoor_temp) + " °C");  //add a nice little c for celsius
} else if (unitSystem == "imperial") {
Serial.println(String(outdoor_temp) + " °F");  //or F for Fahrenheit
}
#endif
int colourR, colourG, colourB;
//if temperature is below zero °C
if (outdoor_temp < 0) {
colourR = 30;
colourG = 50;
colourB = 255;
}
//if it is below 10 °C
else if (outdoor_temp < 10) {
colourR = 50;
colourG = 150;
colourB = 220;
}
//if it is below 20 °C
else if (outdoor_temp < 20) {
colourR = 100;
colourG = 150;
colourB = 150;
}
//if it is above 25 °C
else if (outdoor_temp > 25) {
colourR = 240;
colourG = 150;
colourB = 20;
}
//if it is above 30 °C
else if (outdoor_temp > 30) {
colourR = 230;
colourG = 130;
colourB = 35;
}
//if it is above 40 °C
else if (outdoor_temp > 30) {
colourR = 230;
colourG = 80;
colourB = 60;
}
//--- Weather LOGIC ---
JsonObject weather_0 = doc["weather"][0];  //here we figure out which kind of weather we will get
int weather_0_id = weather_0["id"];        // Weather-ID
#ifdef DEBUGING
Serial.print("Received Weather ID: ");
Serial.println(weather_0_id);
#endif
//Cloudy
if (weather_0_id > 800 && weather_0_id <= 804) {
pixels.setPixelColor(1, pixels.Color(colourR, colourG, colourB));  //Set color of Pixel 1 to temperature dependend colour
Gposition = 1;
}
//Different types of Rain
else if (weather_0_id >= 300 && weather_0_id < 600) {
pixels.setPixelColor(2, pixels.Color(colourR, colourG, colourB));  //Set color of Pixel 2 to temperature dependend colour
Gposition = 2;
}
//Thunderstorm
else if (weather_0_id >= 200 && weather_0_id < 300) {
colourR = 241;
colourG = 196;
colourB = 15;
pixels.setPixelColor(2, pixels.Color(colourR, colourG, colourB));  //Set color of Pixel 2 to overwritten thunderstorm colour
Gposition = 2;
}
//Snow
else if (weather_0_id >= 600 && weather_0_id < 700) {
pixels.setPixelColor(3, pixels.Color(colourR, colourG, colourB));  //Set color of Pixel 2 to temperature dependend colour
Gposition = 3;
}
//Atmosphere Stuff (Mist, Dust, and so on) -> setting LED Colour to White
else if (weather_0_id >= 700 && weather_0_id < 800) {
colourR = 255;
colourG = 255;
colourB = 255;
}
//Weathergroup 800 = Clear Sky
else if (weather_0_id == 800) {
pixels.setPixelColor(0, pixels.Color(colourR, colourG, colourB));  //Clear sky is Pixel 0
Gposition = 0;
}
GcolourR = colourR;
GcolourG = colourG;
GcolourB = colourB;  //store this in global variables
}  // End if HTTP Succesfull
else if (httpCode == 401) {
#ifdef DEBUGING
Serial.println("401 - not found - maybe a typo in your api?");
#endif
for (int i = 0; i < NUMPIXELS; i++) {  // For each pixel...
// pixels.Color() takes RGB values, from 0,0,0 up to 255,255,255
// Here we're using a moderately bright red color:
pixels.setPixelColor(i, pixels.Color(255, 0, 0));
pixels.show();  // Send the updated pixel colors to the hardware.
}
}
//pixels.show();  // Send the updated pixel colors to the hardware.
}  //End of if (is wifi connected)
else {  //if we get an error we can signal via an led animation (Red ...)
#ifdef DEBUGING
Serial.println("Error on HTTP request");
#endif
for (int i = 0; i < NUMPIXELS; i++) {  // For each pixel...
// pixels.Color() takes RGB values, from 0,0,0 up to 255,255,255
// Here we're using a moderately bright red color:
pixels.setPixelColor(i, pixels.Color(255, 0, 0));
pixels.show();  // Send the updated pixel colors to the hardware.
delay(500);  // Pause before next pass through loop
}
}
}
//---SHOW WEATHER
void showWeather() {
pixels.setPixelColor(Gposition, pixels.Color(GcolourR, GcolourG, GcolourB));
pixels.show();  // Send the updated pixel colors to the hardware.
}
//--- DHT ---
#ifdef USEDHT
void getDHT() {
delay(dht.getMinimumSamplingPeriod());
humidity = dht.getHumidity();
temperature = dht.getTemperature();
heatIndex = dht.computeHeatIndex(temperature, humidity, false);
}
#endif
//--- Fun Stuff (from neopixel example) ---
void pixelParty() {
colorWipe(pixels.Color(255, 0, 0), 50);     // Red
colorWipe(pixels.Color(0, 255, 0), 50);     // Green
colorWipe(pixels.Color(0, 0, 255), 50);     // Blue
colorWipe(pixels.Color(0, 0, 0, 255), 50);  // True white (not RGB white)
}
void colorWipe(uint32_t color, int wait) {
for (int i = 0; i < pixels.numPixels(); i++) {  // For each pixel in strip...
pixels.setPixelColor(i, color);               //  Set pixel's color (in RAM)
pixels.show();                                //  Update strip to match
delay(wait);                                  //  Pause for a moment
}
}
void rainbowFade(int wait, int rainbowLoops, int whiteLoops) {
int fadeVal = 0, fadeMax = 100;
// Hue of first pixel runs 'rainbowLoops' complete loops through the color
// wheel. Color wheel has a range of 65536 but it's OK if we roll over, so
// just count from 0 to rainbowLoops*65536, using steps of 256 so we
// advance around the wheel at a decent clip.
for (uint32_t firstPixelHue = 0; firstPixelHue < rainbowLoops * 65536;
firstPixelHue += 256) {
for (int i = 0; i < pixels.numPixels(); i++) {  // For each pixel in strip...
// Offset pixel hue by an amount to make one full revolution of the
// color wheel (range of 65536) along the length of the strip
// (pixels.numPixels() steps):
uint32_t pixelHue = firstPixelHue + (i * 65536L / pixels.numPixels());
// pixels.ColorHSV() can take 1 or 3 arguments: a hue (0 to 65535) or
// optionally add saturation and value (brightness) (each 0 to 255).
// Here we're using just the three-argument variant, though the
// second value (saturation) is a constant 255.
pixels.setPixelColor(i, pixels.gamma32(pixels.ColorHSV(pixelHue, 255,
255 * fadeVal / fadeMax)));
}
pixels.show();
delay(wait);
if (firstPixelHue < 65536) {                                 // First loop,
if (fadeVal < fadeMax) fadeVal++;                          // fade in
} else if (firstPixelHue >= ((rainbowLoops - 1) * 65536)) {  // Last loop,
if (fadeVal > 0) fadeVal--;                                // fade out
} else {
fadeVal = fadeMax;  // Interim loop, make sure fade is at max
}
}
for (int k = 0; k < whiteLoops; k++) {
for (int j = 0; j < 256; j++) {  // Ramp up 0 to 255
// Fill entire strip with white at gamma-corrected brightness level 'j':
pixels.fill(pixels.Color(0, 0, 0, pixels.gamma8(j)));
pixels.show();
}
delay(1000);                      // Pause 1 second
for (int j = 255; j >= 0; j--) {  // Ramp down 255 to 0
pixels.fill(pixels.Color(0, 0, 0, pixels.gamma8(j)));
pixels.show();
}
}
}Damit sollte das ganze etwas Einsteigerfreundlicher sein. Also Sketch Uploaden, zusammengebaute openWeather Station an 5V. Dann mit dem openWeather Accesspoint verbinden, nach dem eigenen Wifi suchen, ggf. die MQTT Daten und die openWeatherMap API eingeben und ab dafür. Wenn ihr auf einzelne Module verzichten möchtet, müssen wir diese einfach oben im Arduino Sketch auskommentieren.
(Strg +#) ist der Shortcut zum Kommentieren in der Arduino IDE.
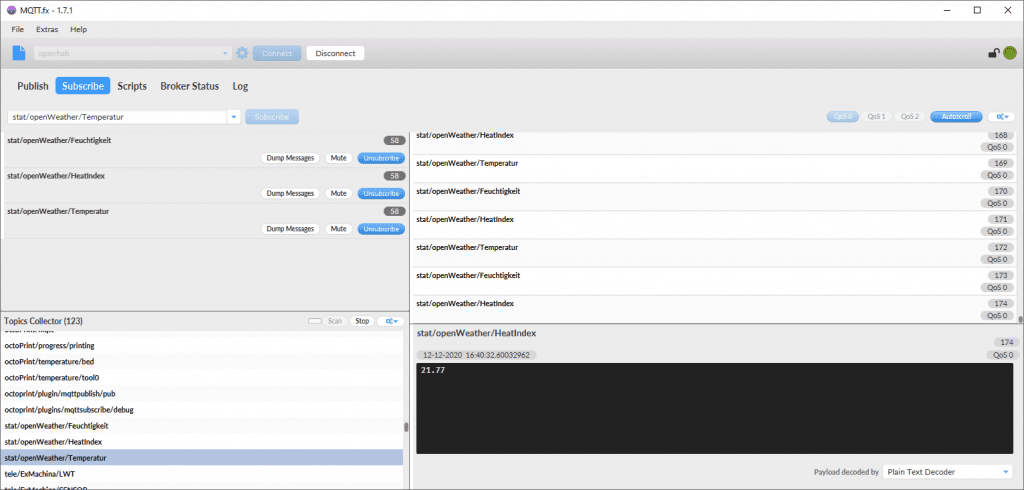
MQTT
Ich nutze wieder MQTT um die Sensorwerte in meine openHAB HomeAssitant Instanz auf dem RaspberryPi zu senden. Dort werden diese in einer InfluxDB gespeichert und mit Grafana visualisiert. Hier nur kurz ein paar Screenshots, da ich das vorgehen ja schon zur genüge in anderen Beiträgen beschrieben hab.
OpenHAB

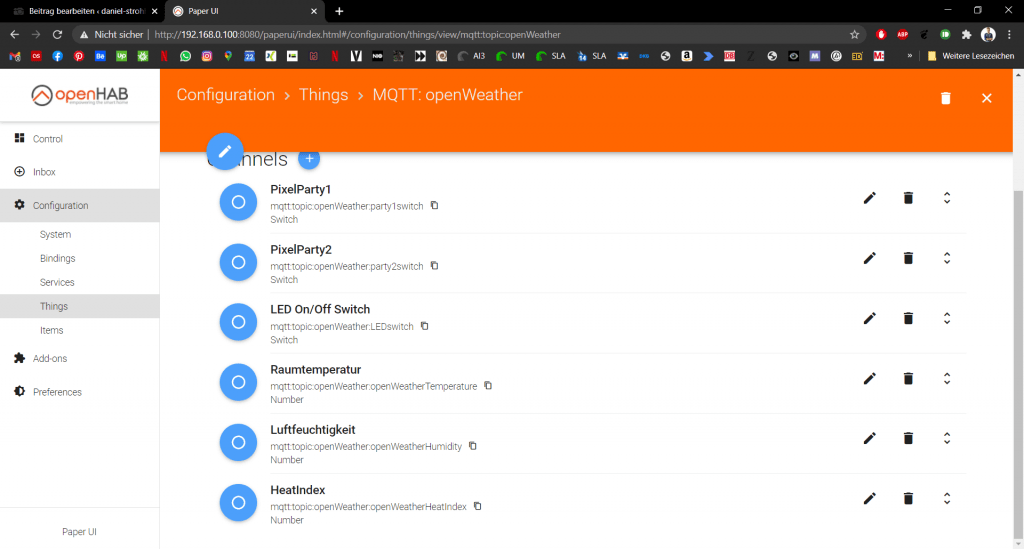
//openWeather
Number openWeatherTemperature   "MQTT: openWeather Temperatur"     { channel="mqtt:topic:openWeather:openWeatherTemperature"}
Number openWeatherHumidity      "MQTT: openWeather Feuchtigkeit"   { channel="mqtt:topic:openWeather:openWeatherHumidity"}
Number openWeatherHeatIndex     "MQTT: openWeather HeatIndex"      { channel="mqtt:topic:openWeather:openWeatherHeatIndex"}
Switch openWeatherPixelParty1   "MQTT: openWeather PixelParty1"    { channel="mqtt:topic:openWeather:party1switch"}
Switch openWeatherPixelParty2   "MQTT: openWeather PixelParty2"    { channel="mqtt:topic:openWeather:party2switch"}
Switch openWeatherLEDswitch     "MQTT: openWeather LEDSwitch"      { channel="mqtt:topic:openWeather:LEDswitch"}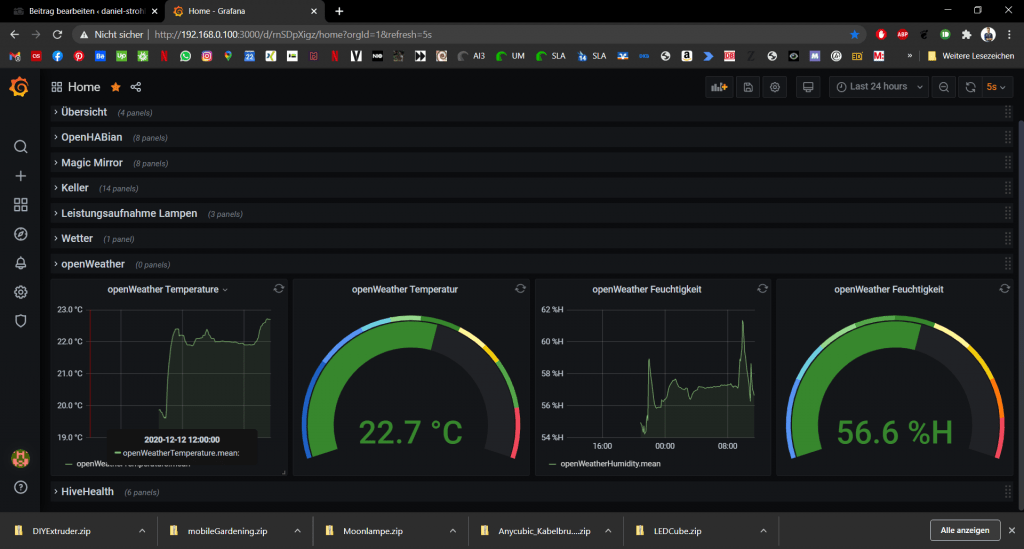
HomeAssistant
Im HomeAssistant müssen wir noch mit dem File-Editor die Sensoren und Switches zur Steuerung hinzufügen.
mqtt:
sensor:
- name: "Wohnzimmer Temperatur"
state_topic: "stat/openWeather/Temperatur"
unique_id: wohnzimmerTemperatur
unit_of_measurement: "°C"
- name: "Wohnzimmer Feuchtigkeit"
state_topic: "stat/openWeather/Feuchtigkeit"
unique_id: wohnzimmerFeuchtigkeit
unit_of_measurement: "%"
switch:
- name: "OpenWeather on/off Switch"
unique_id: openWeather_switch
state_topic: "stat/openWeather/power"
command_topic: "cmnd/openWeather/power"
payload_on: "on"
payload_off: "off"
state_on: "on"
state_off: "off"
- name: "OpenWeather State Switch"
unique_id: openWeather_state
state_topic: "stat/openWeather/state"
command_topic: "cmnd/openWeather/state"
payload_on: "PixelParty1"
payload_off: "PixelParty2"
Damit können wir nun im Dashboard eine Schaltfläche zum ändern des Modus bzw. zum Ein/Ausschalten einrichten.
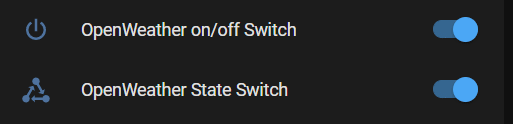
Der On/Off Switch schaltet die Station nicht wirklich aus, sondern nur die Anzeige, da ich gerne weiterhin die Daten loggen möchte. Der State Switch ist für die Easter Eggs gedacht 🙂
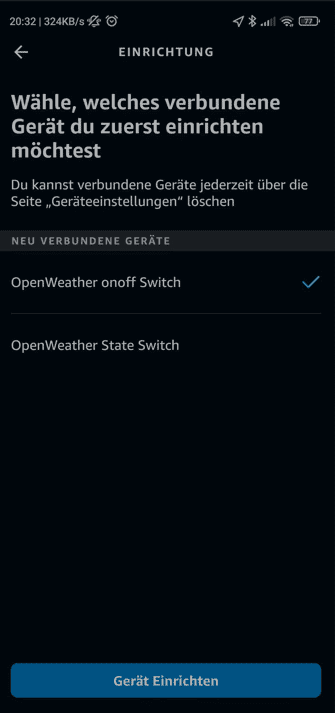
Wer einen $Echo$ oder eine der Alternativen zuhause hat, kann nun auch die Schalter einbinden und per Sprachbefehl bedienen.
Alternative
Wer kein openHAB / HomeAssistant will oder hat, aber noch einen RaspberryPi herumfliegen hat, kann <hier/> den Guide für einen IOT Server auf Basis des RaspberryPi nachlesen.
3D-Files
Hier sind die 3D-Daten zum Angucken:
Case DHT22
[vrm360 canvas_name=s1 model_url=https://daniel-strohbach.de/wp-content/uploads/2020/12/Sockel-Case.stl aspect_ratio=1.33333 hide_cmds=zoom,fullscreen]
Sockel ESP8266
[vrm360 canvas_name=s2 model_url=https://daniel-strohbach.de/wp-content/uploads/2020/12/Sockel-BOTTOM.stl aspect_ratio=1.33333 hide_cmds=zoom,fullscreen]
LED-Halterung
[vrm360 canvas_name=s3 model_url=https://daniel-strohbach.de/wp-content/uploads/2020/12/Sockel-LED_Bruecke.st aspect_ratio=1.33333 hide_cmds=zoom,fullscreen]
Deckel
[vrm360 canvas_name=s4 model_url=https://daniel-strohbach.de/wp-content/uploads/2020/12/Sockel-TOP.stl aspect_ratio=1.33333 hide_cmds=zoom,fullscreen]
Galerie
Hier wieder die restlichen Projektbilder.


$ Die mit einem $ gekennzeichneten Links, sind Affiliate Links. Wenn du über diese in den Shop gelangst und etwas kaufst, bekomme ich eine kleine Provision


1 Kommentar
[…] nehme hier jetzt mal OpenWeatherMap. Wir werden direkt auf die Konfigurationsseite […]